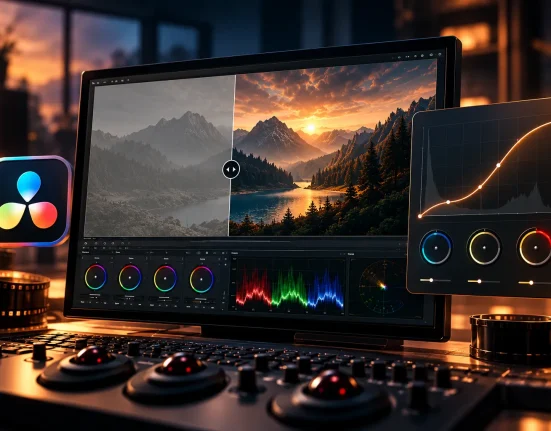
When Editing Takes Longer Than Photography
Have you used the Joy Adaptive Presets in any projects? You’ve probably experienced it: you took a really good portrait or landscape, the lighting is fine, the composition is correct, and the mood of the photo is perfect. But when you get to editing, the story changes. For a clean result, you need to smooth the skin, bring life to the eyes, whiten teeth, control the sky, and tidy up the background a bit. Each of these means a separate selection, a new mask, and lots of zooming and adjustments.
The problem is that this process is not only time-consuming, but it also drains your focus. Instead of thinking about the mood of the photo, you get stuck adjusting sliders and fixing selections. Often, you either rush or lose patience and end up finishing the edit halfway, or you overwork it so much that the photo loses its natural feel.
This is when you realize the problem isn’t the editing itself; the problem is that the path to a good result has become too complicated and exhausting. This is exactly when a simpler, faster, and smarter approach becomes necessary—a method that helps you focus more on the photo, not the tools.

What Exactly Does AI Masking Do and Why Is It Important?
AI Masking means Lightroom doesn’t just see a bunch of pixels—it truly understands the content of the photo. Using artificial intelligence, it detects where the human face is, which parts are skin, exactly where the eyes and lips are, where the sky begins, and where the background is. These detections are done automatically, without requiring you to zoom in and manually make selections.
When this happens, Lightroom creates separate, intelligent masks for each area. This means the adjustments you apply only affect that specific area, while the rest of the image remains untouched. This increases accuracy and greatly reduces the risk of ruining the photo.
To make it more tangible, the results of AI Masking usually look like this:
- Skin is smoothed without losing natural facial texture
- Sky color or lighting is adjusted without harsh edges or halos
- Eyes and facial details are enhanced without looking artificial
What’s important to note here is that these are not static masks. If you change the photograph, if you crop it, if you change the lighting, even if you add other things, the masks respond accordingly. Doing this is very challenging with a manual mask.
In practice, AI Masking turns editing from a technical, time-consuming task into a fast and creative process. Especially when you have many photos or need to deliver clean, professional results in a short time, its value becomes clear.
How Was Editing Done Before These Tools?
Before intelligent tools entered Lightroom, almost everything was done manually. If you wanted to properly edit a portrait, you had to go step by step: first select the skin with a brush, then move on to the eyes, then the teeth, then the sky or background. Each part required a separate mask, separate adjustments, and a lot of precision.
Without smart presets, the typical Lightroom workflow looked like this:
- Select skin with the Brush tool and adjust smoothness and texture
- Separate selection of eyes to enhance clarity and brightness
- Mask teeth to make them whiter
- Use Select Subject to isolate the subject from the background
- Select Sky with Select Sky and adjust color and light
- Manually fix edges to prevent halos and cuts
Each of these steps required precision, zooming, and repeated corrections.
Problems and Limitations of This Method
The main issue was that the entire process became very time-consuming. The same steps had to be repeated for each photo, even if the photos were similar. Additionally, the final quality entirely depended on the user’s skill and patience; a small wrong selection could ruin the whole mood of the photo.
Another problem was fatigue. Once your attention diverts to the cut tools and masking, you start to lose track of the photo. When there are many photos, this is not only a long process, but it transforms editing from a creative process into a repetitive, exhausting job. This is when people seek to find sped-up solutions with the same integrity for consistency.
How Joy Adaptive Presets Simplifies the Process
Joy Adaptive Presets essentially performs the tasks you used to do manually—but much faster and smarter. This preset collection is built directly on Lightroom’s AI Masking, meaning each preset already knows which part of the photo it should affect, leaving the rest untouched.
When you apply a preset, Lightroom first analyzes the photo, creates the necessary masks automatically, and then applies precise adjustments only to those areas. You don’t draw masks, fix edges, or worry about effects spilling onto the wrong parts.
Applications for Portraits
Joy Adaptive Presets are especially noticeable in portrait editing:
- Smooth skin naturally, without losing texture
- Whiten teeth and eyes without a plastic look
- Enhance eyebrows, hair, and facial details
- Perform full, balanced retouching with a single click
The result is usually clean, not exaggerated—exactly what matters for portraits.
Applications for Scenes and Landscapes
For environmental and landscape photos, the presets work precisely and purposefully:
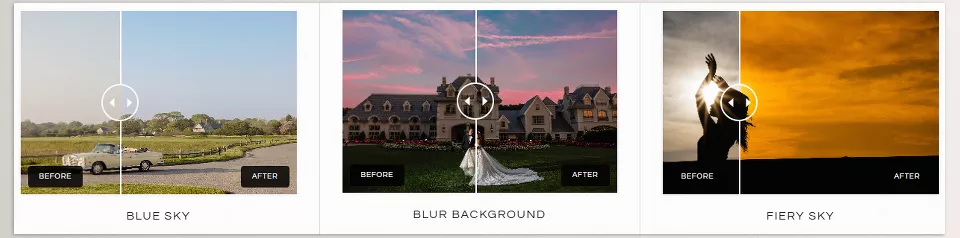
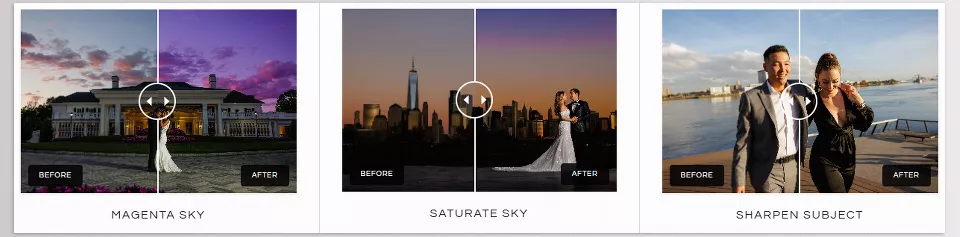
- Enhance or change sky color without halos or cuts
- Blur the background to better isolate the subject
- Sharpen the subject itself without affecting the surroundings
All these adjustments are done in a way that preserves the natural feel of the photo and directs the viewer’s focus exactly where it should be.
Ultimately, what sets Joy Adaptive Presets apart is that it shortens the editing path. What used to take several minutes or multiple steps now happens with a single click—stress-free, without ruining the photo, and with results close to professional manual editing.
A Few Simple Tips for More Professional Results
Before diving into tips, one important note: presets are extremely helpful, but a touch of your own attention and care is necessary for truly natural and professional results.
Adjust Effect Strength
After applying a preset, quickly check and adjust the effect strength. Usually, 50–70% gives the most natural result, especially for portraits.
Combine Multiple Light Presets
Instead of relying on a single heavy preset, combine several light ones. For example, one for skin, one for eyes, and one for the background. This creates layered and more natural editing.
Correct Lighting and White Balance Before Presets
Check the photo’s lighting and white balance before applying a preset. Presets speed up your work—they don’t magically fix a poorly shot photo.
Trust Your Eyes
Always judge with your own eyes. If an effect feels too strong, tone it down. A professional output is one where the viewer feels the photo is good without noticing the edits.
Preserve Natural Look
The ultimate goal is for the photo to look clean and natural, not artificial or exaggerated. Following these tips ensures fast, clean, and professional editing.
With these simple guidelines, Joy Adaptive Presets become a smart and precise tool that saves time while improving the quality of your final results.
Easy and Professional Editing, Without Hassle
Joy Adaptive Presets eliminates the tedious parts of editing, allowing you to focus on the final result. You no longer need to spend hours masking or fixing small details; everything is done intelligently and accurately, so you can concentrate on the mood and impact of the photo.
Joy Adaptive Presets is designed for Lightroom users looking for a fast, easy, and clean way to achieve professional output. With just a few clicks, you can edit skin, eyes, lips, hair, sky, and background accurately and naturally—without worrying about ruining the photo. This saves time while maintaining quality and the photo’s mood.
Joy Adaptive Presets is an extremely helpful tool, efficient and accurate, that doesn’t get in the way of your creative process. It makes tackling bigger projects a breeze and ensures professional quality, authenticity, and aesthetics. Once you start using it, you wonder why editing was ever complicated and not simply as fun as it could be.
If you’re serious about improving your color grading skills, we’ve created a detailed, beginner-friendly guide that explains everything step by step. I strongly suggest checking it out—you’ll pick up techniques that can make an instant difference.