What is a LUT?
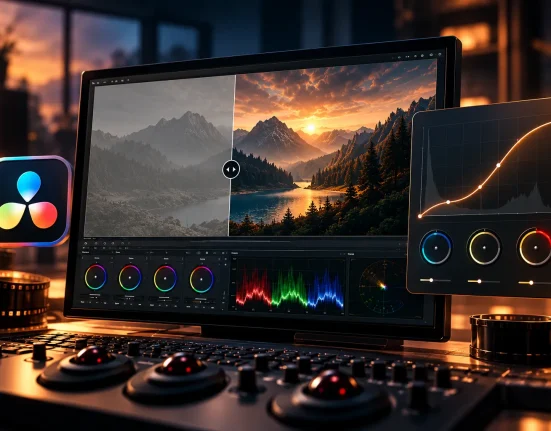
This article is a Complete Guide to Color Grading with LUTs, explaining what they are, how they work, and how to use them effectively in your photo and video projects. A LUT (Look-Up Table) is a tool used in photo and video editing to quickly and consistently adjust colors. Think of it as a recipe or a map that tells your editing software how to transform each color from the original to a new one. Instead of manually tweaking each color or tone, a LUT applies preset adjustments automatically.
LUTs come as files that can be applied to your images or videos in editing software, allowing you to achieve a specific style or mood with just one click.
What Does a LUT Do?
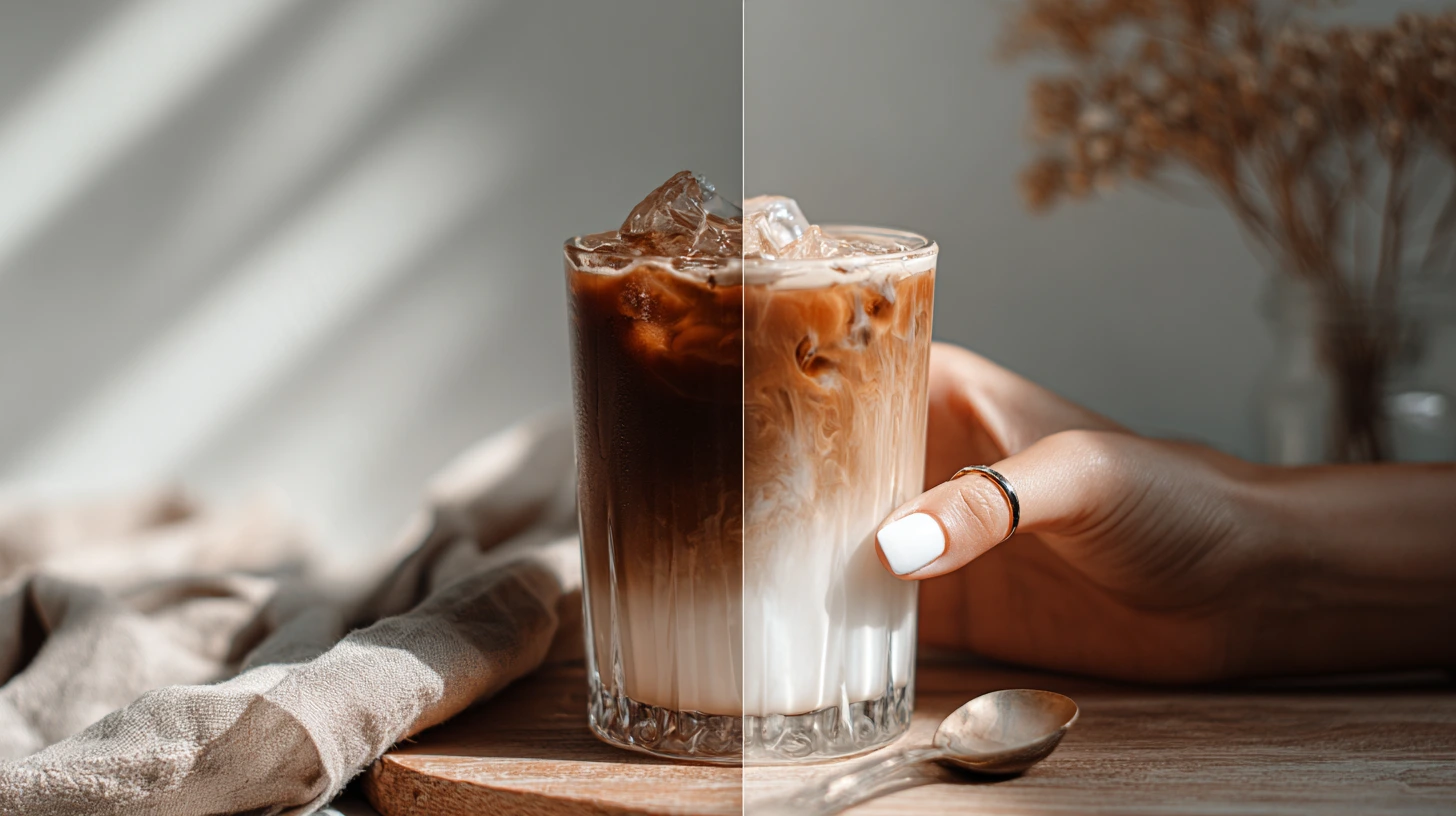
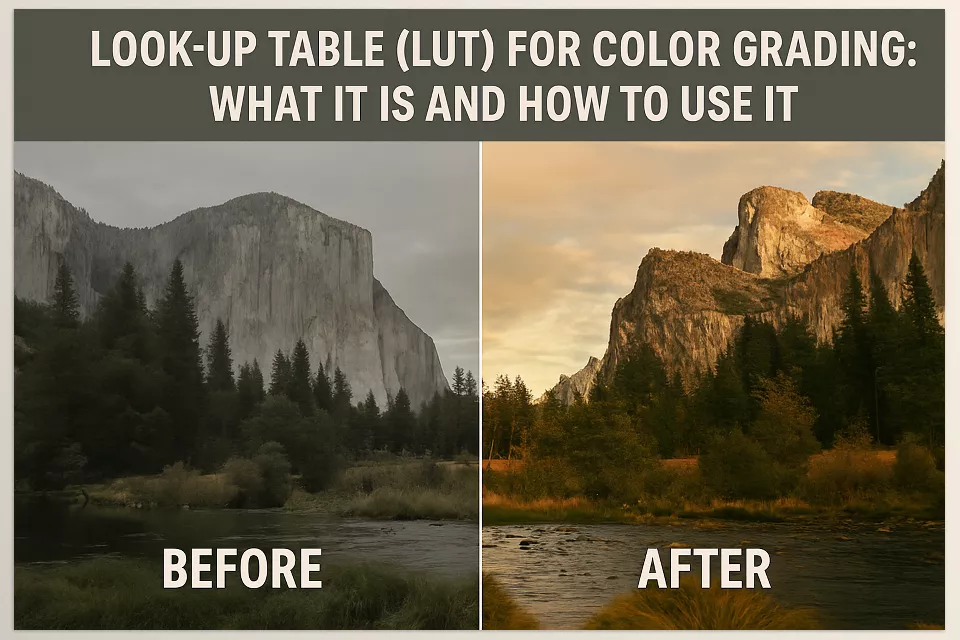
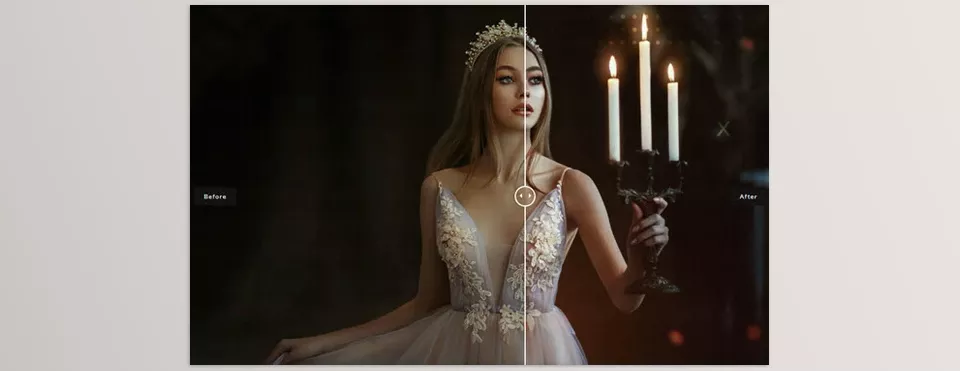
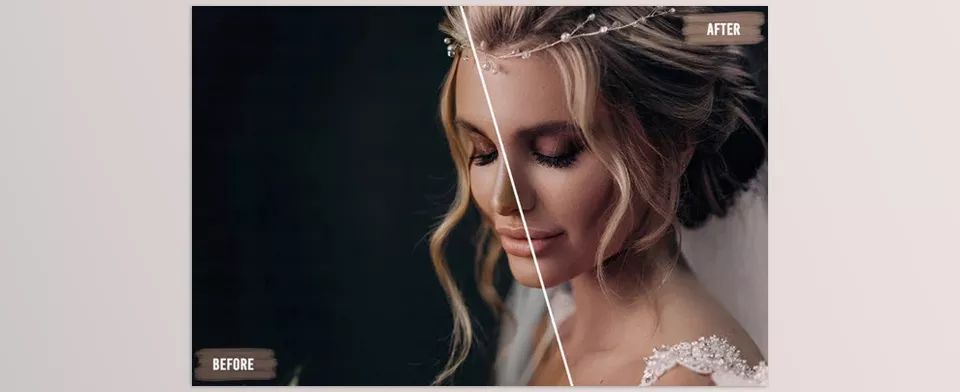
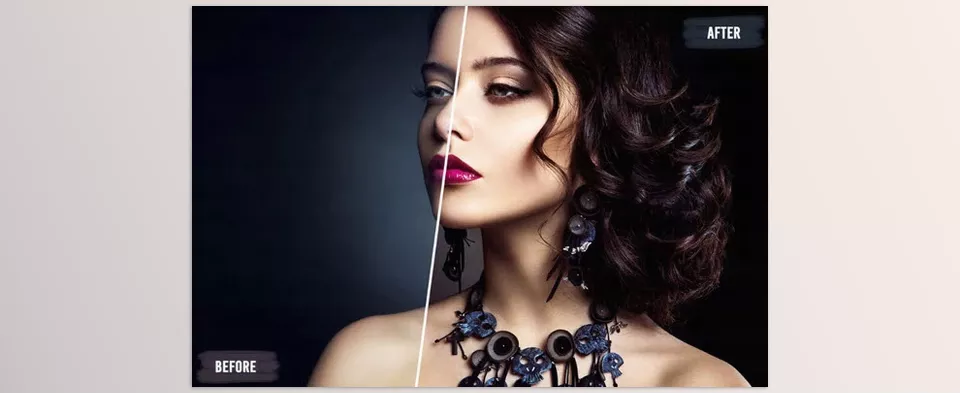
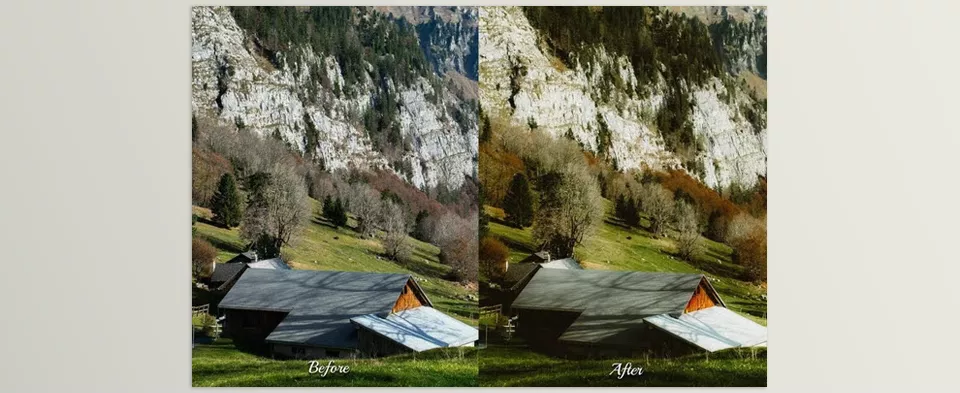
When applied, a LUT adjusts colors, contrast, brightness, and sometimes the overall tone of your image or video. It can:
- Make colors warmer (adding orange and yellow tones) or cooler (adding blue tones)
- Increase or reduce brightness and contrast for sharper or softer visuals
- Create stylistic effects, such as a faded film look, a vintage style, or a modern, vibrant finish
In essence, a LUT works like a powerful, customizable filter, applying multiple adjustments at once without the need to manually move individual sliders. This makes LUTs an essential shortcut in the color grading process, especially when speed and consistency matter.
Why Use a LUT?
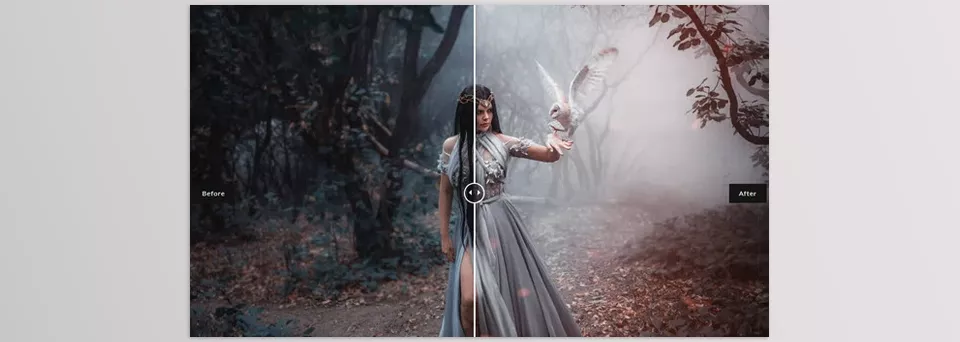
LUTs are valuable tools for both beginners and professionals because they save time by providing ready-made color adjustments without the need for complex manual editing. One of the biggest advantages of color grading with LUTs is the ability to apply a professional look with minimal effort. They help ensure consistency across an entire video or photo series, giving your content a uniform and polished look. LUTs can also spark creativity, offering pre-designed styles that might inspire new visual directions you hadn’t considered. Plus, they’re incredibly easy to apply — most editing software lets you use them with just a few clicks, requiring no advanced skills to get professional-looking results.
How to Use a LUT?
In this part of our Complete Guide to LUTs, you’ll learn the practical steps to apply a LUT in any editing software.
- Choose or Download a LUT
Find a LUT online (free or paid) or use those included with your editing software. - Import Your Photo or Video
Open your editing software and load your project. - Apply the LUT
In the color correction or grading section, import the LUT file (commonly .cube or .3dl formats) and apply it. - Adjust the Intensity
Most software lets you control the strength of the LUT effect, allowing you to fine-tune the look. - Fine-Tune Manually (Optional)
After applying the LUT, you can still adjust brightness, contrast, saturation, and other settings to refine your result. - Export Your Final Edit
Once satisfied, export your photo or video with the LUT applied.
How Are LUTs Made?
LUTs are created during the color grading process by adjusting the colors, contrast, and tones of an image or video. This file can be applied to other projects to instantly recreate the same color style.
Steps to Create a LUT:
- Start with a Reference Image or Video
Open your file in software like Photoshop, Premiere Pro, DaVinci Resolve, or Blender. - Color Grade It
Adjust settings such as:- Brightness & contrast
- Shadows & highlights
- Color balance (warm/cool tones)
- Saturation
- Tint
- Creative color effects (e.g., teal-orange, vintage)
- Save the Look as a LUT File
Once satisfied, export the adjustments as a LUT file (.CUBE or .3DL format). - Apply Your LUT Anywhere
Use your LUT in any compatible software to apply the same consistent style across other images or videos.
How Professionals Create More Advanced LUTs
As we go deeper into this Complete Guide to LUTs, it’s important to know how professionals take things further — they may create LUTs using:
- 3D color models
- Specialized software like:
- 3D LUT Creator
- DaVinci Resolve
- Photoshop
These tools offer more precise control, though beginners can still create effective LUTs using standard editing software.
When Is Coding Needed?
Typically, no coding is required to create or apply LUTs. Standard programs like Photoshop, Premiere Pro, DaVinci Resolve, and Blender offer built-in tools. However, coding might be needed in these cases:
- Building Custom LUT Tools – Developing your own LUT generators or plugins.
- Advanced Color Manipulation – Automating or customizing color workflows beyond standard software limits.
- Automating Batch Processing – Applying LUTs via scripts or command-line tools for large volumes of content.
- Game Development / Real-Time Rendering – Using GLSL or HLSL shaders to apply LUTs in real-time applications.
- Custom Integrations – Modifying LUT handling in open-source or niche software.
Top Photo, Video, and 3D Software That Supports LUTs
Another key part of understanding LUTs thoroughly is knowing which software supports them across various creative fields.
📷 Photo Editing Software
- Adobe Photoshop – Supports LUTs via the Color Lookup adjustment layer.
- Affinity Photo – Allows applying LUTs for creative color grading.
- Luminar AI / Luminar Neo – Use LUTs for instant style adjustments.
- ON1 Photo RAW – Integrates LUTs into filters and presets.
🎬 Video Editing Software
- Adobe Premiere Pro – Apply and export LUTs using the Lumetri Color panel.
- DaVinci Resolve – Industry-standard LUT support with professional grading tools.
- Final Cut Pro – Supports LUTs applied directly to video clips.
- Sony Vegas Pro – Supports native LUTs and third-party LUT plugins.
- HitFilm Express / Pro – LUT support in both free and paid versions.
- CapCut (mobile & desktop) – Simple LUT filters available.
- LumaFusion (iOS) – Supports LUTs for mobile video editing.
📽️ 3D & Rendering Software
- Blender – Apply LUTs via the Compositor or Color Management settings.
- Cinema 4D – Supports LUTs during post-processing or in render outputs.
- Octane Render – Apply LUTs using its post-processing stack.
- Redshift Renderer – Supports LUT application in renders.
- Arnold Renderer – Uses LUTs for tone mapping and final color output.
🛠️ Other Tools & Use Cases
- OBS Studio – Apply LUTs to live streams for real-time color effects.
- Adobe After Effects – Use LUTs on footage, graphics, or adjustment layers.
- Lightroom – Can apply LUTs indirectly via profiles or third-party plugins.
- 3D LUT Creator – Dedicated software specifically for LUT creation and editing.

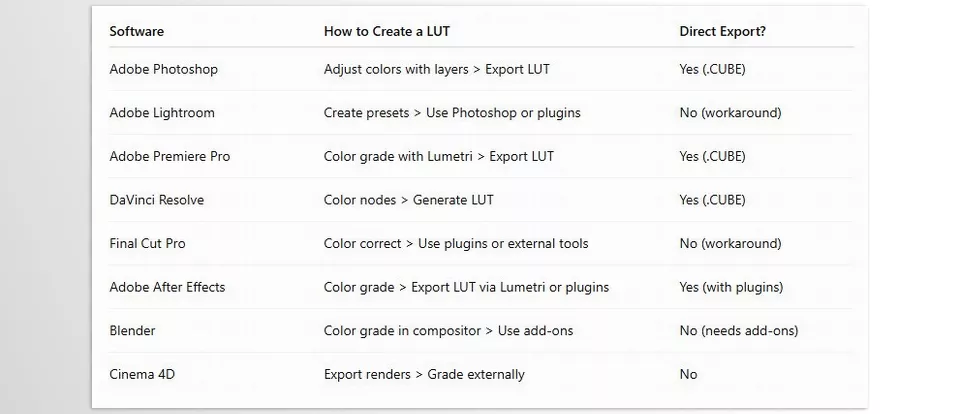
How to Create a LUT in Popular Software
In this part, we explain how to create and export LUTs in popular editing applications.
1. Adobe Photoshop
- Open an image.
- Use adjustment layers (Curves, Color Balance, Levels, etc.) to grade the image.
- Go to File > Export > Color Lookup Tables to save the LUT (.CUBE format).
- Apply this LUT in any compatible software.
2. Adobe Lightroom
- Lightroom doesn’t export LUTs directly.
- Create a preset, then:
- Export the edited image.
- Import it into Photoshop.
- Export the LUT from Photoshop using the edited image as a reference.
- Alternatively, use third-party plugins to convert Lightroom presets into LUTs.
3. Adobe Premiere Pro
- Import footage.
- Use the Lumetri Color panel for color grading.
- Click the panel’s menu and choose Export .cube to save your LUT.
- Use it on other clips or share it with others.
4. DaVinci Resolve
- Import your footage and color grade using nodes.
- Right-click a node and choose Generate LUT to save it as a .CUBE file.
5. Final Cut Pro
- Apply color corrections using the Color Board or Color Wheels.
- No built-in LUT export feature.
- To create a LUT:
- Use third-party plugins, or
- Export a graded frame and generate the LUT externally.
- Final Cut Pro supports importing and applying LUTs.
6. Adobe After Effects
- Grade footage using adjustment layers and effects like Curves, Levels, or Lumetri Color.
- Export a LUT via Lumetri Color or using third-party scripts/plugins.
7. Blender
- After rendering, use the Compositor to color grade with nodes (Color Balance, RGB Curves).
- Blender doesn’t natively export LUTs, but add-ons like Final LUT allow LUT export.
- Generated LUTs can be used in other video editors.
8. Cinema 4D
- No built-in LUT creation tools.
- Export renders to external editors (Photoshop, Premiere) for grading and LUT creation.
- Some third-party plugins add LUT support.
How to Use LUTs in Different Software Applications
LUTs work like advanced color filters, allowing you to quickly change the mood and tone of your image.
How to Use LUTs in Photoshop (Step-by-Step)
Steps to Apply a LUT in Photoshop:
- Open Your Image
Open your photo inside Adobe Photoshop. - Add a Color Lookup Adjustment Layer
- In the Layers Panel, click the New Adjustment Layer icon (half-black/half-white circle).
- Select Color Lookup… from the list.
- Load a LUT
- In the Properties Panel, locate the 3DLUT File dropdown.
- Click Load 3D LUT… and select a LUT file (usually .cube).
- The LUT effect applies instantly.
- Adjust LUT Strength
- Lower the Opacity of the adjustment layer if the effect feels too strong.
- Optionally, change the Blending Mode for creative effects.
- Combine with Other Adjustments
- Stack LUTs with other layers like Brightness/Contrast, Exposure, etc., for precise control.
🎬 Color Grading with LUTs in Premiere Pro (Step-by-Step)
LUTs in Premiere Pro streamline video color grading for a cinematic or stylized look.
Steps to Apply a LUT:
- Import Your Video
Load your clips into Premiere Pro as usual. - Open the Color Workspace
Go to Window > Workspaces > Color to open the Lumetri Color panel. - Apply a LUT
- In Lumetri Color, under the Creative Tab, click Browse in the Look dropdown.
- Select a LUT file from your system.
- Adjust LUT Intensity
Use the Intensity slider to fine-tune the effect’s strength. - Refine the Look
- Adjust shadows, highlights, saturation, contrast, and exposure using other Lumetri settings.
🛠️ Creating and Using LUTs in Blender
Blender also supports LUTs for both images and animations.
Two Ways to Use LUTs in Blender:
- In the Compositor:
- After rendering, use Compositor Nodes to apply LUTs during post-processing.
- In Color Management:
- Go to Render Properties > Color Management.
- Choose a Look or load a custom LUT for your render output.
Why Use LUTs in Blender?
- Experiment with different color moods quickly.
- Consistent render styles across projects.
- Easier than manual node-based color correction.
Beginner Tip: For still images, apply LUTs directly in Color Management for the fastest workflow.
Frequently Asked Questions About LUTs
1. What’s the Difference Between Effects and LUTs?
Effects:
- Effects modify your image or video by adding visual changes like blur, sharpness, glow, noise, vignettes, or overlays.
- They alter or add new visual elements to enhance, fix, or stylize content beyond just color adjustments.
LUTs (Look-Up Tables):
- LUTs focus solely on color and tone adjustments.
- They remap the existing colors to create a specific mood or style, making them a core part of the color grading workflow.
- LUTs don’t add physical effects like blur or glow — only color grading.
2. Can You Combine Multiple LUTs?
Yes. You can stack LUTs to layer different color effects. For instance:
- Use one LUT for a basic color correction.
- Apply a second LUT for a cinematic or stylized look.
Tip:
Stacking too many LUTs can cause unnatural colors or excessive contrast. Always adjust the strength or opacity of each LUT when layering.
3. Do LUTs Reduce Image Quality?
Not directly. LUTs remap colors but don’t compress or pixelate your image. However, extreme LUTs (with harsh color shifts or contrast boosts) can:
- Cause color clipping (loss of detail in shadows or highlights).
- Make images look unnatural or overly processed.
To avoid issues:
- Use high-quality LUTs.
- Adjust intensity if the software allows.
- Apply LUTs to high-resolution files whenever possible.
4. What File Formats Do LUTs Use?
- .CUBE — The most common, supported across most apps (Photoshop, Premiere, Blender, etc.).
- .3DL — Often used in professional video pipelines.
- .LOOK — Specific to DaVinci Resolve.
- .MGA — Used in niche software.
Beginner tip: Stick with .CUBE files for maximum compatibility.
5. Are LUTs Only for Photos and Videos?
No. LUTs are also widely used in:
- 3D Rendering & Animation (Blender, Cinema 4D).
- Real-Time Graphics & Games (for mood and environment control).
- Broadcast Production (to standardize footage from different cameras).
- Virtual Production & Filmmaking (to preview color grading live on set).
Any workflow needing consistent color can benefit from LUTs — not just photography or video.
Where to Find LUTs
To complete this guide, here are some of the best places to discover both free and paid LUTs to expand your creative toolkit.
1. Dedicated LUT Websites
- LUTs Color — Offers both free LUTs and premium professional packs.
- RocketStock Free LUTs — Free, professional-grade cinematic LUTs for video editors.
- IWLTBAP — Provides free starter packs as well as high-quality premium collections with a strong community reputation.
- Triune Films (Paid) — Cinematic LUTs created by professional filmmakers.
- Color Grading Central (Paid) — A platform for professional colorists offering premium LUTs.
- Motion Array & Envato Elements (Paid) — Marketplaces with large collections of professional LUTs.
2. YouTube Channels
- Search “Free LUT Pack” — Many creators share free LUT collections and tutorials. Great for finding LUTs designed for cinematic, retro, or stylized looks.
3. Forums and Online Communities
- Reddit — Subreddits like r/colorgrading, r/Filmmakers, and r/VideoEditing often share free LUTs and tips.
- Creative COW — Professional editing forum with occasional LUT discussions.
- LiftGammaGain — A color grading forum with free LUT sharing and professional advice.
- Blender Artists Forum — For Blender users seeking LUTs for renders.
- Facebook Groups — Searching terms like “Free LUTs”, “Color Grading Tips”, or “Video Editing Help” can uncover shared packs and advice.
4. Software-Specific Communities & Marketplaces
- Adobe Creative Cloud Forums — Community-shared LUTs and tips.
- DaVinci Resolve Forum — Blackmagic’s official hub for Resolve users.
- Final Cut Pro Communities — User forums and Facebook groups with free resources.
- Blackmagic Design Store (Paid) — Official LUT packs for DaVinci Resolve.
- Adobe Stock (Paid) — Curated LUTs for Premiere Pro and After Effects.
- Final Cut Pro Marketplaces (Paid) — Specialized LUT stores for Apple editors.
Tips for Beginners
Experiment — Mix different LUTs and adjust intensity to develop your own unique color style.
Check Licensing — Most free LUTs are fine for personal use; always verify if commercial use is allowed.
Stick to Trusted Sources — Download from well-known sites to avoid poor-quality or unsafe files.
Why Are Paid LUTs More Professional?
- Higher Quality and Precision:
Premium LUTs are crafted carefully to enhance colors without breaking skin tones or causing clipping in highlights and shadows. The result looks natural and polished. - Broader Compatibility:
Paid LUTs are designed for different environments (studio, outdoor, night, day) and are better optimized for various cameras and formats. - Support and Tutorials:
Many paid LUTs come with tutorials and support, helping you apply them effectively and get professional results. - Specialization and Variety:
While free LUTs are often basic and general, professional LUTs cover more specific styles like blockbuster cinematic looks, music videos, commercial ads, vintage styles, or even black & white modern grades. - Time-Saving:
Using premium LUTs can help you achieve a professional-grade color result much faster, saving you time on manual adjustments.
If you’re a beginner, starting with free LUTs is a smart way to learn.
But when quality matters — for client work, commercial projects, or serious filmmaking — investing in professional LUTs makes sense.
Paid LUTs are not just filters — they’re an investment in your project’s final quality.
With the right LUT packs, you can elevate your work from amateur to professional and deliver consistent, cinematic, and visually striking results.
Wrap up
As you’ve learned throughout this Complete Guide to LUTs, they are powerful yet simple tools that help creators. Wrap up
As you’ve learned throughout this Complete Guide to LUTs, they are powerful yet simple tools that help creators. Although effects spreads and refines the visuals through blur, overlay, and textual elements, LUTs take care of color and tone restructuring, ensuring uniform professional outputs across several works. Be it speed of work, uniformity, artistic imagination, or all of the above – integrating LUTs to your work is guaranteed to boost the quality of your visuals and help achieve a refined stylistic signature.
In programs such as Final Cut Pro or After Effects, LUTs are just one of the many enhancements to one’s work. Other assets like templates, and plugins, presets, and even LUTs themselves allow for additional creative input. For those interested in the extra features, they have been discussed in detail in our Final Cut Pro Tools and After Effects Tools guides.