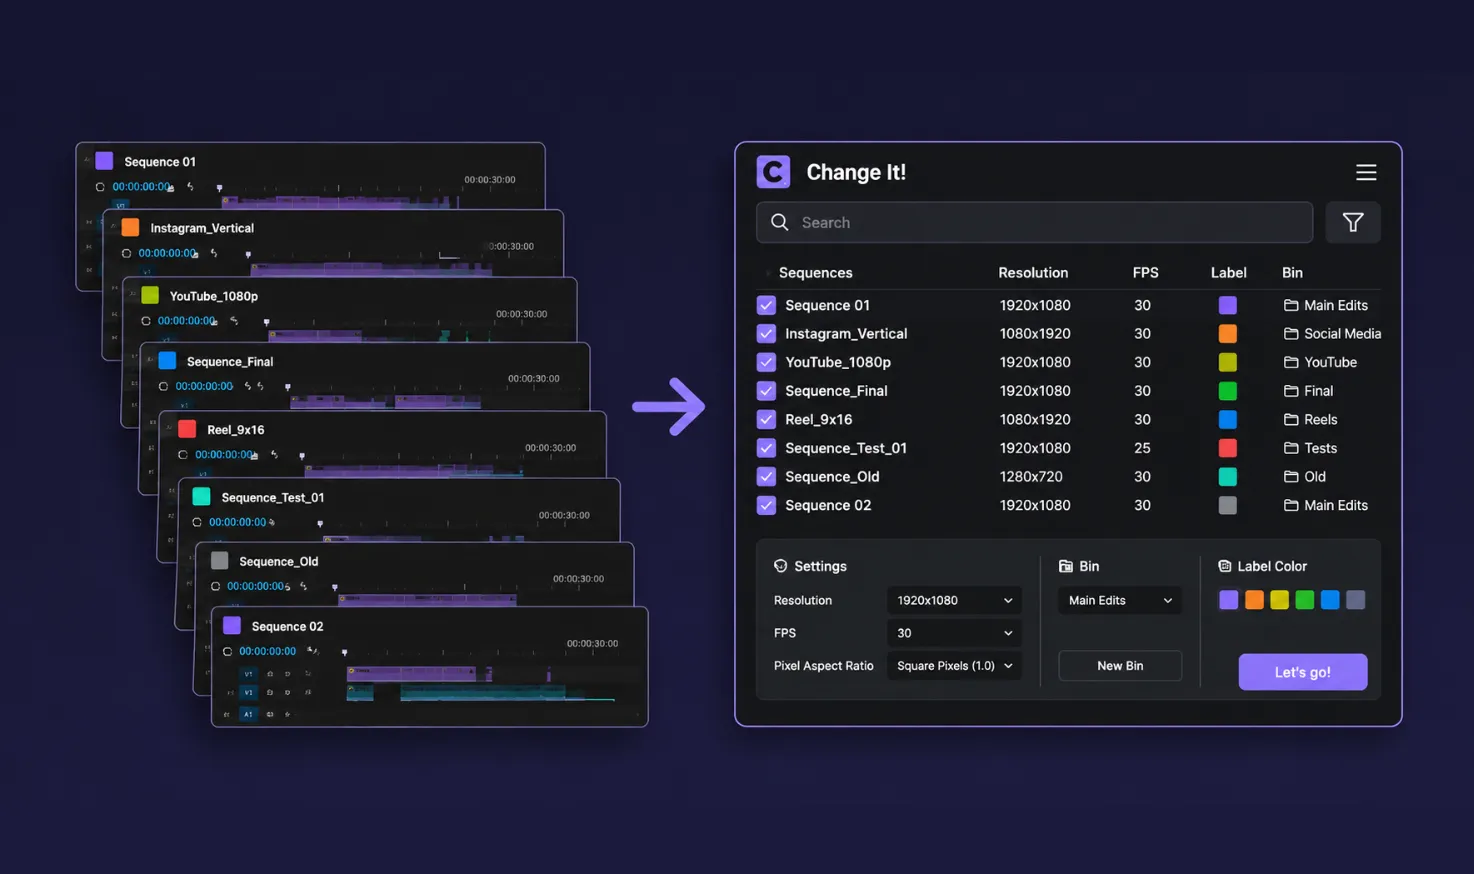
When the Number of Sequences Gets Out of Control 🎯
Do you know anything about the Change it! Plugin by aescripts? Have you ever had a Premiere Pro project that started with just a few Sequences, but after a few hours of work, it became filled with different versions, tests, exports, and Sequences you don’t even remember creating? 😅
The problem isn’t just the growing number of Sequences; when there are too many, finding the right Sequence, checking its settings, changing the Resolution or FPS, and organizing everything can become time-consuming and exhausting. Especially when you want to make a specific change across a large number of Sequences.
This is where having an organized Workflow becomes important. If you can quickly find the Sequences you need, change their settings all at once, and then organize them, a large portion of the repetitive work in your project is eliminated, allowing you to focus more on the editing itself.

What Exactly Is a Sequence in Premiere Pro and What Is It Used For?
In Premiere Pro, a Sequence is the main timeline of your project; the place where you arrange video clips, audio, images, text, and effects together to create the final video. In fact, every time you create a new Timeline, you’re creating a new Sequence.
Each Sequence also has its own settings, such as Resolution, FPS, Pixel Aspect Ratio, and Sample Rate. That’s why you might have several different Sequences in a single project; for example, one for the main version of the video, one for a vertical Instagram export, and another for a YouTube version.
When the number of Sequences increases, managing them becomes a separate task in itself. You need to be able to quickly find the right Sequence, check or change its settings, and organize them into different Bins when necessary. This is where Sequence management tools can make your Workflow much faster and more organized.
Common Ways to Manage Sequences in Premiere Pro 🎬
Before moving on to specialized tools, Premiere Pro itself gives you several ways to find and organize Sequences. For simple projects, these features are completely sufficient, and you can manage your project without any additional tools.
One of the main methods is using the Project Window. You can find Sequences among your files, place them inside different Bins, and change settings such as Resolution and FPS by opening the settings of each Sequence. For better categorization, you can also use Label Color. 🎨
In general, the tasks you can perform manually include:
- 🔎 Searching for and finding Sequences: Using the Project Window and Bin structure.
- ⚙️ Changing settings: Opening the settings of each Sequence and changing its Resolution, FPS, and other related options.
- 📁 Organizing: Moving Sequences into different Bins for better project organization.
- 🏷️ Color categorization: Using Label Color to identify Sequences more quickly.
- 🔄 Managing different versions: Creating separate Bins for main Sequences, test versions, different exports, and similar items.
What Happens When the Number of Sequences Increases? 😵💫
The problem starts when your project no longer has just a limited number of Sequences, and their number reaches dozens or even hundreds. For example, if you want to find all Sequences with a specific Resolution or FPS and change the settings for all of them, you usually have to do much of the work manually. Organizing them into Bins and changing their Label Color involves the same issue. In addition to making the process more time-consuming, the chances of missing a Sequence or accidentally changing the settings of the wrong one also increase. 😅
This is where a faster and more focused Workflow can really come in handy, especially when you’re dealing with large projects filled with Sequences.
Change It!; Complete Sequence Management in Premiere Pro 🚀
Change It! for Premiere Pro by Kabansky is a management panel designed to simplify working with project Sequences. The main idea behind the tool is very simple: instead of constantly moving between different parts of Premiere Pro to find, review, change, and organize Sequences, you can do all of these tasks from a single panel.
The tool’s Workflow is designed around this idea as well; first, you find the Sequences you need using different filters, then you view and review the search results, specify the settings you want, and finally apply the changes to all of them. Even organizing them into Bins and changing their Label Color can be handled within the same process. 👌
🔎 Find Sequences Precisely with Deep Search
One of the most important features of Change It! is its Deep Search system. When a project gets large, finding a Sequence by name alone isn’t always enough; several Sequences may have similar names, or you may want to find all Sequences that share the same settings. This is where the tool’s different filters come into play.
You can narrow down your search based on Name, Label Color, Resolution, FPS, Pixel Ratio, Sample Rate, Fields, Duration, Max Bit Depth, and Max Render Quality. The good thing is that these filters can be combined. For example, if you’re looking for Sequences with a specific Resolution and FPS, you don’t have to find everything first and then manually search through the results; you can specify both criteria at the same time so that only the relevant items are displayed.
You can also choose whether the search should be performed across the entire project or only on the Sequences you’ve already selected in the Project Window. So, if you’re only working on a specific part of the project, the rest of the Sequences don’t need to be included in the search process. 🎯
📋 The Found Section: Review Everything Before Making Changes
After you specify the filters, Change It! displays the search results in a table inside the Found section. This step is important because before any changes are made to the project, you can see exactly which Sequences were found and what their current settings are.
If you click on any row, the corresponding Sequence is also highlighted in the Project Window. This feature is very useful for crowded projects; if you have hundreds of files and Sequences in your project, you don’t have to search through different Bins to find a specific one.
In fact, Found acts as a review stage before execution. First, you see the results, make sure the filters have been selected correctly, and then move on to making changes. This simple step can prevent many unwanted changes. 👀
⚙️ Batch Changes to Sequence Settings
After finding the Sequences, you move on to the Changing section, where you can specify the new settings. The main difference here is that you no longer need to open the settings of each Sequence separately and change the values one by one.
Change It! allows you to batch-change Resolution, FPS, Pixel Ratio, Sample Rate, Fields, Max Bit Depth, and Max Render Quality. So, for example, if you have a large number of Sequences that need to be moved from one specific configuration to another, you can change all of them in a single operation.
Quick Presets are also available for frequently used settings. You can use these quick Presets and Pin the settings you use most often so they’re faster to access. This feature is especially useful when you regularly work with a few fixed Configurations across different projects. ⚡
📁 Organizing Sequences Inside Bins
Sequence management isn’t limited to changing settings. When the number of Sequences increases, the Bin structure also becomes very important, and Change It! covers this part as well.
After finding the Sequences you need, you can move all of them to an existing Bin or create a new Bin for them. When creating a new Bin, you can also specify its name and Label Color to make the project structure more organized and easier to identify.
For example, imagine you have a project where you’ve created several different versions of a video: the main version, a vertical version, a version for social media, and several test versions. You can find the Sequences belonging to each category using the appropriate filters and then place all of them at once into their corresponding Bin. 📁
🏷️ Batch Change Label Colors
Label Color is one of the simplest ways to organize the Project Window in Premiere Pro, but when the number of Sequences increases, changing their colors manually can become time-consuming.
Change It! allows you to change the Label Color of multiple Sequences at the same time. The good thing is that Labeling can be done independently of changing settings; this means that if you only want to mark a specific group of Sequences with a certain color, you don’t need to change any other settings.
Of course, you can also combine this with other operations. For example, you can find specific Sequences, change their settings, assign their Label Color at the same time, and finally place all of them into a Bin. 🎨
🚀 Multiple Changes with a Single Run
One of the interesting parts of Change It! is that you can combine its different features within a single Workflow. This means that finding Sequences, changing settings, organizing Bins, and changing Label Colors don’t necessarily have to be completely separate steps.
For example, imagine you want to find all Sequences that have a specific Resolution and FPS. Once those items are displayed in the Found section, you can specify the new settings in the Changing section, assign them an appropriate Label Color, and finally move all of them into a specific Bin.
By running Let’s go!, these changes are applied to the selected items in a single Pass. As a result, a task that might otherwise require repeatedly opening settings, moving files, and changing Labels can be completed through one focused Workflow. 🎯
↩️ Revert; Undo the Latest Changes
Naturally, when you apply multiple changes to a large number of Sequences at the same time, having a way to go back is very important. That’s why Change It! includes a Revert option.
After running Let’s go!, you can revert the most recent Pass. This rollback includes changes related to Sequence Settings, Labels, and Bin Layout; in other words, these parts are restored to the state they were in immediately before the most recent operation was executed. 🔄
However, there’s one important point to keep in mind: Revert only restores the most recent Pass. So, if you run additional Passes after an operation, you can’t use this feature to separately undo all previous operations. That’s why it’s better to carefully review the search results and selected settings in the Found section before applying major changes.
🎯 Work on the Entire Project or a Selection
Change It! gives you two ways to define the scope of your work. If you want to review the entire project, you can run the search across the whole Project Window so that Sequences matching your filters are found throughout the entire project structure.
But if you only want to work on a few specific Sequences, the Work with Selected option lets you first select the Sequences you want in the Project Window and then perform the search and operations only on that Selection.
This feature is especially useful for large projects because you won’t always want to change every Sequence in the project. Sometimes only a specific group needs to be adjusted or organized, and in that case, you can limit the scope of the operation precisely to those items. 👌
🔄 From Search to Organization, All in One Workflow
If you look at the entire process as a whole, Change It! essentially gives you a clear path: first, you Search, then review the results in the Found section, specify the settings you want in Changing, and, if necessary, place the Sequences into a Bin or change their Label Color. Finally, you run the operation with Let’s go!, and if needed, you can restore the most recent Pass using Revert.
This structure makes Change It! more than just a simple tool for changing Sequence Settings; it’s actually a panel for searching, reviewing, changing, and organizing Premiere Pro Sequences. The larger the project and the more Sequences you have, the more this kind of focused Workflow can reduce manual and repetitive work. 🚀
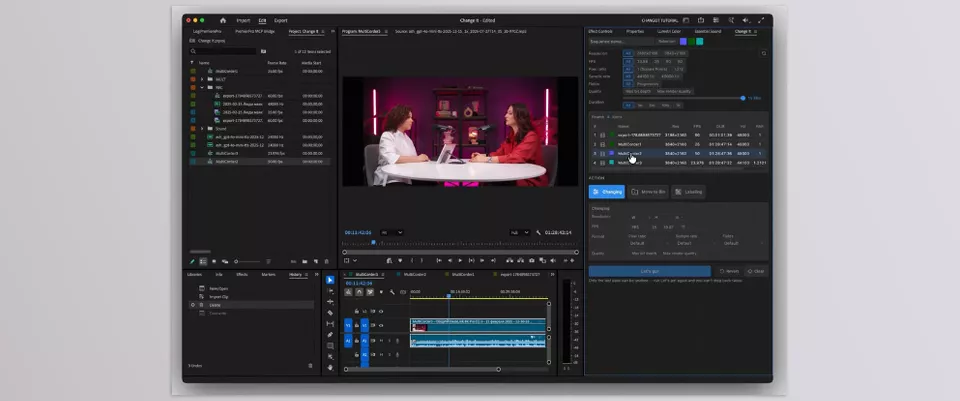
A Few Tips for a More Organized Workflow with Change It! 🎯
To get the best results from a tool like this, it’s better to take a little time before applying batch changes. A few simple tips can help prevent unwanted mistakes.
- Review the results before applying. After applying the filters, look through the list of found Sequences to make sure exactly the items you wanted have been selected.
- Use combined filters. Instead of searching only by name, you can filter by Name, Resolution, and FPS together to get more precise results.
- Create Presets for frequently used settings. If you regularly switch between a few specific settings, Quick Presets can speed up your work.
- Organize your Bins logically in advance. If your project has a clear structure, batch-moving Sequences into the appropriate Bins becomes much more useful.
- Don’t forget Revert for major changes. If you realize after running a Pass that the result isn’t what you wanted, you have the option to revert the most recent operation.
- You don’t always need to change the entire project. If you’re only working on a few specific Sequences, use Selection mode so the changes remain limited to those items.
Ultimately, these few simple tips help you use Change It! with greater confidence while keeping your project organized and manageable alongside the increased speed. 🎯
Spend Less Time Searching for Sequences, More Time Editing 🎬
When a Premiere Pro project gets large, a significant amount of time isn’t spent on editing itself; finding files, organizing the project, and managing different Sequences also become part of the Workflow. Change It! targets these repetitive tasks and turns Sequence management from a manual process into a faster, more organized one.
If your projects usually contain a large number of Sequences, or you constantly need to change different settings across multiple Sequences, features such as Deep Search, Batch Change, Move to Bin, and Labeling can be genuinely useful. This is especially true for projects that contain different versions, multiple exports, or more complex structures.
Ultimately, the appeal of Change It! lies less in doing something unusual and more in eliminating a large number of these small, repetitive tasks; tasks that may only take a few minutes each time, but can really add up over the course of a large project.
Whether you’re a beginner or an experienced Premiere Pro editor, learning how to use the right tools can significantly improve your workflow and save you valuable time. That’s why we suggest reading our complete guide to the most useful Premiere Pro tools.