Welcome to the Magical World of DaVinci Resolve!
If you’ve ever worked with DaVinci Resolve, you already know that this software isn’t just a simple editor. DaVinci is an all-in-one tool for editing, color grading, visual effects, and even audio, capable of covering your entire video project from start to finish. Even if you’re a beginner, with a little practice, you’ll feel like you have a professional studio right on your laptop!
DaVinci Resolve is powerful on its own, but the real magic happens when you explore the world of DaVinci Resolve Tools — plugins, LUTs, transitions, templates, and Fusion macros that transform your editing process into something faster and more creative.
In this article, we’ll go through all Davinci Resolve Tools, see what each one does, and how they can elevate your projects to the next level. Our goal is that when you finish reading, you’ll not only understand what they are but also know how to use them and truly enjoy the process.
So get ready for an exciting journey into the world of Davinci Resolve Tools! 🎬✨
Getting Up Close with DaVinci Resolve
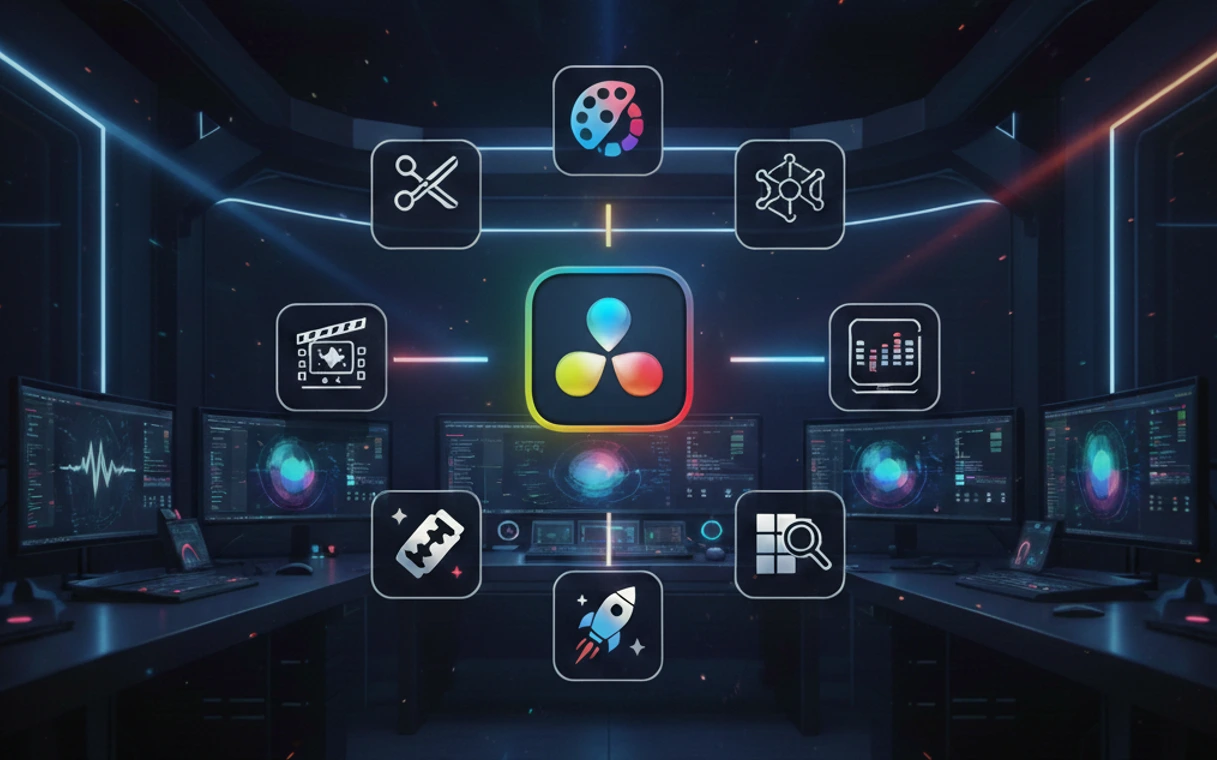
DaVinci Resolve is an all-in-one software for video editing, color grading, visual effects, and audio. In other words, with one software, you can handle all stages of a video project without opening multiple programs. Its interface is divided into sections:
- Edit: for video editing
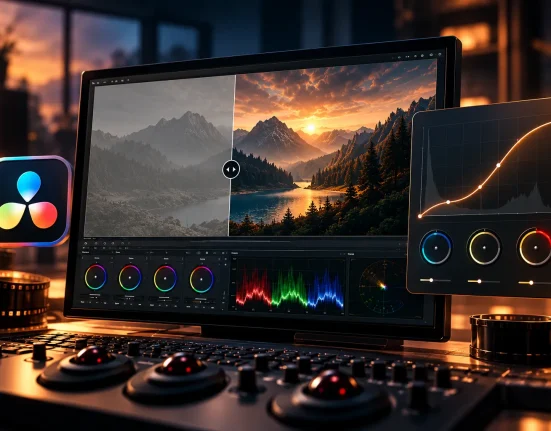
- Color: for color correction
- Fusion: for visual effects
- Fairlight: for audio
- Deliver: for final output
A great feature is that it works on Windows and Mac, and there’s even a Linux version. Core features are consistent across systems, but some specific plugins may be limited to Windows or Mac.
Here are a few cool features you might not know about:
- Smart Media Pool: You can categorize and filter clips by metadata such as camera, shot, or location.
- Fusion and Color Integration: Apply Fusion effects while masking and grading in the Color Page without separate rendering.
- Flexible Timeline: Clips and effects work non-destructively, so you can always adjust them.
- Built-in ResolveFX: Many effects and transitions are built-in, no external plugin needed, though you can add OFX plugins if desired.
- Everything in One Place: Audio, visuals, and effects are managed simultaneously; no need to render sections separately.
- HDR and RAW Support: Work seamlessly with professional files while maintaining original video quality.
In short, DaVinci Resolve combines flexibility, speed, and professional features, allowing anyone from beginners to experts to create magic—whether on Windows, Mac, or Linux.
Why Knowing Davinci Resolve Tools Is Useful
Before we introduce Davinci Resolve Tools, it’s important to understand how knowing supplementary tools and resources can make your work easier and faster:
- You can choose the best tool for each specific task and save a lot of time.
- You’ll know which tools are built-in and which require plugin installation, eliminating confusion.
- Understanding the tools allows for more creativity and full utilization of professional features like Fusion Macros or LUTs.
- For large projects, managing tools ensures your projects stay organized and repeatable.
Now, let’s take a look at Davinci Resolve Tools and resources in a concise and practical way:
| Tool Name | Short Use | Real Example |
|---|---|---|
| OFX Plugins | Add professional effects to videos | Boris FX, Red Giant, Neat Video |
| ResolveFX | Built-in DaVinci effects for color grading, glow, blur, etc. | Glow, Film Grain, Lens Blur |
| ResolveFX Transitions | Ready-made clip-to-clip transitions | Smooth Zoom, Glitch, Spin Blur |
| OFX Transitions | External, installable transitions | Red Giant Universe Transitions |
| Color Presets | Pre-made color settings for quick styling | Color Grade Preset, PowerGrade |
| LUTs | Color transformation files (Look-Up Tables) for precise color/light correction | Film LUTs, Osiris LUTs, Dehancer LUT Pack |
| Project Template | Pre-made project including timeline, effects, titles, and settings | Titles, music videos, commercials |
| Project Preset | Project technical settings for quick start | Resolution, frame rate, color space, export preset |
| Fusion Composition | Node-based environment for effects and motion graphics | 3D text effects, particle effects |
| Macro | Pre-made and saved Fusion effects | Text Glitch Macro, Lens Flare Macro |
| Text+ | Ready-made titles and motion graphics in Fusion | Intro titles, lower thirds |
| Python Scripts | Automate projects or rendering | Auto render, batch rename files |
| Lua Scripts | Custom scripts for project control | Export batch script, timeline modifier |
Note: All of these tools work on Windows and Mac, and most also on Linux, though some specific plugins may have limitations.
In the next section, we’ll explain each tool in detail: what it is, how to use it, and tips that few people mention.
Complete Guide to Davinci Resolve Tools
So far, we’ve gotten a general overview of Davinci Resolve Tools and why knowing them is important. Now, we’ll examine each tool in detail: what it is, what it does, how to use it, and tips that are often overlooked. The goal is that when you finish this section, you’ll not only know what each tool is but also exactly how to apply it in real projects to maximize DaVinci’s professional capabilities.
🎩 OFX Plugins
What is it?
OFX Plugins (OpenFX Plugins) are external, installable visual effects for DaVinci Resolve that provide capabilities not available in DaVinci’s built-in effects.
Simply put: if DaVinci has a standard toolbox, OFX Plugins are professional add-ons that bring new magic to that box.
Main Uses:
- Add professional lighting effects like Glow or Flare
- Advanced image correction, such as professional noise reduction
- Cinematic and creative effects like Glitch, Distortion, or Film Damage
- Special transitions not included in the software
Example: Imagine making a music video and wanting lights and colors like a Hollywood clip. Some effects aren’t built-in, and that’s where OFX Plugins come in.
Real Examples:
- Boris FX Continuum: Lighting, Glow, Film Damage, particle effects
- Red Giant Universe: Transitions and cinematic effects for music videos and ads
- Neat Video: Advanced noise removal for low-light footage
Pro Tips:
- Installed separately; must be installed to appear in DaVinci.
- GPU vs CPU: Some OFX Plugins use only CPU and may slow rendering. Test first.
- Version compatibility: Some OFX Plugins don’t work with older/newer versions.
- Can be applied on Nodes in Color Page, Fusion, or Edit Page.
- Most Plugins have sliders for precise control of light, intensity, color, edges, etc.
- Can be used inside Project Templates or Fusion Macros for multiple projects.
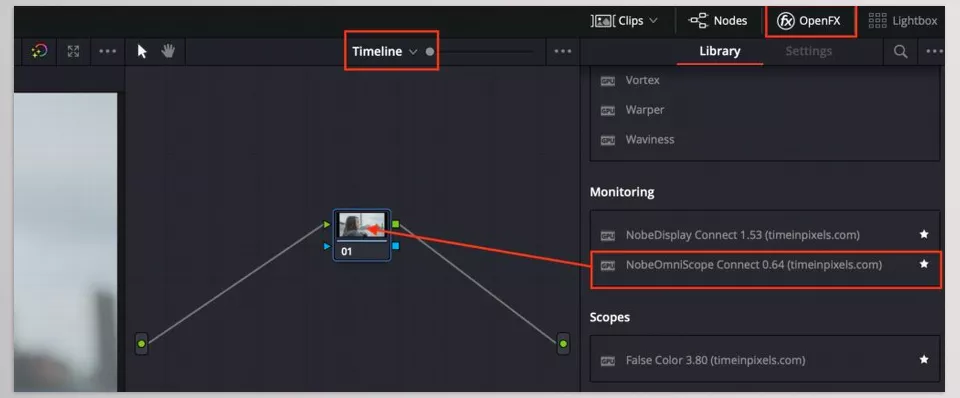
Difference Between OFX Plugins and Similar Tools:
| Tool | Main Role | Key Difference |
|---|---|---|
| OFX Plugin | Add professional external effects | Independent, installable, provides effects not built-in |
| ResolveFX | Built-in DaVinci effects | Free, limited to internal effects, no installation needed |
| Fusion Composition / Macro | Create complex effects with nodes | Mostly for motion graphics, requires Fusion knowledge |
🎨ResolveFX
What is it?
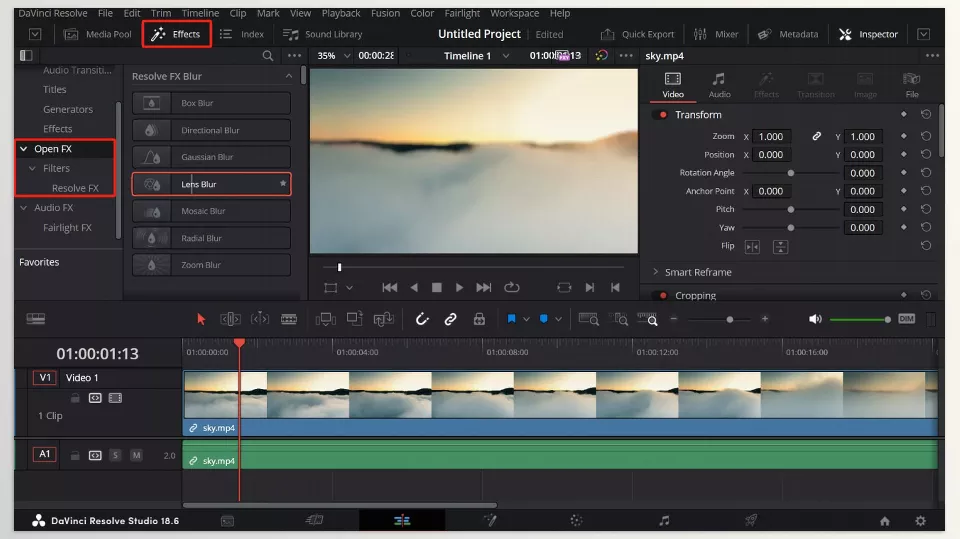
ResolveFX is the set of DaVinci Resolve’s built-in effects that you can apply without installing external plugins.
Simply put: if OFX Plugins are professional add-ons, ResolveFX is DaVinci’s always-ready toolbox.
Main Uses:
- Color and light correction: Brightness, Contrast, Soft Glow
- Built-in cinematic effects: Film Grain, Lens Blur
- Quick visual enhancements: Sharpen, Motion Blur
- Basic noise reduction (Light Noise Reduction)
Example: For a short YouTube video, quickly add Glow to text or sharpen edges—no plugin required; ResolveFX is enough.
Real Examples:
- Glow: Add soft light to text or subject
- Film Grain: Simulate old film texture
- Lens Blur: Create artificial depth of field
- Sharpen: Increase image clarity
Pro Tips:
- Easy to use; faster rendering than most OFX Plugins
- Can combine multiple ResolveFX effects on one Node or with OFX and LUTs simultaneously
- Precise controls for intensity and effect range
- Ideal for quick projects or social media videos
- Free and built-in; no extra installation required
🔄 ResolveFX Transitions
What is it?
ResolveFX Transitions are built-in DaVinci transitions used between two clips to make cuts smoother, cinematic, or creative.
Simply: they are the magic that makes scene changes feel natural or exciting. 😎
Difference from regular ResolveFX:
- Regular ResolveFX applies to a single clip (Glow, Sharpen, Film Grain)
- ResolveFX Transitions are specifically for the border between two clips—where one image moves to another
Real Examples:
- Smooth Cut: Removes jump between two takes with smart transition
- Zoom Blur: Smooth motion zoom transition
- Swirl Dissolve: Combines two scenes with rotation and fade
- Vortex: Cinematic spinning effect between scenes
- Glitch Transition: Digital noise effect for modern videos or music videos
Advantages:
- Built-in, no installation needed
- GPU-rendered, fast and optimized
- Adjustable intensity, duration, and fade type
- Compatible with LUTs and other effects
- Live preview, no rendering needed
Pro Tip: Some ResolveFX Transitions use DaVinci Neural Engine AI—for example, Smooth Cut analyzes frames and generates in-between frames for natural transitions.
Comparison with OFX Transitions:
| Feature | ResolveFX Transitions | OFX Transitions |
|---|---|---|
| Source | Built-in | External plugins (Boris FX, Sapphire) |
| Speed | High (GPU optimized) | Depends on plugin |
| Complexity | Simple to semi-professional | Highly professional and customizable |
| Use Case | Quick projects, YouTube clips | Ads, music videos, large projects |
🔮 OFX Transitions
What is it?
OFX Transitions are clip transitions added via external OFX plugins (Boris FX, Sapphire, Red Giant, MotionVFX, etc.). They’re part of the broader family of Davinci Resolve Tools that expand what’s possible beyond the built-in effects.
Simply: if ResolveFX Transitions are everyday bread 🍞🧀, OFX Transitions are a steak dinner with fine wine 🍷—special, professional, sometimes heavy.
How they work:
After installing the plugin, transitions appear automatically in Effects Library > Transitions. Each has its own algorithm and settings—some use motion vectors for realism or lens distortion to mimic camera movement.
Real Examples:
- Sapphire FilmRoll Transition: Simulates changing real film reels
- Boris FX WhipPan: Fast left-to-right camera motion with real motion blur
- Red Giant Universe Glitch: Noisy transition for digital/techno style
- MotionVFX mTransition Modern: Clean modern effects for ads
Advantages:
- Higher visual quality—designed for cinematic or ad output
- Full control over intensity, direction, blur, background color, and depth
- HDR and 32-bit float support for advanced color projects
- Smart processing—some use GPU + Neural Engine
- Various styles—cinematic, cyberpunk, glitch, ink, particle, etc.
Drawbacks:
- Requires separate installation and license
- May render heavier, especially in 4K
- Some plugins work only with DaVinci Studio version
Pro Tip:
Use ResolveFX Transitions for quick, simple videos, but for special scenes (trailers, ads), use OFX Transitions to make scene changes a signature moment ✨
🎛️ Color Presets
What is it?
A Color Preset is a pre-saved package of color correction settings. It’s one of the many Davinci Resolve Tools that help you speed up your grading workflow.
Instead of adjusting Color Wheels, Curves, Contrast, or Saturation from scratch every time,
you can select a Preset and DaVinci will apply those settings for you.
In simple terms:
A Color Preset is like a “color recipe” — set it once, and whenever you want, it applies to your video and the flavor repeats 😎
⚙️ Where it’s useful
- When you want your project’s color style to stay consistent (e.g., YouTube videos or brand promotions).
- To save time during color correction.
- When you want to transfer successful color settings from a previous project to a new one.
- When working in a team and you want everyone to have the same color reference.
🎬 Real-life example
Imagine you’ve spent a lot of effort creating a warm, neon style for a travel video project;
now you don’t want to redo it for each clip.
You can save those Node settings as a Preset and apply them to other clips anytime.
🧠 Difference between Color Preset and LUT
Simply put:
A LUT is like a photo filter, while a Color Preset is like your camera’s manual settings 📸
💡 Pro tips that many don’t know
- You can organize Presets into folders to keep projects tidy.
- Presets aren’t just for Color! Some include combined light and Curve settings stored in the gallery.
- Shareable: you can create a Preset, save it, and give it to a colleague for the exact same result.
- Compatible with Camera RAW — works with BRAW or ARRI files.
- Perfect for Look Development: create multiple Presets (Film Look, Vintage, Cyberpunk) to quickly compare visual vibes.
🎨 LUTs
What is it?
A LUT (Look-Up Table) is one of the essential Davinci Resolve Tools — a small mathematical file that tells DaVinci:“Convert each input color to a specific output color.”
Essentially, a LUT is a color transformation map — not just a simple filter.
In everyday terms:
A LUT is like a “smart filter” that tells the software how to treat every pixel to give the video a particular mood.
⚙️ What it does
When you apply a LUT to a clip, the colors, contrast, and overall tone adjust according to that table.
For example, skin tones may become warmer, shadows bluer, or highlights softer.
🎬 Real-life examples
- Cinematic LUT for creating a film-like atmosphere (like Netflix shows 🎬)
- Kodak Film LUT to simulate analog film colors
- Rec.709 Conversion LUT to correct color from log to standard space
- Creative LUT for a special mood (Vintage, Teal & Orange, Sci-fi, etc.)
📁 Formats and storage location
LUTs are usually saved as .cube files and can be placed in:Color → LUTs → Open LUT Folder
so they are always accessible in your projects.
⚡ Difference between LUT and Color Preset
| Feature | LUT | Color Preset |
|---|---|---|
| Structure | Mathematical file (color conversion) | Internal settings and parameters |
| Editability | Fixed, not precisely editable | Fully editable |
| Compatibility | Usable across software | Only in DaVinci Resolve |
| Accuracy | Sometimes limited to LUT color space | Depends on internal settings |
| Use | Fast, lightweight, cross-software | Precise, project-based, controlled |
Simply put:
A LUT is like instant coffee ☕ — quick and flavorful,
while a Preset is like brewing coffee with your machine — slower but precise 😎
💡 Pro tips & tricks
- Don’t apply LUT directly on the clip! First, perform basic light and color balance (Primary Correction), then apply LUT for a more natural result.
- Adjust LUT intensity using Key Output Gain in DaVinci.
- You can create your own LUT! Save your favorite color combo via
Color → Generate LUT. - Combine LUT with Nodes for control, deletion, or comparison.
- Use camera-specific LUTs for files like S-Log3 or V-Log to achieve more natural colors.
🚫 Common mistake
Many think a LUT is a magic tool that makes any video “cinematic” 😅
But if the base color correction isn’t done properly, the LUT will only make it worse!
A good LUT works only when the input and exposure are correct.
🧩 Project Templates
What is it?
A Project Template is one of the most useful Davinci Resolve Tools — a complete pre-configured project: timeline, resolution, effects, transitions, and even pre-set color and audio settings.
In simple terms:
A Project Template is like a “pre-lined design notebook” — you just drop in your content.
⚙️ Where it’s useful
- Quickly start repetitive projects (intros, trailers, social media videos)
- Maintain consistency across multiple projects (e.g., all brand videos use one template)
- Save time adjusting timelines, effects, or text
- Create educational or professional projects with fixed structure
🎬 Real-life example
Imagine you are a YouTuber publishing a weekly video:
each video has a fixed Intro, Outro, and text structure.
Instead of building the project from scratch every week, you create a Template once and just replace the new files.
3 minutes instead of 30 😌
📁 What is stored in a Project Template?
- Timeline settings (resolution, frame rate, color)
- Media Pool structure and bins
- Pre-arranged effects and transitions
- Texts, subtitles, or placeholders
- Final render settings
🧠 Pro tips
- Create custom Templates: use “Save As Template” for future projects.
- Shareable: give Templates to colleagues or your team to work with the same structure.
- Cross-version support: DaVinci usually saves Templates compatible with future versions.
- Combine Templates with LUTs and Presets: pre-load Color Presets and LUTs so all videos are consistent.
🧠 Fusion Composition
What is it?
A Fusion Composition is one of the most powerful DaVinci Resolve Tools — essentially a project within a project. It’s a separate environment (Fusion Page) that uses a Node-Based system for visual effects, animations, text motion, and professional compositing.
In simple terms:
Fusion Composition is where regular editing ends, and the magic begins ✨
⚙️ How Fusion works
Instead of layers (like Premiere or After Effects), Fusion uses Nodes.
Each Node performs a specific function — Blur, Glow, Transform, Merge, etc.
This gives you full control over order, intensity, combination, and effect paths.
🎬 What exactly is a Fusion Composition?
When you add a Fusion Composition in the timeline, it’s a “blank canvas” for Fusion effects.
It can include:
- Motion graphics text (Text+, Lower Thirds)
- Light and particle effects (Particles, Light Rays)
- Multiple video layers with precise masking
- Custom effects (Glitch, Neon, Smoke)
- Background removal or replacement (Keying, Masking)
🌟 Real-life examples
- 3D logo Intro with light and particles
- Motion tracking text on moving subjects
- Combining images for a “broken glass” effect
- Creating a “Teleport” effect with Blur and Glow
- Cyberpunk HUD for tech videos
🧩 Difference between Fusion Composition and ResolveFX/OFX Plugin
Simply:
ResolveFX is like a “ready-made filter,”
while Fusion Composition is a “custom filter lab” ⚗️
💡 Pro tips
- Integrates with Text+: each Text+ is a mini Fusion Composition — you can open it and build custom effects with Nodes.
- Save as Macro: reuse complex Fusion effects in other projects.
- Compatible with 3D Elements: control light, shadows, cameras, and 3D models inside Fusion.
- GPU & Multi-thread supported: very fast rendering on strong systems.
- Organize Nodes: if Nodes aren’t tidy, your project can become a “Node Spaghetti” 🍝😂
Fusion Composition may seem intimidating at first, but once mastered, no ready-made effect will satisfy you 🎇.
Here, you can create anything you imagine — from light effects to 3D motion.
🧩 Macro
What is it?
A Macro is one of the handy DaVinci Resolve Tools — a custom, compact version of a Fusion Composition. If you create an effect in Fusion (e.g., neon text, a glitch, or custom transition),
you can turn it into a “Macro” to reuse it later with drag-and-drop — no need to rebuild Nodes.
In simple terms:
Macro is “a Fusion effect you made yourself and saved like a personal plugin” 🔧
⚙️ How it works
Each Node has its own parameters.
When combining Nodes (e.g., Blur + Glow + Merge + Text+),
you choose which parameters the user can control, then File → Save As Macro to create a .setting file.
The Macro appears in the Effects tab as a new tool ✨
🎬 Real-life examples
- Custom neon text effect with adjustable glow intensity
- Personal “Warp” transition with control over distortion and blur
- Particle systems (light or snow) saved as Macro
- Camera shake for action scenes
- Combined tools like “Glitch+Chromatic Aberration” in a single Node
🧠 Why Macro is special
- Fully customizable and lightweight — a small file, but as powerful as a professional plugin.
- Shareable — can be shared or sold. Many commercial DaVinci effects are Macros.
- Controllable parameters — define what the user can adjust (intensity, color, duration).
- High speed — runs internally in DaVinci, usually faster than OFX Plugins.
- Personal library — pros build Macro libraries to speed up projects.
💡 Pro tips
- Make a Macro if you reuse an effect in multiple projects — faster and cleaner.
- Name carefully for easy navigation.
- Optional: create custom thumbnails for the Effects Library.
- Works on all DaVinci versions (even free) ✅

✍️ Text+
What is it?
Text+ is one of the powerful DaVinci Resolve Tools, serving as the advanced version of the standard “Text” tool.The difference: it uses the Fusion engine, not the simple Edit engine.
Simply:
Text+ = “Regular text with Fusion brains!” 🤓
You can animate, add light effects, 3D shadows, particles, masks, and all professional motion graphics effects.
🎯 Main uses
- Create animated titles and logos
- Add neon, typing, or burn text effects
- Animated subtitles for cinematic or YouTube videos
- Design custom intros and outros
🎬 Real-life examples
- Typewriter effect (letters appear one by one with typing sound)
- Text with colored Glow and 3D depth
- Animated logo with smoke or light particles
- Text moving along a curve path
- Fancy effects like text dissolving in water or fire
⚙️ How it works
Text+ has a dedicated Node inside Fusion.
You can:
- Control font, color, shadow, and animation
- Apply masks to reveal text along paths
- Connect additional Nodes like Glow, Blur, Tracker, or ParticleEmitter
- Do 3D transformations (rotate text in 3D space, add lighting) 🌌
🧠 Difference between Text and Text+
| Feature | Text (Standard) | Text+ (Fusion) |
|---|---|---|
| Performance | Lightweight for simple text | Professional, heavy for motion graphics |
| Location | Edit page | Fusion page (or Edit with Fusion Engine) |
| Animation | Limited transitions | Unlimited, Node-based |
| Lighting & 3D | None | Yes |
| Timing control | Limited | Fully controllable via Keyframes |
Simply:
“Text” is good for quick subtitles or titles,
while “Text+” is for text that grabs the viewer’s attention 🎆
💡 Pro tips
- Text+ uses GPU directly → powerful graphics card greatly improves complex animations.
- Convert Text+ to Macro for reuse of special typing effects.
- Compatible with ResolveFX and OFX Plugins — add Blur, Glow, or Shake.
- For lightweight projects with Fusion look, use ready-made Text+ Templates.
- Use Modifiers like Follower for typing effects — a hidden but magical tool 😎
🧠 Python/Lua Scripts
What is it?
Python (and Lua) scripts are among the most powerful DaVinci Resolve Tools, allowing you to automate repetitive or complex tasks.
Simply put:
Instead of doing the same task ten times manually, you write a “command” once, and from then on, it does it automatically.
⚙️ Simple Example
Imagine you need to rename and color-code a hundred clips individually.
With a simple Python script, you can say:
“Tag each clip with its camera name and assign its specific color.”
DaVinci will handle the rest, without you even clicking 😎
🎯 Real-World Applications
• Project automation: create new Sequences, Bins, or Timelines automatically
• Render management: set up multiple outputs of a project with different formats and paths
• Batch control: change color, name, or settings of multiple clips with one command
• Reporting: extract project information (clip names, timecodes, total duration)
• Adding new functionalities: create personal tools that don’t exist in the software (e.g., an “Export Thumbnail” button)
🧩 How It Works
DaVinci Resolve has an official API called the DaVinci Resolve Scripting API, which works with Python and Lua.
Just create a text file with the .py extension, place it in the Scripts folder,
then go to Workspace → Scripts → Your Script Name to run it directly.
💡 Pro Tips & Hidden Tricks
- Python is more powerful than Lua because it can work with external libraries like
os,json,re,PySide2. - You can even create a UI (Graphical Interface) so users can interact via buttons and windows.
- If you have multiple versions of DaVinci, set the API path separately for each.
- Studio version offers extended API capabilities (e.g., full control over the Color Page).
- Scripts can bridge Fusion, Edit, Cut, and Deliver Pages — one command can control multiple areas simultaneously.
🧮 Cool Practical Examples
• Create an “Auto Render All Timelines” button 🔁
• Script “Find Missing Media” to locate lost files
• Generate “Batch Export LUTs” from Color Nodes
• Automatically produce subtitles from text or time-coded files
• Change the resolution of multiple projects with one click
💬 Friendly Summary
Python in DaVinci is like having a professional digital assistant who understands exactly what to do.
It halves your time, eliminates errors, and doubles your productivity.
If you have a big project or hate repetition, Python is your best friend in DaVinci 🐍💻
❓ FAQ — Frequently Asked Questions About DaVinci Resolve Tools 🎬
🔹 1. What’s the difference between ResolveFX and OFX Plugins?
ResolveFX are DaVinci’s built-in effects — always available without extra installation.
OFX Plugins are external Davinci Resolve Tools made by other companies (like Boris FX or Red Giant) and need a separate installation.
Simply: ResolveFX = built-in | OFX Plugin = external add-on
🔹 2. What’s the difference between Preset and Template?
Preset is a saved setting (e.g., color, effect, or transition).
Template is a pre-arranged project — like a “complete blueprint” with timeline, effects, and text ready.
Preset = a “setting”, Template = a “semi-finished project ready to use.”
🔹 3. How is Fusion Composition different from Macro?
Yes ✅
Fusion Composition is a full effect or scene inside the Fusion node environment (fully editable).
Macro is a condensed, packaged version of the same effect for quick use or selling.
In other words: Fusion Composition = “Effect Workshop”, Macro = “Packaged Effect Version”.
🔹 4. How is Text+ different from regular Text?
Regular Text is good for quick writing (like subtitles).
Text+ uses the Fusion engine, letting you create animated, 3D, and visually rich text.
For professional motion graphics or title design, always use Text+.
🔹 5. Can ResolveFX and OFX Plugins be used together?
Absolutely 💪
For example, you can combine a Glow effect from ResolveFX with a Glitch plugin from Boris FX for a unique result.
DaVinci allows using both effect types on a single Node or Layer.
🔹 6. Are Python Scripts available to everyone?
Yes, with some differences.
The free version of DaVinci supports scripting, but some API features are Studio-only (e.g., full Color Page control).
Still, for clip automation, rendering, or file management, the free version is enough.
🔹 7. Is a LUT the same as a color Preset?
Not exactly.
A LUT is a mathematical file that converts colors algorithmically (e.g., Rec.709 → Film Look).
Preset is a manually saved adjustment.
LUT = standard color file, Preset = saved personal setting
🔹 8. Where should I start learning the Davinci Resolve Tools?
Follow this order to understand the concepts and practice:
- ResolveFX & LUTs (for color correction)
- Text+ & Titles (for animation & titling)
- Fusion Composition & Macro (for special effects)
- Python Scripts (for automation & professional workflow)
🔹 9. Can I sell or share my tools?
Yes 💰
Many artists publish or sell their Macros, LUTs, or Templates as installable packages.
Just make sure files are clean, tested, and documented for others to use.
🔹 10. How can I tell what type a tool is?
Usually, by the file extension or installation location:
• .setting → Macro
• .drp → Project Template
• .cube → LUT
• Effects / Fusion folder → ResolveFX or Title
• Scripts folder → Python / Lua
🏁 Conclusion
DaVinci Resolve isn’t just a video editing and color grading software — it’s a professional environment that lets you manage projects with precision, organization, and speed.
Knowing Davinci Resolve Tools and features means you no longer have to build everything from scratch, letting you focus your time and energy on real creativity.
Understanding Davinci Resolve Tools helps you make better decisions, keep your projects organized, and achieve more professional results than traditional methods.
It also enables you to develop your personal style and maintain high productivity on long or repetitive projects.
Ultimately, knowing these elements by heart means every task, no matter how big or small, can be completed quickly and with quality. The more you know about Davinci Resolve Tools, the more you can take control and let your creative ideas flourish in your style and process.
Premiere Pro is another editing tool with features similar to DaVinci Resolve, and if you’re interested, we’ve also written a full article about Premiere Pro tools.