The Look That Doesn’t Match Your Vision
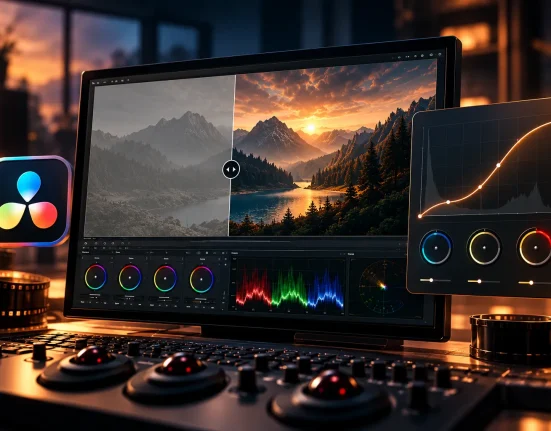
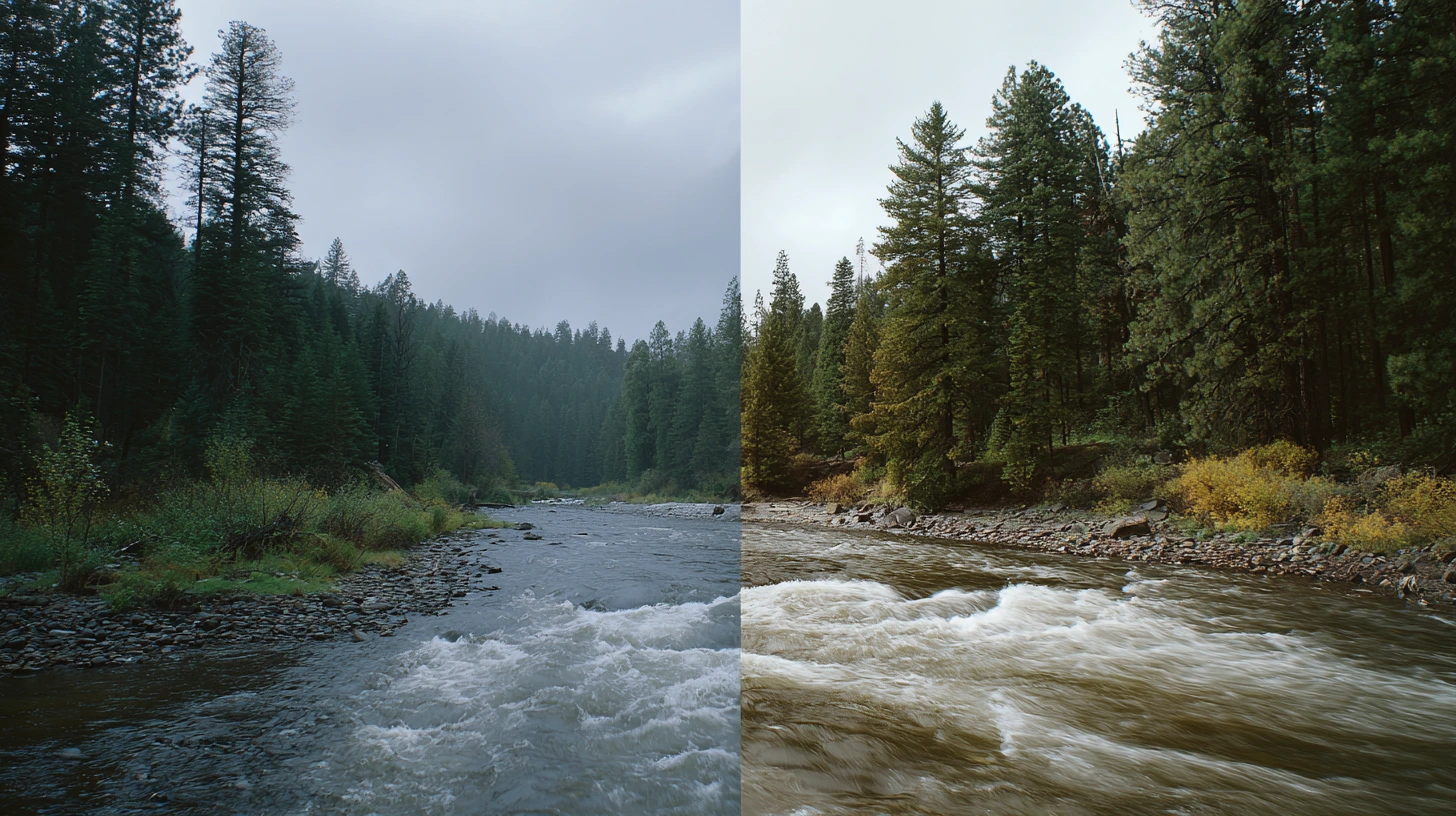
If you’ve ever tried color grading log footage, you know. You bring up your footage and it looks flat, desaturated and not in the way you hoped it would look. Frustrating, huh? But it shouldn’t be. It’s log footage in its proper form. It’s attempting to capture all the information from the highlights and shadows in your image. That flat, lifeless look at first isn’t a problem — it’s a starting point that gives you way more freedom to shape your final image exactly how you want. Still, it can be confusing and discouraging when you don’t know how to get from that flat image to the vibrant video you want.
What Is Log Footage?
Log footage is basically a special way your camera saves video. It intentionally looks flat and low in contrast so it can hold onto more detail in the shadows and highlights — details you wouldn’t see otherwise. It might look strange and boring when you first see it, but that’s normal. The advantage is that this flat “canvas” gives you much more control when you’re color grading later. So shooting in log means you’re capturing the best possible quality, with lots of room to adjust colors and brightness exactly how you want in post. This is why color grading log footage is such a powerful part of post-production — it lets you unlock the full potential of what your camera captured.
When One Size Doesn’t Fit All Cameras
When it comes to color grading log footage from different cameras, things can get tricky fast. What works perfectly to correct Sony S-Log3 footage might not look right on DJI’s D-Log or an iPhone’s log files. Trying to grade different log footages without the right tools can get messy, inconsistent, and take way longer than it should. It’s easy to feel stuck or overwhelmed when you want your clips to match but don’t know how.
A Bridge Between Flat and Filmic
One of the biggest challenges in color grading log footage is dealing with the unique look of each camera’s log profile. Thankfully, there’s a smart shortcut. Specialized LUTs (Look-Up Tables) are designed to do the heavy lifting for you. They take your flat, lifeless log footage and transform it into rich, cinematic colors that match the way each camera captures images. Using the right LUTs can save you tons of time and help your footage look professional and polished — without the guesswork and frustration.
For those who aren’t sure what a LUT is, we’ve referenced a guide at the end of this article.
Making the Most of Every Frame
Choosing the right tools for color grading log footage can save you hours of trial and error. Coming up, we’ll dive into some of the best LUT packs out there, made for different popular log profiles. These tools can help you solve the tricky problem of grading log footage, making sure every frame looks its best — no matter what camera you’re working with.
Tools That Make the Difference
If you’re looking for a faster, more reliable way to bring your log footage to life, the right LUT can make all the difference. Here are some of the most trusted options tailored for different cameras and log profiles.
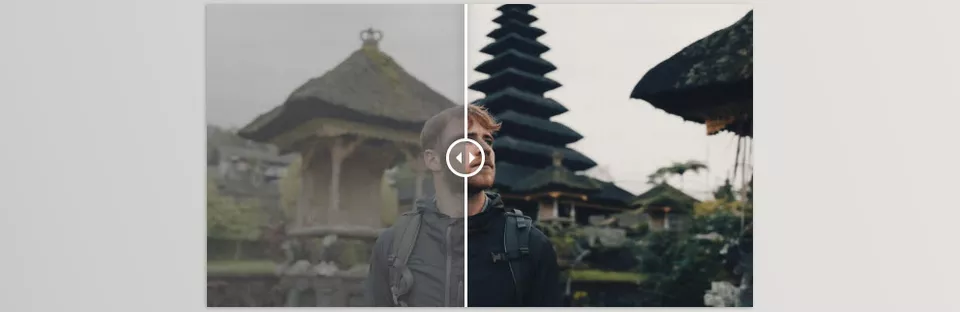
1. Cinem8 – Sony S-Log3 Cinematic LUTs
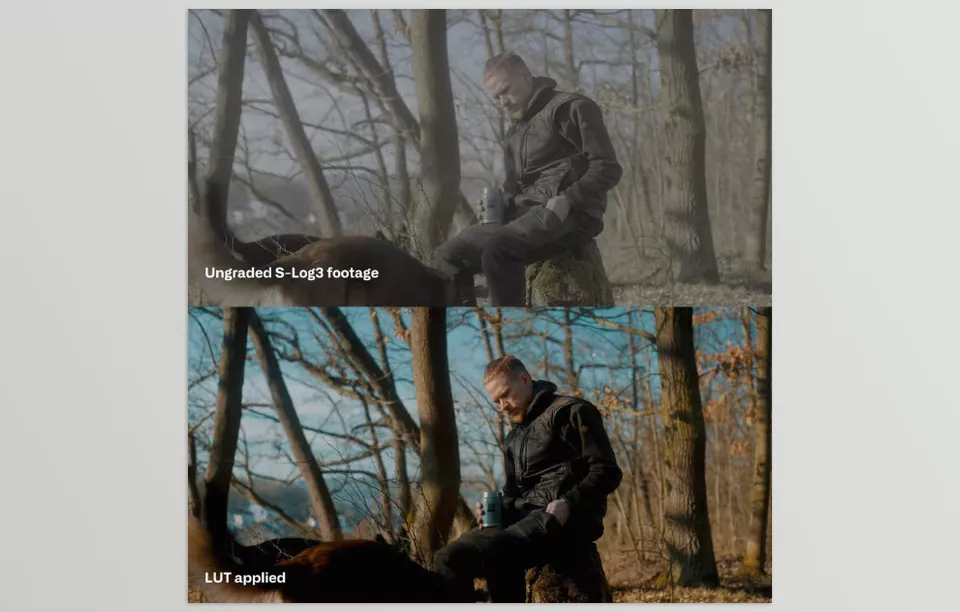
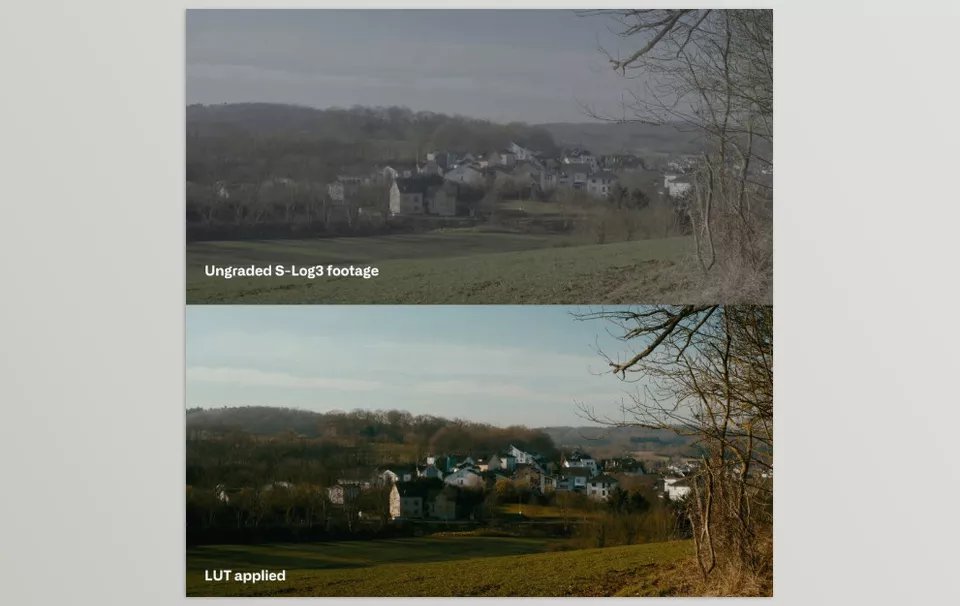
A set of 10 LUTs designed for Sony mirrorless cameras using S-Log3 / S-Gamut3.Cine. These LUTs deliver cinematic color, natural contrast, and clean results without needing a Rec.709 conversion.
Ideal for various shooting situations — outdoor, indoor, travel, and landscape.
Compatible with:
FX3, FX30, FX6, A7SIII, A7IV, A7RV, A7CII, ZV-E1, and other Sony cameras using S-Log3.
Includes:
- 10 stylized LUTs (.cube)
- One in-camera View Assist LUT
- Quick tutorial for best results
- Bonus content
Works with:
Final Cut Pro X, Premiere Pro, DaVinci Resolve, CapCut, and any software that supports .cube LUTs.
2. Film Space – JustKay Sony S-Log LUTs
Sony S-Log LUTs pack by Film Space (in collaboration with JustKay) is designed to deliver a rich, cinematic look for Sony S-Log3 footage. It focuses on maintaining accurate skin tones, color integrity, and uniform consistency across your entire video.
What’s Included:
- 5 carefully designed .CUBE LUTs
- Optimized for varied lighting conditions (indoor, outdoor, etc.)
- Designed for Sony Alpha series cameras (A7, A7S, A7R) using S-Log3
- Recommended shooting exposure: +1.7 EV
Key Features:
- Fast drag & drop workflow – great for both beginners and professionals
- Natural, cinematic tones without manual color correction
- Compatible with:
- DaVinci Resolve
- Adobe Premiere Pro
- Final Cut Pro X
- Sony Vegas, and more
Try Before You Grade:
You can test the LUTs with free downloadable Sony S-Log3 footage from JustKay, available via Dropbox. This lets you preview results in your own software before applying them to your project.

3. RD-Films – DJI Mavic 3 Series Cinematic LUT Pack
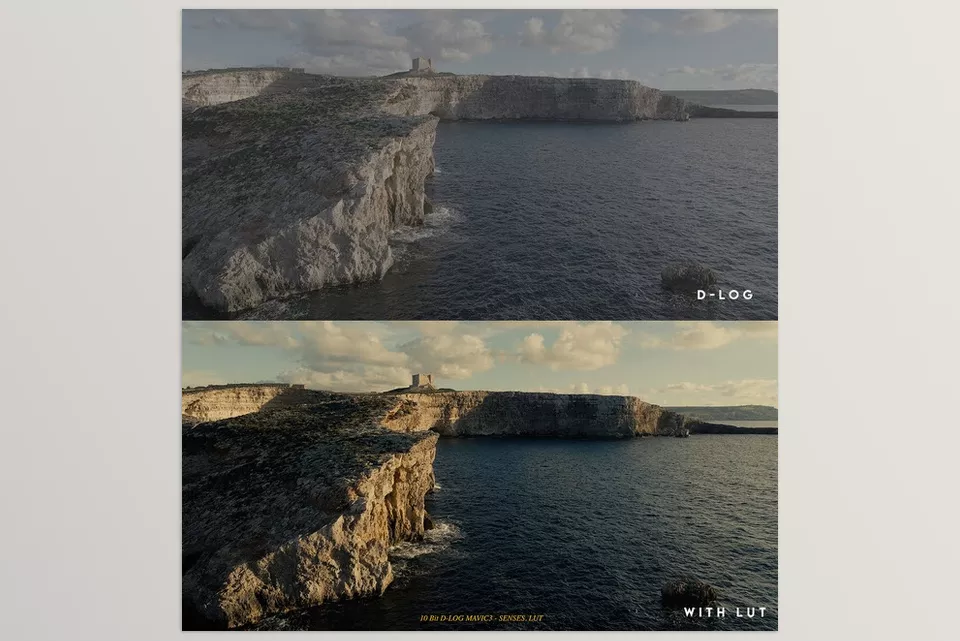
If you want your DJI Mavic 3 drone videos to look professional and cinematic, DJI Mavic 3 Series Cinematic LUT Pack is made just for you. These LUTs are designed specifically for the Mavic 3’s 10-bit D-LOG footage to bring out rich colors and great detail easily.
What’s Included:
- 19 Cinematic LUTs for natural, film-like colors
- 27 Creative LUTs for more stylized looks
- 4 LUTs to quickly convert D-LOG to standard color
How to Get the Best Results:
Shoot in D-LOG, set your white balance to around 5200–5500K (avoid auto WB), and use ND filters to control exposure. Make sure your footage is not overexposed by checking the histogram or exposure warning on your drone. If you do this, you can simply apply the LUTs and get great results without extra color correction.
Works With:
Any video editing software that supports .CUBE LUTs, like Adobe Premiere, DaVinci Resolve, Final Cut Pro, and more. In Premiere, use the Lumetri Creative tab so you can adjust the LUT strength.
This pack makes it easy to add cinematic style to your drone shots — no complicated editing needed.

4. Gumroad – Apple iPhone Log Conversion LUT & Power Grade
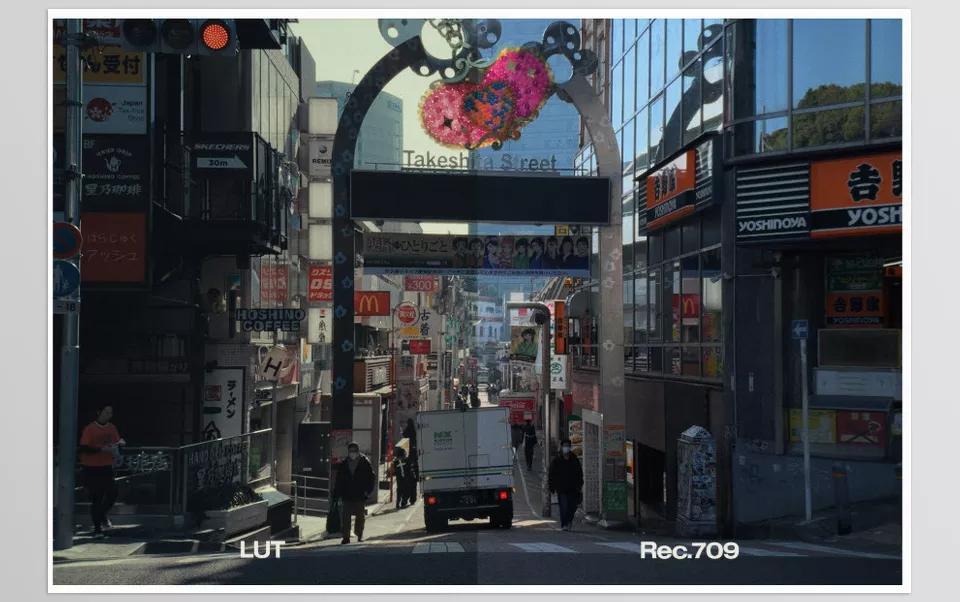
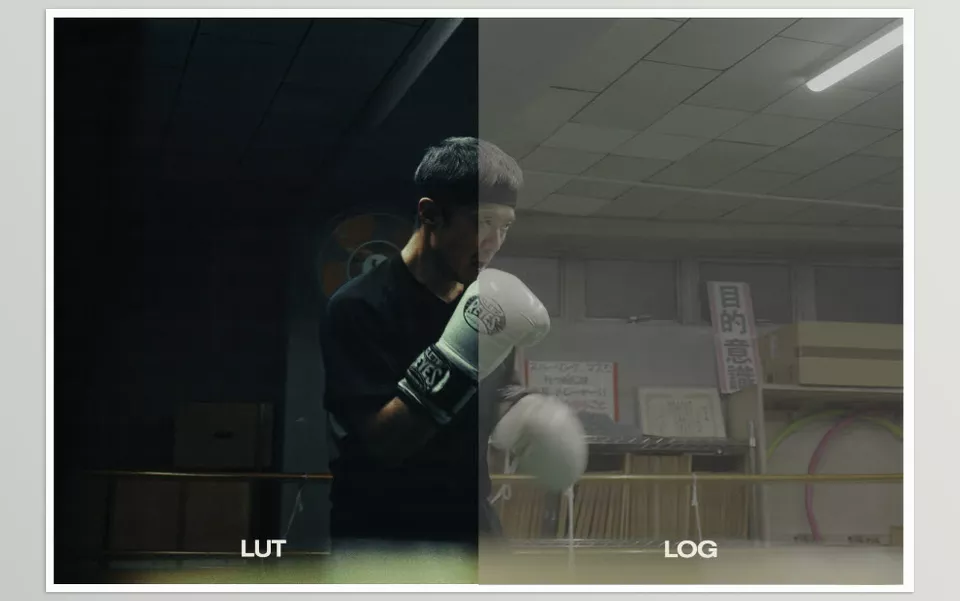
Apple iPhone Log Conversion LUT & Power Grade LUT pack is the go-to tool used by the creator for color grading iPhone log footage, compatible with iPhone 15 and 16 Pro models—or any device supporting Apple Log. It works across all codecs like ProRes, H.264, and H.265.
Designed for flexibility, it preserves original image details while delivering a custom look with smooth highlight rolloff and rich shadow detail.
What’s inside:
- 3 different LUT variations
- 2 DaVinci Resolve Powergrades
- A detailed tutorial on using the LUT and color grading process
This pack is digital and non-refundable, but if you run into issues, the creator offers support via email.
5. Juan Melara – iPhone16Pro to Alexa PowerGrade and LUTs
What’s Included in iPhone16Pro to Alexa PowerGrade and LUTs:
LUT Version:
- Converts iPhone 16 Pro/Max Apple Log footage to match ARRI Alexa’s native LogC format.
- Includes ARRI LogC to Rec709 LUTs in 4 styles: Standard, Standard V2, Standard V3, and Wide Dynamic Range V2 (WDR V2).
- Post-Production Rec709 LUTs made at high precision for best quality.
- In-Camera/On-Set Rec709 LUTs for previewing on set at lower precision.
PowerGrade Version:
- Full PowerGrade to match iPhone 16 Pro/Max footage to Alexa LogC, with Rec709 conversion.
- Resolve Color Managed (RCM) workflow version included.
- Same ARRI LUTs as above.
- In-camera/on-set LUTs for on-set previews.
Which to Choose:
- Use LUTs for quick grading in Premiere or other NLEs.
- Use PowerGrades in DaVinci Resolve for maximum flexibility and quality.
- Bundle available if you want both.
Additional Info:
- Compatible with iPhone 15 Pro/Max as well — sensor differences are minor.
- Initial release: 11.04.2025.

Key Takeaways
Working with log footage from different cameras can feel confusing because each one records colors in its own unique way. That’s why color grading log footage properly is essential to getting consistent results. But luckily, there are special LUTs and PowerGrades that do the hard work for you — they help turn that flat, lifeless video into something colorful and cinematic. The packs we talked about here are made especially for popular cameras like Sony, DJI, and iPhone, so you get consistent and polished results no matter what you’re shooting with. Choosing the right tools not only saves you time but also makes color grading log footage easier and helps your footage look amazing — whether you’re editing in Premiere or DaVinci Resolve.
Learn the basics of LUTs, their different types, and where to use them in our article about LUTs.