

Do You Have to Go Inside the Precomp Every Time You Want to Change the Animation Timing? 😅
Are you familiar with the workflow of the Trigger Plugin by aescripts? If you have worked with After Effects, this scenario probably feels very familiar. You create an animation inside a Precomp, everything moves forward cleanly and precisely, and you feel like the project is fully under control 👌 But as soon as the project moves forward, a repetitive problem slowly starts to show itself: timing changes. Something that seemed simple at first becomes a tiring cycle when it is repeated several times.
For example, the client, or even you, decides that one part of the animation should start earlier, or another part should enter the scene later. On the surface, this change seems very small, but in practice it means you have to go inside the Precomp, find the keyframes, move everything around, come back out, render or test it, and then repeat the same path from the beginning again if needed 😵💫 When the project only has one or two Precomps, maybe it is tolerable, but in real projects where several layers and Precomps are involved, these back-and-forth steps become very exhausting over time.
This is where you slowly start feeling that there has to be a better way 🤔, a way that controls only the playback timing instead of touching the internal structure of the animation. In other words, you should be able to define exactly when each part of the animation should run without having to go inside the Precomp every single time 🎯

Linear Animation and the Timing Problem ⏱️
To properly understand the problem, we first need to know how After Effects thinks by default.
In After Effects, animations are usually “linear.” What does that mean? It means that everything you have created inside a Precomp starts from second zero and plays in order until the end.
Now imagine you have several events inside a Precomp:
- A text appears
- Then it gets bigger
- Then it fades out
All of these run one after another.
The problem starts when you want to use the same Precomp at different times and with different behavior. For example, one time you may only need the middle part, another time you may want it to start later, or another time you may want only one specific section to play.
This is where time control, instead of being simple, becomes something that constantly requires manipulation of the animation’s internal structure. In fact, the main problem is that “playback time” and “animation structure” are conflated, whereas in professional projects, it is better to keep the two separate.
Common Methods for Controlling Time in After Effects
When you want to control animation timing without any extra tools, you usually have to use the methods that After Effects itself gives you. Each of these methods works in some way, but depending on the type of project, they may have their own limitations.
The most common methods are usually these:
- Moving the Precomp layer itself inside the timeline, which is the simplest method for changing the start time ⏱️
- Using Time Remapping for more precise control over playback time inside the Precomp
- Creating multiple versions of one Precomp to have different timings 📁
- Or, in some cases, using Expressions for more advanced time controls
Each of these methods can work in specific situations, especially when the project is small or medium-sized. But the issue starts when the project becomes bigger and more complex, and the number of Precomps increases.
Why Do These Methods Become Problematic in Large Projects?
The main problem with these methods is not that they do not work, but that, at scale, they quickly become difficult and unmanageable systems. When you have several Precomps, and each one has been used multiple times in the timeline, changing the timing becomes something that has to be done very carefully so you do not accidentally create problems in other parts of the project ⚠️
On the other hand, some of these methods, like Time Remapping, no matter how powerful they are, create visual complexity in busy projects and reduce the timeline’s readability. This makes finding and fixing timing changes more time-consuming and increases the chance of errors. As a result, something that was supposed to make time control easier becomes a new layer of complexity in the project 😅
Trigger | When Time Gets Separated from Animation 🎯
This is exactly where Trigger enters the game. Trigger is a plugin for After Effects that implements a very simple but very important idea: separating “playback time” from the “animation” itself.
What does that mean? It means that instead of having animation and timing locked together and being forced to go inside the Precomp and adjust keyframes for every change, the playback time is controlled independently here.
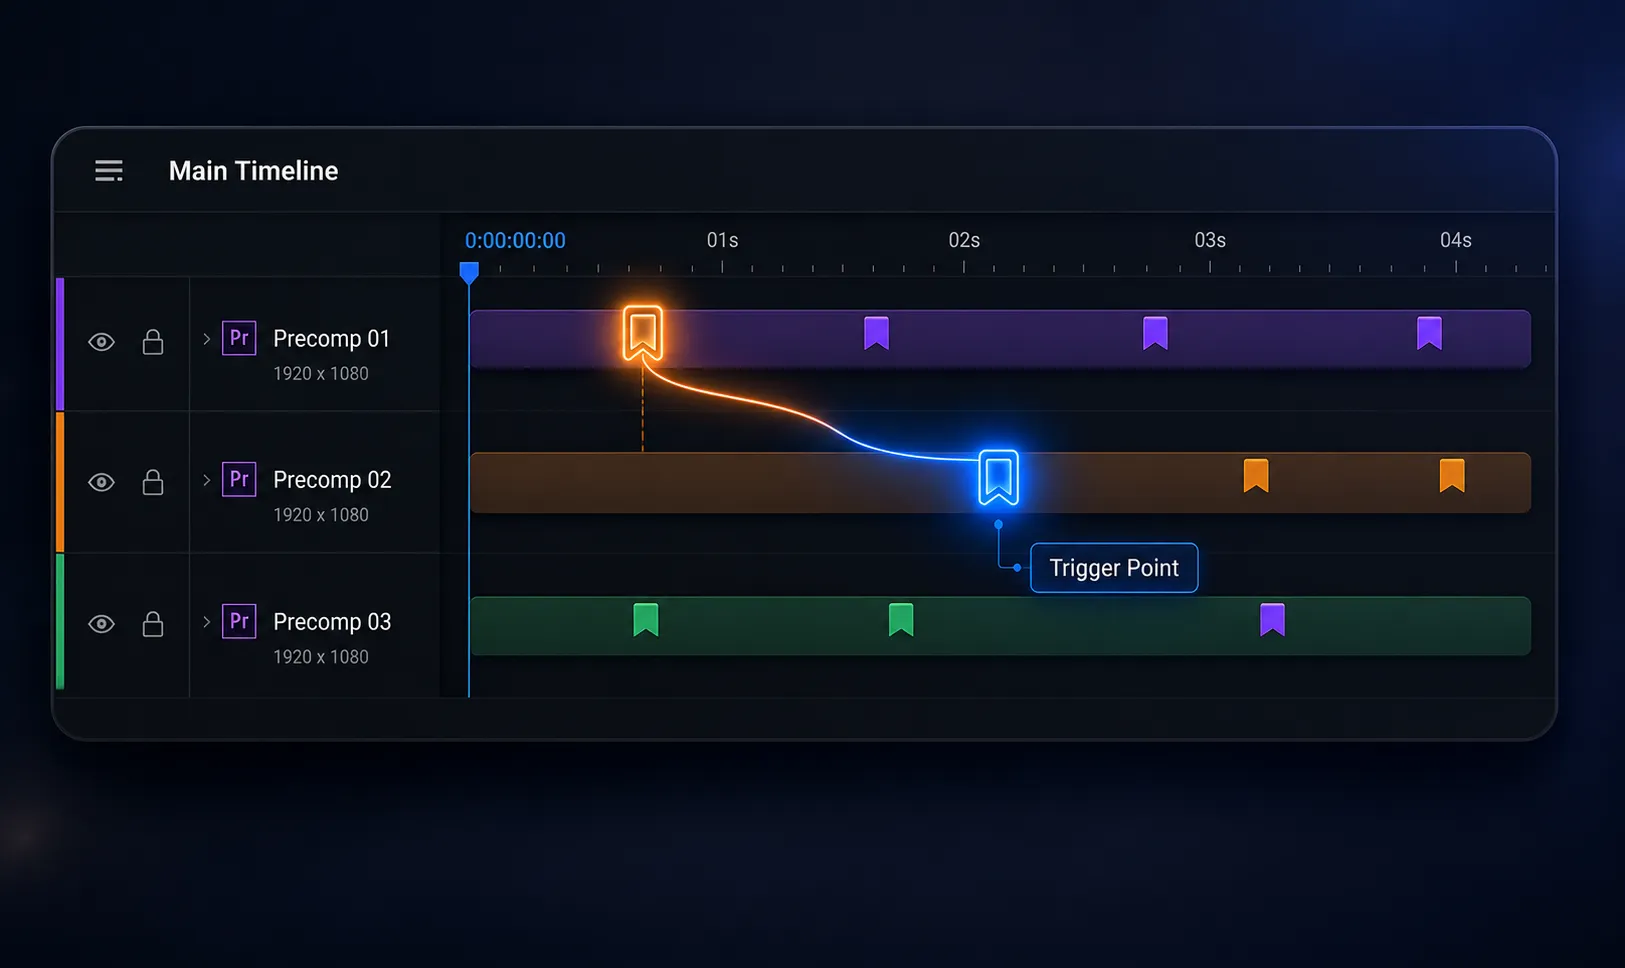
With this tool, you design the animations only within the Precomp and mark their key points with Markers. Then, in the main comp, you define exactly when each part should run. The trigger connects these two together and makes the animation play exactly at the moment you have defined.
The important point is that Trigger does not change the animation structure; it only manages playback timing, and it does so non-destructively.
Main Features and Uses of Trigger 🚀
Trigger is not just a simple tool for placing Markers; it is actually a complete system for controlling and managing animation timing inside After Effects. Its main idea is that, instead of getting involved with keyframes, the timeline, and the internal structure of the Precomp, you focus only on “playback time.”
🎯 Event-Based Animation
One of the most important features of Trigger is that it takes animation out of its linear state and turns it into an event-based system. This means that instead of the animation playing from second zero to the end in order, you define when each part should become active.
This allows you to manage one Precomp as several “independent events,” rather than a single unified, linear animation.
⏱️ Precise Time Control Without Manipulating Keyframes
Normally, if you want the timing of one part of the animation to change, you have to go to the keyframes or Time Remapping. But with Trigger, there is no need for that at all.
You only move the Marker, and the result is applied to the playback instantly, without going into the animation’s internal structure or breaking anything.
🔁 Reusing One Precomp in Different Scenarios
One of the very important uses of a Trigger is that it allows you to use a single Precomp many times, each with different timing behavior.
This means a single animation can:
- Run once at the second 5
- Run once at 20 seconds
- Play only one specific part of it once
Without needing to create multiple versions of the same Precomp.
🧩 Easier Management of Complex Projects
When a project becomes large and the number of Precomps increases, the main problem is usually “timing management,” not the animation itself.
Trigger solves this problem with a simple structure:
Everything stays inside one Precomp, and only the playback time is controlled from outside.
This makes it so that:
- The timeline does not become cluttered
- The need to duplicate files becomes lower
- Project control becomes easier
⚡ Quickly Changing Scenarios and Testing Different Versions
Another important use of Trigger is that you can easily create several different scenarios from one animation.
For example:
- A faster version
- A slower version
- Or playing only one specific part
Without changing the main animation structure, you can change the entire behavior of the project just by moving the Markers.
🧠 Non-Destructive Workflow
One of the most important advantages is that Trigger does not change the animation itself. The keyframes are not manipulated, and the Precomp structure does not change.
Only one control layer is added over the playback time. This is exactly what keeps the project clean and editable at all times.
A Simple Example for Better Understanding 💡
Imagine you have a Precomp with a logo animation inside; it includes an intro, a short motion, and an outro. Normally, this animation always starts from second zero and plays one part after another. But when the project becomes real, you usually need to use the same animation in different places and with different timings. This is where Trigger helps you define when each part should play, without changing the animation’s internal structure. For example, the logo intro appears once at second 5, once at second 20, and only the middle motion of the animation appears at a completely different time.
Trigger does not actually change the animation; it changes how you control its playback timing. Instead of changing keyframes and creating different versions of a single Precomp, it keeps everything within a single structure and manages playback time only using Markers. This is exactly what makes large projects faster to work with, keeps the project cleaner, and gives you more control over different animation scenarios.
Professional Techniques and Tips 💡
Before we move on to the tips, keep one important thing in mind: Trigger delivers the best results when you start with a clean, well-thought-out structure from the very beginning of the project. If you give a little order to your Markers and Precomps from the start, you will work several times more easily later in the project.
Now let’s go to the more practical tips 👇
- 🎯 Use Clear and Descriptive Marker Names
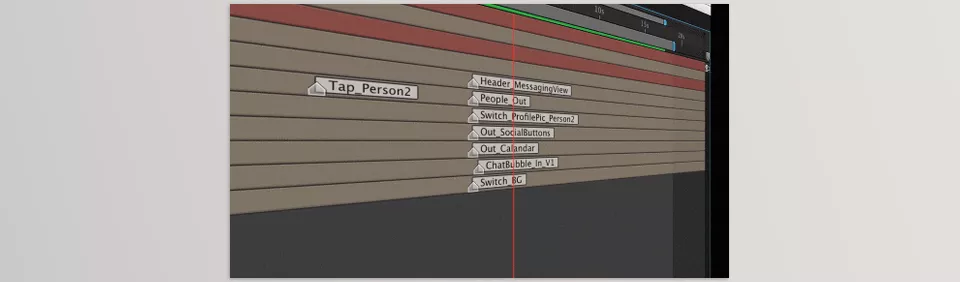
Always use names that immediately tell you what each Marker represents. Instead of generic names, choose descriptive ones such as “Logo_In,” “Logo_Spin,” or “Text_Intro.” This makes navigation much faster, especially in large and complex projects.
- ⛳ Clearly Define the Start and End of Each Animation
It is better to keep every animation between clearly defined Markers. This creates obvious boundaries for each animation segment, so when changes are needed later, you immediately know which section you’re working with.
- 🧩 Plan the Structure Before Animating
One common mistake is placing Markers while you’re already animating. It’s much better to build the overall Marker structure before creating the animation itself. A little planning at the beginning can save a lot of cleanup later.
- 🔁 Use a Consistent Marker Pattern for Repetitive Projects
If you frequently create the same type of animation or Precomp, establish a consistent Marker structure. This helps you work much faster in future projects and keeps everything predictable and organized.
- 📦 Keep Your Precomps Clean
Try to keep all related animations inside a single Precomp whenever possible, and avoid creating unnecessary duplicates. Trigger is specifically designed to reduce the need for multiple copies of the same animation.
- ⚡ Test Different Timing Scenarios by Moving Markers
One of Trigger’s biggest advantages is how easily you can experiment with different timing scenarios. Simply moving Markers lets you compare playback timings without altering the original animation.
- 🧠 Keep the Project Structure Simple
Always remember that the simpler your project structure is, the easier it will be to manage. The goal isn’t to create more Markers—it’s to create Markers that are meaningful, organized, and easy to maintain.
These practices help you see Trigger not just as a plugin, but as a different way of thinking about animation timing. Once you adopt this workflow, your speed, organization, and flexibility in large After Effects projects improve dramatically. 🚀
Why Is This Method Important? 🚀
In the end, what Trigger and similar tools solve is not the animation itself or keyframe design; the main issue lies elsewhere. The real problem starts when you want to manage the “playback timing of animations” across different projects. In other words, not how the animation was created, but exactly when and where each part should run. This is the exact point that turns into a real challenge in serious projects.
The reality is that in small projects, this issue may not stand out very much. Moving a few keyframes or adjusting the timing of a single Precomp is not difficult. But when the project becomes large, the number of Precomps increases, and each one is used several times in the timeline; that is where time control becomes one of the most sensitive and time-consuming parts of the work. The smallest change can create a chain of corrections across the entire project.
The main idea of this tool is very simple but important: instead of getting involved with the internal structure of the animation, you only control how it runs. When this mindset enters the workflow, the project’s speed, accuracy, and flexibility practically multiply. In practice, the result is completely clear: less time spent on revisions, a cleaner project, and much more control over the final output. For someone who works on serious motion graphics projects, this is not just a tool; it is a significant change in how they work.
Get more done in After Effects with less effort. Find practical tools and simple workflow tips that help you edit more efficiently. Take a look at the After Effects Tools guide.



