🎮 A Modern Image with an ’80s Vibe
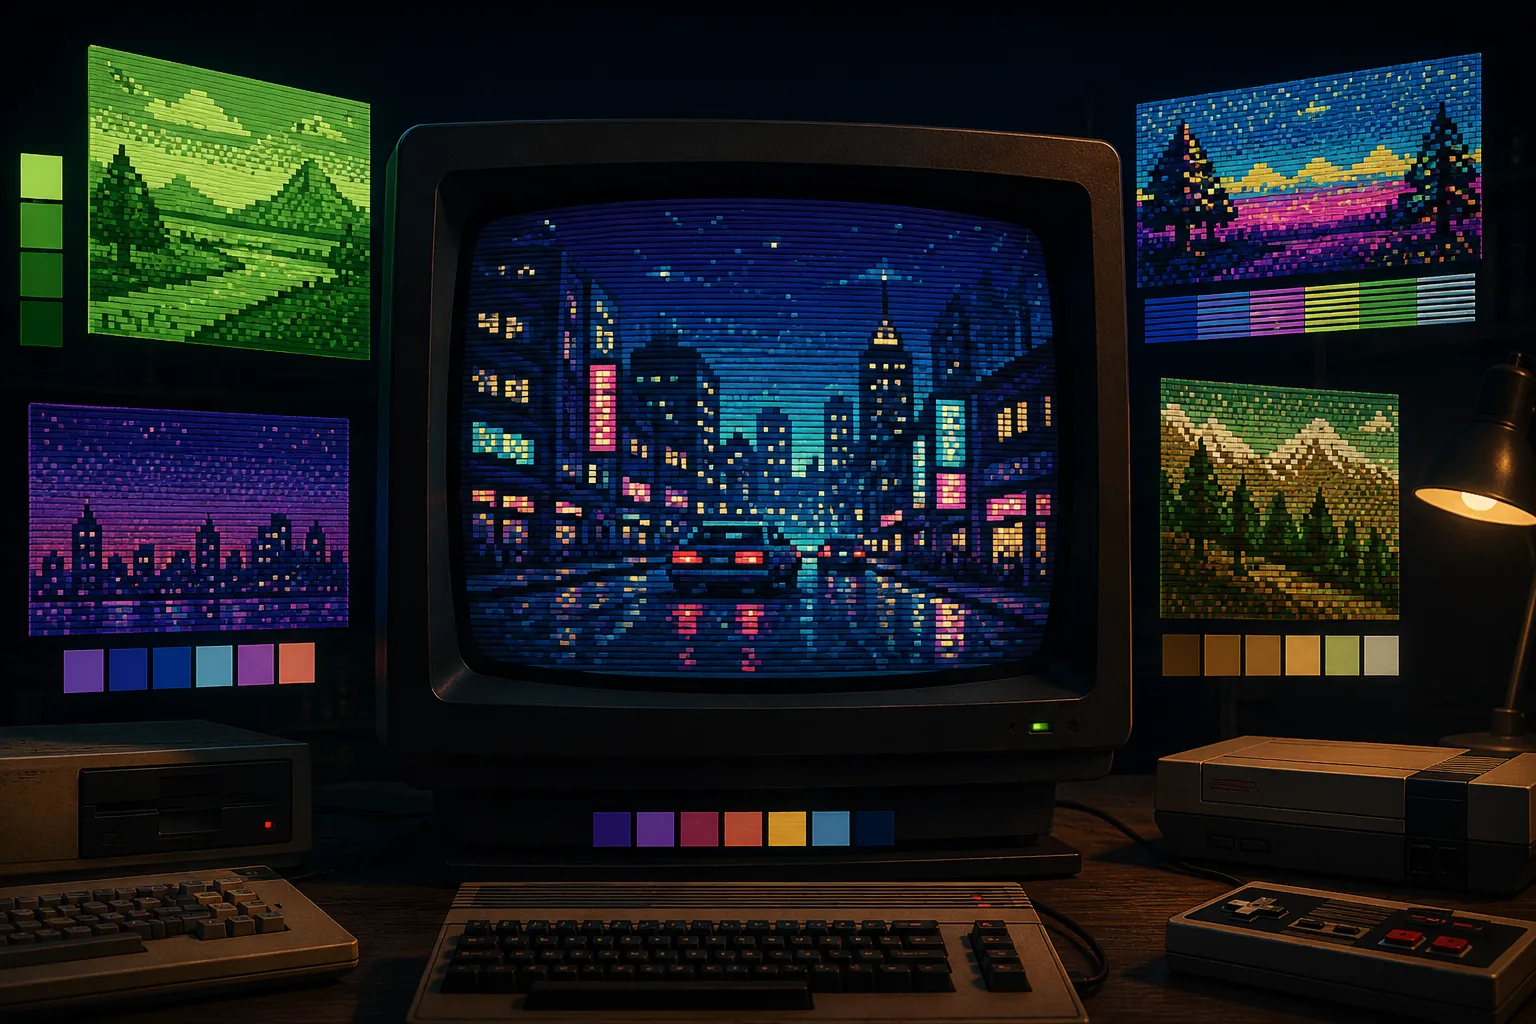
Are you familiar with what the Retro Computer Effect Bundle by aescripts can do? Have you ever wanted to design a video so that it looks like it came straight out of an old computer or game console? For example, the image might be limited to a few specific colors, the pixels might have a distinctive appearance, and CRT lines might be visible across the screen. Creating this kind of look may seem simple at first, but when you want the result to genuinely resemble old hardware, things become much more complicated.
The problem is that a simple Pixelate effect only makes the image larger and more pixelated, while the look of old computers and consoles came from a combination of hardware limitations, restricted color palettes, specific color-display methods, and the characteristics of displays from that era. That’s why, if you’re looking for an authentic Retro Look, a few simple filters usually aren’t enough.

What Exactly Is the Secret Behind Retro Images? 🕹️
To understand this style, we need to know that Retro Computer Graphics doesn’t simply mean “pixelating the image.” Older systems had access to a limited number of colors and displayed images on the screen using specific methods. These limitations are exactly what made their visual appearance so distinctive that it remains instantly recognizable even today.
One important technique in this area is Color Quantization, or limiting the number of colors. Instead of using millions of colors, the image is converted to a limited palette. Alongside that, Dithering helps create colors and details that don’t directly exist in the original palette by intelligently combining pixels.
On the other hand, the display’s appearance is also important. Scanline simulates the familiar horizontal lines of CRT displays, while Bloom causes the brightness of certain areas to spread slightly. Combining these elements can transform an ordinary video into an image that resembles the actual output of an old system.
This style is appealing for a wide range of projects, from Motion Graphics and music videos to promos, intros, gaming videos, old-school UI design, and even sections of films or animations that need a nostalgic atmosphere.
Manual Methods for Creating a Retro Look 🛠️
If you want to achieve this style without a plugin, you’ll need to combine several effects and techniques in After Effects. In fact, each part of the retro appearance has to be simulated separately, from limiting the colors and creating the pixels to simulating old displays. 🎨
To get started, you can use this combination:
- Posterize: To reduce the number of colors in the image and bring it closer to the limited palettes of older systems. 🌈
- Mosaic: To create a pixelated appearance and convert the image into distinct blocks. 🧩
- Noise: To add a bit of texture and irregularity to the image.
- Glow: To simulate the way light spreads on old displays. ✨
- Turbulent Displace: To add a bit of distortion and instability to the image.
- Pattern or Repeating Layer: To create Scanlines and horizontal lines similar to CRT displays. 🖥️
- Dithering: By combining different effects and methods, you can display limited colors more naturally.
By combining these techniques, you can achieve an acceptable retro look and even adjust the intensity of each element based on the project. But if your goal is to recreate the appearance of a specific system like the Apple II or Game Boy, you’ll also need to adjust the colors, pixels, and how the image is displayed to match that system. 🎮
What’s the Main Problem with Manual Methods? 🤔
The problem is that this appearance isn’t created with a single simple effect, and to achieve a good result, you need to configure several stages one after another. On top of that, every time you want to switch from Game Boy to NES or Commodore 64, you’ll have to readjust a large portion of the settings. At the same time, accurately simulating the color palette and Dithering method is more difficult than it might seem, and animated videos may also suffer from Flicker and unwanted changes between frames. As a result, the manual method works for a simple project, but when you’re looking for a look that genuinely resembles old hardware, it becomes both time-consuming and requires greater control and precision. ⏳
Retro Computer Effect Bundle: Five Classic Systems in One Package 🎮
This is where the Retro Computer Effect Bundle really shows what it can do. Retro Computer Effect Bundle is designed to transform modern videos and images into the look of classic computers and consoles, but it does more than simply pixelate the image. The main idea is to recreate the actual limitations of old hardware, including color palettes, color display methods, Dithering, and CRT display characteristics, so the result feels like a real vintage system rather than just a retro filter.
What’s interesting is that all of this is offered in 5 different visual systems, each with its own hardware characteristics and distinctive appearance. So, depending on the atmosphere you want for your project, you can transform the image from the look of an old home computer to that of classic game consoles. 🕹️
Apple II: Recreating the Graphics of One of the Legendary Computers 🍎
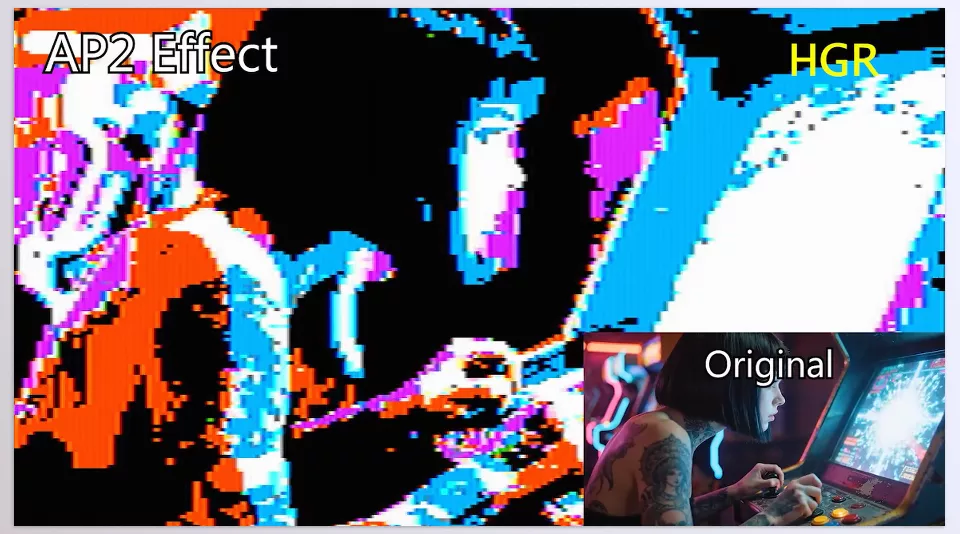
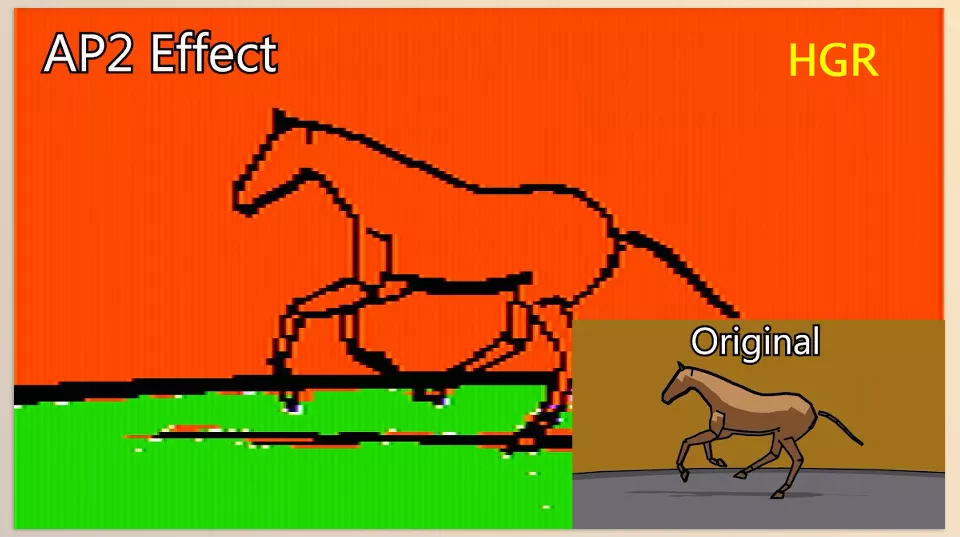
With Apple II Effect, you can recreate the graphical appearance of the Apple II family, including the Apple II, Apple IIe, and Apple IIc. This section isn’t just a simple color filter; it also accounts for the different graphics modes of these systems, such as HGR, DHGR, LORES, and DLORES.
This means the process of converting the image into retro graphics is based on the visual characteristics of the Apple II, and the result can be especially appealing for projects that need the atmosphere of early personal computers, vintage technology, or graphics from the ’70s and ’80s. 💾
Commodore 64: The Colors and Atmosphere of ’80s Home Computers 🖥️
The C64 Effect option simulates the visual appearance of the Commodore 64. With its distinctive graphics and unique color palette, this system is one of the most recognizable home computers of that era.
By relying on the visual characteristics of the original hardware, the plugin transforms colors and how graphics are displayed into the Commodore 64 style. So, if you’re looking for a retro style with the feel of classic home computers, this option can create a completely different look than Game Boy or NES. 🎨
Game Boy: Four Colors and a Nostalgic World 🟢
One of the most distinctive styles in the Retro Computer Effect Bundle belongs to the Nintendo Game Boy. In this mode, the image is converted into 4 monochrome shades to simulate the Game Boy’s famous display and graphics limitations.
But even with such a limited number of colors, the image doesn’t have to become completely flat and lose all its detail. Using several high-quality Dithering algorithms helps combine pixels to create different visual tones, making the image appear more natural.
This style is an interesting choice for gaming designs, Game UI, nostalgic videos, motion graphics inspired by classic games, and projects that need a highly recognizable visual appearance. 🎮
NES / Famicom: Classic Nintendo Game Graphics 🕹️
With NES Effect, you can transform the image into the style of the Nintendo Entertainment System or Famicom. This section recreates the console’s graphical characteristics and specific color palette, giving the image the atmosphere of classic Nintendo games.
As a result, instead of simply lowering the image Resolution, the Color Quantization itself and the way the graphics are formed are also changed to match the style of the original hardware. For projects that want to evoke the feeling of 8-bit games, this difference is very important. 👾
TMS9918: A Piece of Computer Graphics History 💻
The fifth option focuses on the TMS9918, a video display processor used in many computers and gaming systems in the late ’70s and early ’80s.
For this reason, this section doesn’t simulate just one specific look and can create the visual feel of a wide range of old systems, from ColecoVision and MSX to SG-1000, TI-99/4, Sord M5, Tatung Einstein, and several other systems that used the TMS9918 or its variants.
Dithering: Something Beyond Large Pixels 🎨
One of the important parts of the Retro Computer Effect Bundle is its Dithering system. When you reduce the number of colors in an image to a limited palette, naturally, some of the original colors and tones are lost. Dithering helps make this limitation less noticeable by creating controlled patterns between pixels, allowing the image to appear more natural.
The package provides 3 high-quality Dithering algorithms, and you can select your preferred method through Dither Type and adjust its intensity using Dither Strength.
There are also two additional features for better control over dithering in animated videos: Spatial Mix and Switch Hold. The first also considers neighboring pixels for more stable color selection, while the second preserves the palette selection from the previous frame to reduce sudden changes and Flicker between frames. 🔧
Of course, the amount of these settings matters. If you increase Spatial Mix or Switch Hold too much, the result may start to look unnatural. Therefore, it’s better to adjust their values while the image is in motion.
Scanline and Bloom: The Authentic Feel of a CRT Display 🖥️
To complete the retro look, the package also includes visual features related to CRT displays. The most important is Scanlines, which add the familiar horizontal lines of old displays to the image.
Alongside that, the Bloom effect helps bright areas of the image spread and soften slightly, making the output look more like an image viewed on an old display.
These two features become especially appealing when you want the final output to feel like a real old screen rather than a digital image with simply limited colors. ✨
Brightness and Contrast Control Before Color Conversion 🎛️
To get better results when converting the image to limited palettes, you also have two important controls: Input Level and Input Contrast.
Input Level adjusts input brightness, while Input Contrast changes the image contrast. These two parameters directly affect the Color Quantization process, letting you adjust the image before the final conversion so important details and tones fit better within the selected system’s limited palette.
This feature is especially useful when you have an image that is too bright, too dark, or low in contrast and want to correct the input before converting it to a retro appearance. 🎯
Use Linear Color: Better Control in Float Projects
There is also a more specialized option called Use Linear Color for Float I/O. This feature of the Retro Computer Effect Bundle is designed for situations where the input and output work with Floating-Point Color and allows color processing to be performed in linear color.
If you’re using Retro Computer Effect Bundle in Nuke or Natron, enable this option per the developer’s instructions so color processing works correctly.
Compatibility with Different Software 💻
Another strength of Retro Computer Effect Bundle is that it isn’t limited to a single application and can be used in several professional environments:
- After Effects: Versions 2025 and 2026
- Premiere Pro: Versions 2025 and 2026
- DaVinci Resolve: Versions 20 and 21
- Media Encoder: Versions 2025 and 2026
- Nuke / NukeX: Version 17.0
Additionally, version 0.3.1 of Retro Computer Effect Bundle was released on August 26, 2026, and according to the developer’s information, this version fixed GPU rendering-related bugs and improved quantization accuracy.
Overall, what separates Retro Computer Effect Bundle from an ordinary pixel effect is this collection of details: authentic hardware palettes, Color Quantization, three Dithering methods, Flicker control, Scanline, Bloom, and precise Input settings. In other words, instead of simply making the image look old, you can also bring much of the visual logic of classic systems into your project. 🕹️
A Few Tips for a More Professional Retro Look 🎨
To make sure the final output doesn’t just look “pixelated” and genuinely conveys the feel of an old system, a few simple tips can make a big difference. Especially with animated videos, it’s better not to judge the result based on just one static frame. 🎮
- Don’t make the pixels too large. If the pixelation is too high, the image quickly becomes artificial and unrecognizable. It’s better to adjust the effect intensity based on the video’s details and original content.
- Use Dithering in a controlled way. Too much Dithering can make the image look cluttered and full of noise. It’s better to gradually increase the Dither Strength until you reach a suitable balance between preserving details and achieving a retro appearance. 🎨
- Be sure to check for Flicker. In moving images, palette changes between frames may cause the image to flicker. If you notice this problem, use Spatial Mix and Switch Hold to stabilize color selection between frames.
- Keep Scanline subtle. Scanline should create the feel of a CRT display, not become the main element of the image. If the lines are too obvious, they may affect the video’s main details. 🖥️
- Don’t overdo Bloom. The right amount of Bloom can create the sense of light and glow associated with old displays, but too much of it can make the image look overly soft and blurry. ✨
- Adjust Input Level and Input Contrast before conversion. The input brightness and contrast affect how colors are placed within the limited palette. So, if the result becomes too dark, too bright, or low in contrast, adjust these two parameters first.
- Choose the appropriate system style. Each system has its own visual personality; Game Boy, with its four-color monochrome appearance, creates a different feel from NES, Commodore 64, or Apple II. Choosing the right system can be an important part of the project’s visual identity. 🕹️
- Check the result in motion. The settings may look great on a static frame, but during video playback they might cause Flicker, drastic color changes, or unstable Dithering. Before the final export, check several moving sections of the project.
Ultimately, the best Retro Look isn’t necessarily the effect with the most pixels, scanlines, or Dithering; what matters is that these elements work together to make the appearance of the selected system believable. 🎯
The Feel of Old Computers, with Just a Few Clicks 🕹️
Retro Computer Effect Bundle is appealing when you want a more authentic Retro Look, not just an image with a few large pixels placed over it. The simulation of limited palettes, Dithering methods, CRT display characteristics, and the differences between five classic systems gives you much more control over the final result.
What makes it interesting is that you can start with a modern video and transform it into the look of Apple II, Commodore 64, Game Boy, NES, or TMS9918 without having to build a collection of effects from scratch for every project.
If Retro, Pixel Art, and Vintage Gaming styles are part of your workflow, Retro Computer Effect Bundle can be a fast yet precise way to achieve this appearance, especially if you want the result to not only “look retro” but also genuinely incorporate the visual characteristics of classic systems.
If you work with add-ons for video editing and motion graphics software, it’s worth getting familiar with the different types of these tools and how each one is used. You can read our After Effects Tools article to learn more about Plugins, Scripts, Extensions, and other tools available for this software. You can also check out our Premiere Pro Tools and DaVinci Resolve Tools articles to get a better understanding of the tools used to expand the capabilities of these two applications.