

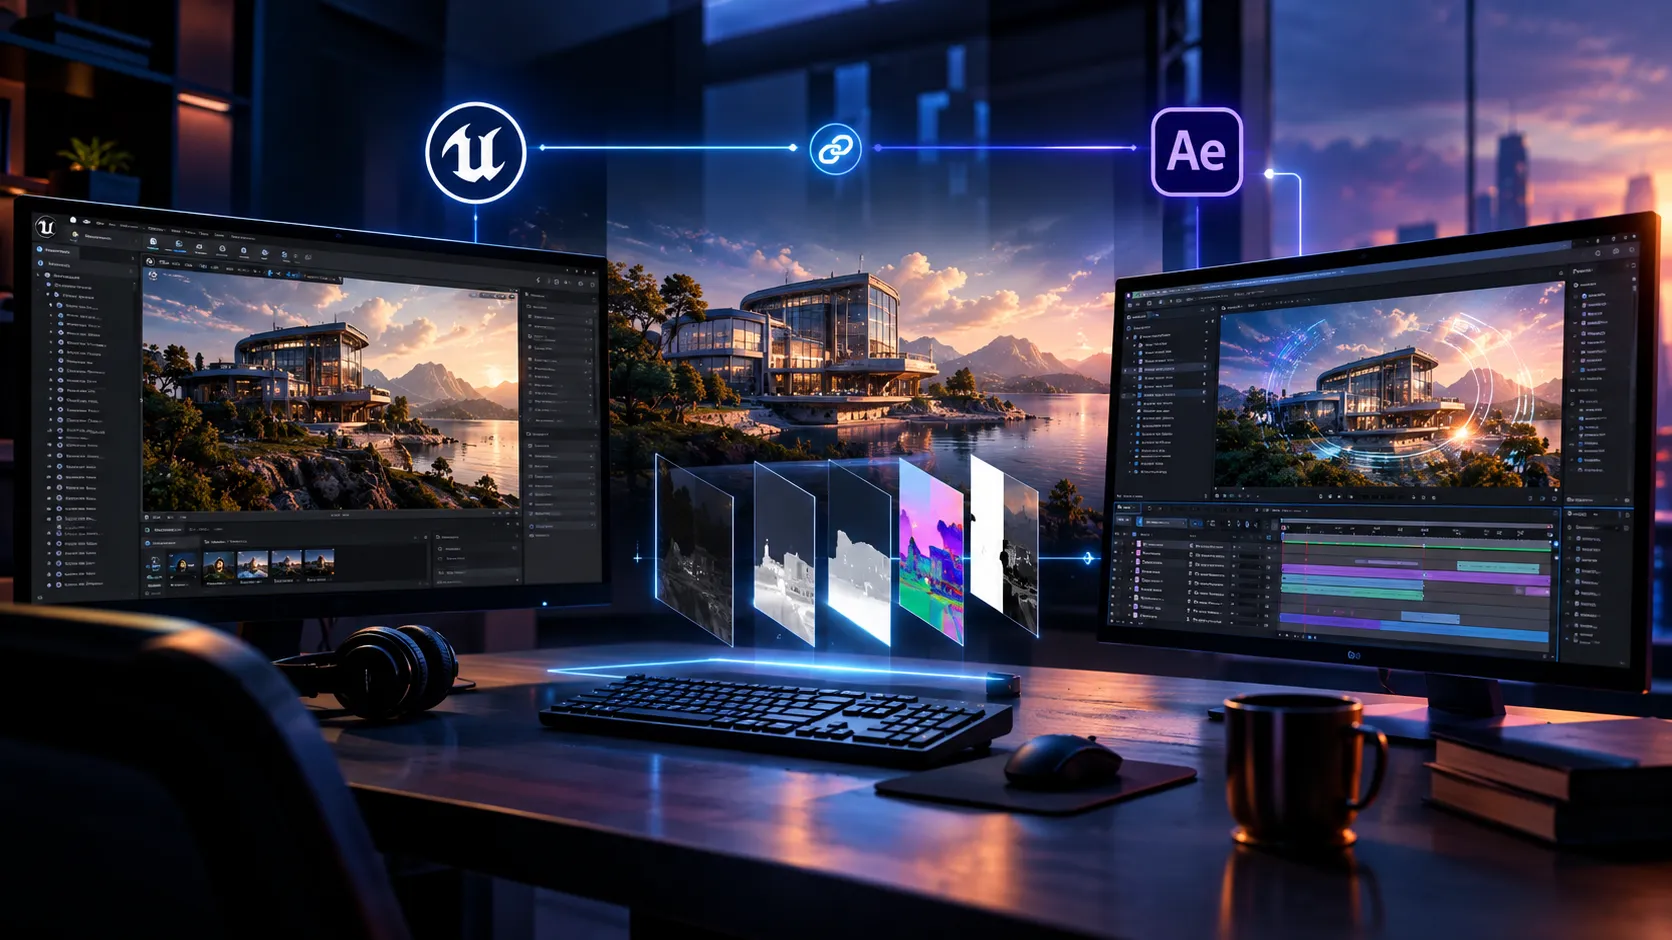
When Every 3D Change Means Another Render!
Do you know about the ShotLink Plugin by aescripts? When you’re working on a 3D motion graphic, an advertising video, or a cinematic composite, a large part of your time can end up being spent switching between software applications. You create the scene in a 3D environment, open the render settings to export it, and then import the file into your editing and compositing software. If the lighting, camera angle, or an object’s material changes, you have to repeat the whole process.
On top of that, when you combine text, visual effects, and graphic elements with a 3D scene, keeping everything in sync can become time-consuming. It would be great to see the 3D scene inside your compositing environment as you build and modify it, then review the results of your changes without constantly exporting new renders. This is where a direct connection between 3D software and compositing tools can make your workflow much smoother.

🌐 How Does Combining 3D and Motion Graphics Work?
In motion graphics and VFX projects, you don’t always need to complete every stage of image creation in a single software application. For example, you can model, light, and build the 3D environment in Unreal Engine, then move to Adobe After Effects to add typography, visual effects, or graphic elements.
Unreal Engine is a powerful 3D engine that allows you to create realistic environments, complex materials, lighting, and animations. In contrast, After Effects offers tools for compositing, 2D animation, layer blending, and final image refinement.
When these two applications are connected in a workflow, you can take advantage of both. In other words, you can build the 3D environment in Unreal and add the finishing details in After Effects.
🎥 Which Projects Can Benefit From This Connection?
3D Advertising Videos
Imagine a perfume bottle placed in a cinematic environment. You can model and light the scene in Unreal, then combine advertising titles, glowing effects, and graphic details in After Effects.
Environment-Based Motion Graphics
For title sequences, product introduction videos, or sci-fi motion graphics, you can build a futuristic city or fantasy environment in Unreal and add the animated elements and effects you need in After Effects.
Architecture and Realistic Environments
If you’re working on a video introducing a building or interior space, you can create the environment in Unreal and use After Effects to add text, guide lines, project information, and visual effects.
The advantage is that you don’t have to do everything in a single tool. Each application handles what it does best, giving you more freedom to design and refine the final result.
🛠️ How to Connect Unreal to After Effects Without a Plugin
Even without dedicated plugins, you can use Unreal Engine renders in After Effects. The usual approach is to prepare the 3D scene, render it, and then import the rendered file into an After Effects composition.
You have several methods and tools available for this:
- Rendering with Movie Render Queue: In Unreal Engine, you can render your scene and manage image quality, resolution, and output format. Depending on your project’s needs, you can export a video file or an image sequence.
- Using an Image Sequence in After Effects: You can import a series of rendered frames into After Effects as a continuous footage clip and composite it.
- Exporting Different Passes: For projects that require more control, you can also prepare passes such as Depth or object mask information, giving you greater flexibility when refining the image in After Effects.
- Manually Synchronizing Cameras: By transferring camera information or recreating its movement in the target application, you can synchronize 3D movements with graphic elements. The complexity depends on the project and the information you have.
⏳ Where Do These Methods Become Time-Consuming?
The main problem isn’t that traditional methods don’t work. It’s that whenever something changes in the scene, you may have to repeat earlier steps.
For example, if you notice after rendering that a product’s lighting is too intense or the camera needs to move slightly left, you’ll probably have to return to Unreal, adjust the settings, and re-render. Then you’ll need to check whether the new footage matches the layers and timing of your existing composition.
Also, synchronizing camera movement and finding the exact position of a graphic element on a 3D object’s surface can require more manual adjustments when you don’t have access to the scene’s spatial information.
If your project lasts only a few seconds and doesn’t involve many changes, this workflow is perfectly manageable. However, when you’re constantly adjusting lighting, materials, cameras, and animation, having a direct connection between the two applications can make a noticeable difference.
🚀 ShotLink: View Your Unreal Scene Directly in After Effects!
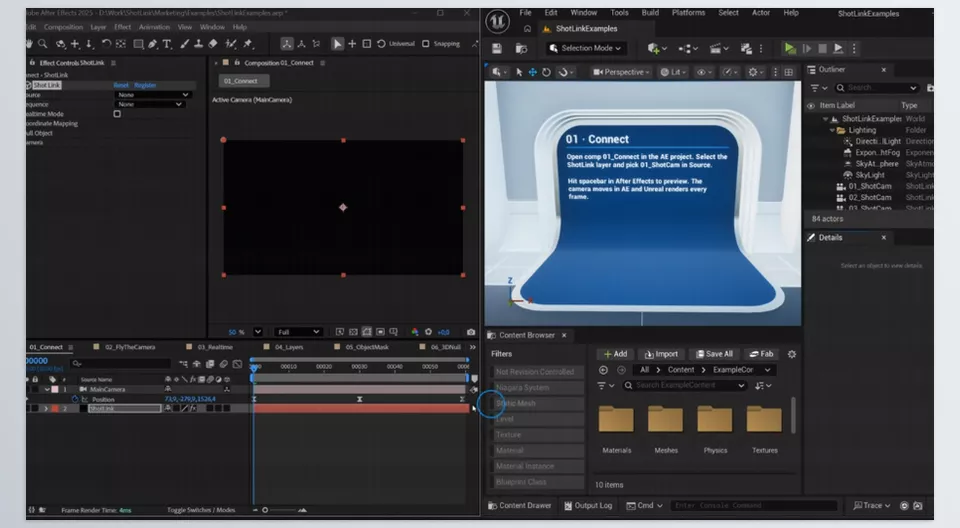
ShotLink is a plugin for Adobe After Effects that brings live renders from Unreal Engine cameras into a composition as a layer. Instead of rendering the scene for every change and importing a new file into After Effects, you can connect the two applications and see your changes immediately.
To use this tool, simply select a ShotLink camera from the Source menu to display its image as a layer in After Effects. One useful detail: the camera connection stays intact even after restarting Unreal. This means you don’t have to configure everything from scratch every time you relaunch the 3D engine.
However, ShotLink can do more than display images. The plugin also transfers camera information, image passes, 3D positions, and animation between the two applications. As a result, you can use Unreal’s tools to build your scene and After Effects’ tools for compositing and final refinement without relying on manual file transfers at every stage.
🎞️ Live Scene Display with Realtime Mode
One of ShotLink’s most important features is Realtime Mode. When you enable this option, Unreal continuously sends new frames to After Effects. This means that when you change the scene’s lighting, adjust an object’s material, or move part of the environment, you can see the results in your composition.
Imagine you’re creating an advertising video for a luxury watch. The watch model and environmental lighting are ready in Unreal, but you want to change the light intensity on the watch’s body or adjust the camera angle. Instead of rendering after every adjustment and importing a new file into After Effects, you can make the changes in Unreal and review the results in the composition at the same time.
This live connection doesn’t mean you can eliminate final rendering entirely. You’ll still need to choose the appropriate settings for a high-quality output. The main advantage is that you need fewer test renders and fewer file reimports when reviewing changes and working toward your desired result.
🎨 Receive Beauty, Depth, and Normals as Separate Layers
In professional compositing, the final image alone isn’t always enough. Sometimes you need separate information about depth, surface orientation, or different parts of the image to control effects more precisely.
ShotLink supports several types of image passes, each with a specific purpose:
- Beauty Pass: You receive the main image of the scene, showing what the Unreal camera renders. You can use this as the basis for your composition in After Effects.
- Depth Pass: This provides scene depth information. It’s useful for creating distance-based effects, controlling fog, or adding depth effects in After Effects.
- Normals Pass: This transfers information about the orientation of 3D surfaces. It’s useful in certain compositing workflows and when creating effects that depend on surface orientation.
- Post Process Material Passes: Each Post Process Material in Unreal can be received as a separate pass. This allows you to use the image information you need in your composition independently of the main image.
These passes are provided as independent layers with true alpha. Alpha lets you combine each layer’s content with other elements more easily and gives you greater control over how it appears.
For example, in an architectural scene, you can combine a building’s main image with depth information to adjust fog based on how far away different elements are. Alternatively, you can use different passes to create custom visual effects in an advertising video. Of course, the final result depends on the pass type, your Unreal settings, and the effects you use in After Effects.
🎭 Isolate Objects with Object Mask
Sometimes, you only want to work on a specific element in a 3D scene. For example, you might want to separate the lighting or appearance of the main product from its surroundings, apply an effect to it, or align a graphic layer with its position.
ShotLink’s Object Mask feature lets you render a specific object independently and use its output as a matte for After Effects layers.
Imagine a 3D product centered in the image, and you want a glowing effect to appear only around it. With an object mask, you can isolate the desired area from the rest of the scene and better control how the effect blends with the image.
This feature can also help in projects with camera movement. Instead of manually creating masks for multiple frames, you can use the object’s information from the Unreal scene. However, how you use the matte depends on the mask’s structure and the composition you’re creating.
📷 Transfer and Synchronize Cameras Between Unreal and After Effects
When a camera moves through a 3D environment, you need to keep it synchronized with graphic elements. If the camera’s position or movement isn’t consistent across both applications, text and effects may not appear in the correct positions within the composition.
ShotLink provides several features for managing cameras:
- Fly the Camera: Find the desired angle in Unreal’s Viewport, then press Get to transfer it to the After Effects camera as a keyframe. This method helps you quickly find the right camera angle.
- Transfer from Unreal: This option transfers the Unreal camera to the After Effects camera, keeping the camera position and view synchronized throughout the compositing workflow.
- Camera Bake / Bake to Sequencer: You can send camera movement created in After Effects back to Unreal and record it as keyframes. Afterward, you can use the camera when rendering through Movie Render Queue.
For example, imagine a camera moving past a building in a 3D environment while a project title needs to appear at a specific position in the frame. By synchronizing the camera information, you can position graphic elements more easily and spend less time manually recreating the camera path to achieve the desired movement.
📍 Create a 3D Null on the Actual Surface of the Scene
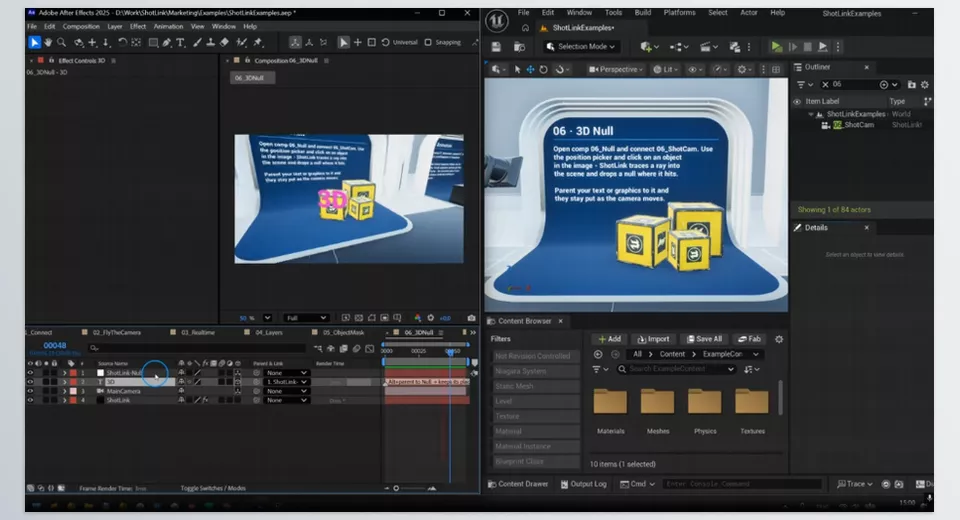
One useful ShotLink feature is creating a 3D Null by clicking a point in the image. This feature helps you turn a point in the 3D scene into an element you can use in After Effects.
To do this, select the desired point in the image and use the Null at Position option to create a Null at the 3D position of that surface. The surface’s orientation or rotation is also taken into account during this process.
This feature is useful for projects in which graphic elements need to align with specific parts of an environment. For example, in a product introduction video, you can attach an information label to a point on a device’s body. In an architectural shot, you can create guide lines and text that point to specific parts of a building.
Instead of manually moving layers in 2D space to find the right position, you can use the scene’s spatial information. This makes element placement more accurate and simplifies later adjustments.
🎬 Synchronize Unreal Animation with the After Effects Timeline
ShotLink isn’t just for transferring images and cameras. It also lets you synchronize scene animation with the After Effects timeline.
By selecting a Level Sequence in Unreal, you can synchronize the scene animation with the After Effects timeline so that moving between frames displays the corresponding frame of the Unreal animation.
Imagine an advertising video in which the camera moves toward a product, one of its components shifts position, and a graphic title appears in After Effects at the same time. When you sync the 3D animation with the composition timeline, it’s easier to adjust when the text appears, when effects display, and how scene events line up.
This feature is particularly useful for 3D title sequences, product advertisements, and projects in which multiple movements need to be precisely synchronized.
⚙️ An Overview of All ShotLink Panel Controls
The ShotLink panel includes several options for managing the connection between Unreal and After Effects. These settings help you control the camera, timing, and scene coordinates.
| Option | Function |
|---|---|
| Source | Selects the Unreal camera whose image you want to display in After Effects. |
| Sequence | Defines the range of frames Unreal renders for the composition. |
| Realtime Mode | Enables continuous updates of the Unreal image in After Effects. |
| Origin | Defines the origin point of Unreal’s world coordinates in the composition. |
| Unit Scale | Adjusts the scale between pixels and centimeters to keep positions aligned. |
| Origin from Unreal | Sets the origin based on the position of the Unreal camera. |
| Picked Position | Specifies the point in the image where you want to place a Null. |
| Null at Position | Creates a 3D Null at the selected point in the image. |
| Transfer from Unreal | Transfers the Unreal camera to the After Effects camera. |
| Bake to Sequencer | Sends After Effects camera movement to Unreal as keyframes. |
Together, these controls let you manage different aspects of the connection between the two applications according to your project’s needs, from selecting the camera and frame range to setting coordinates, creating Nulls, and transferring camera movement.
🌍 Test ShotLink Without Installing Unreal Engine
If you haven’t installed Unreal Engine yet or want to explore ShotLink before using it in your own projects, the developer provides a ready-made Earth scene that runs as a packaged application.
The scene’s ZIP file is approximately 600 MB and is designed to test the live connection with After Effects. You can load the ready-made scene, move through the timeline, and explore the plugin’s workflow on your system without installing Unreal Engine separately.
However, this option is intended for testing with the provided scene. To work with your own environments and 3D projects, you’ll still need to install a compatible version of Unreal Engine.
🖥️ Image Quality and Settings for Better Rendering
ShotLink transfers frames to After Effects exactly as Unreal Engine renders them. As a result, image quality and how certain details appear depend on Unreal’s rendering settings.
Some Unreal settings are designed primarily for real-time playback rather than capturing final frames at the highest possible quality. For example, Auto Exposure, Screen-Space Reflections, and Temporal Accumulation can cause brightness fluctuations, blurry reflections, or unwanted frame-to-frame changes in certain scenes.
If you encounter these issues, you may need to adjust the related settings in Unreal. The necessary changes usually depend on the scene and the settings you’re using, so it’s best to evaluate them separately for each project.
The important thing to remember is that ShotLink isn’t an independent rendering engine. It uses Unreal’s output. So the better your scene’s lighting, materials, and rendering settings, the more reliable the result you see in the composition will be.
💡 Practical Tips for Synchronizing Rendering, Cameras, and Compositing in ShotLink
To make sure the live connection between Unreal and After Effects genuinely improves your workflow, pay attention not only to the plugin’s features but also to your scene settings and project management.
- Check your image settings before compositing: ShotLink transfers frames exactly as Unreal renders them. So, if Auto Exposure, Screen-Space Reflections, or Temporal Accumulation cause image flickering or blurry reflections, you may need to adjust the related settings in Unreal.
- Use the right pass for each effect: If you want to work with image depth, check the Depth Pass. If you need to isolate a product, Object Mask may be a better option. Choosing the right information from the beginning makes compositing easier to control.
- Use Realtime to review changes: When adjusting lighting, materials, or object positions, the live display helps you see the results faster. For the final output, evaluate the rendering settings appropriate for your project separately.
- Keep camera movement synchronized: Define the camera path and animation timing before adding a large number of graphic layers. This helps you avoid repositioning and readjusting numerous elements later.
- Pay attention to coordinate origins and scale: If Nulls don’t appear where expected or the spatial relationships between elements seem incorrect, check the Origin and Unit Scale settings.
- Start with a simple scene: Before adding a complex environment with many objects and effects to your workflow, test the camera connection, passes, and timeline in a small scene. This makes it easier to determine which settings work best for your project.
Finally, remember that a live display doesn’t eliminate the need for technical adjustments. The more organized your scene structure, camera, and rendering settings are, the more predictable and convenient ShotLink will be to use.
✨ Less Switching Between Applications Means More Room for Creativity
If you use Unreal Engine to build 3D environments and also do much of your work in After Effects, you probably know keeping these two environments synchronized isn’t always easy. A small change can send you back to the previous application to render again and update your composition.
ShotLink makes this process easier by letting you preview scenes in real time, receive image passes, sync cameras, and connect Unreal animations to the After Effects timeline. This means you can spend less time moving files and syncing everything manually, and more time working on lighting, composition, and improving the final image.
Of course, this tool’s value depends on the type of projects you work on. If you mostly use ready-made footage or rarely switch between Unreal and After Effects, the usual rendering workflow may be perfectly sufficient. But if you frequently modify 3D scenes and want your composite to update as you change them, ShotLink’s features can simplify an important part of your workflow.
There are many different tools you can use to enhance your After Effects workflow, but knowing what each one does isn’t always easy. Our After Effects Tools guide explains the main categories—including plugins, scripts, extensions, presets, and more—to help you choose the right tools for your needs.