

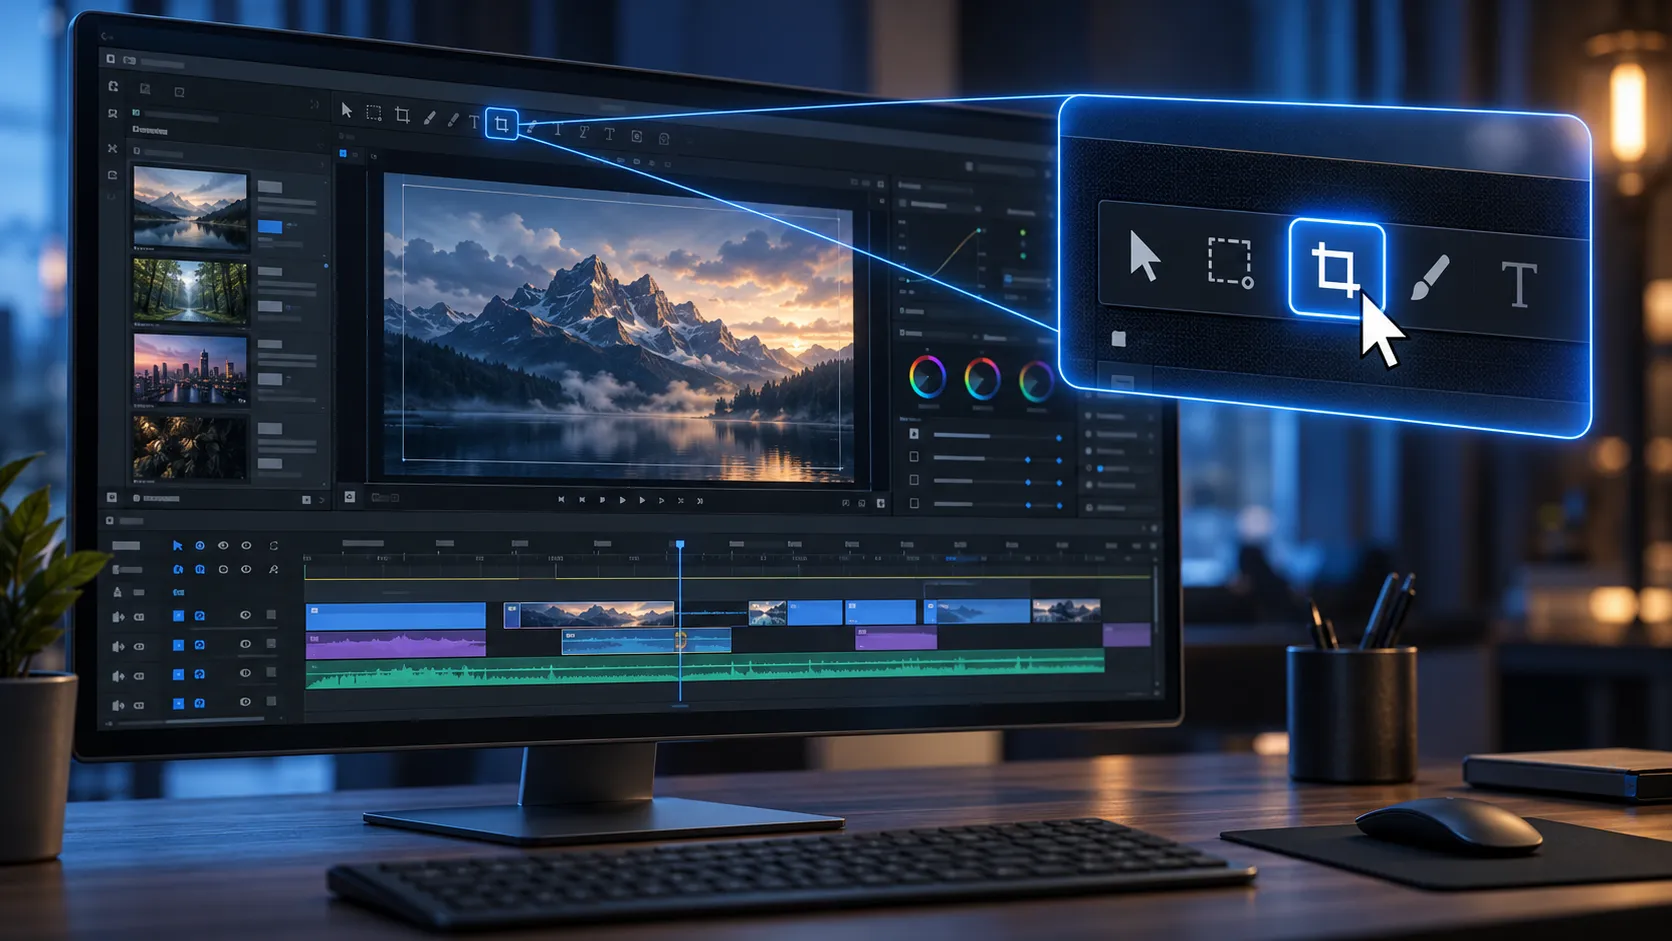
🎬 When Zooming in on Details Becomes Time-Consuming!
Are you aware of what the ClickZoom Pro Plugin by Edgard St Felix does? Have you ever recorded a software tutorial and then realized during editing that viewers can’t clearly see which part of the screen you’re referring to? For example, you click an option, open a menu, or change a specific setting, but because the entire screen is displayed at a fixed size, the details aren’t visible enough.
To do this, you often need to zoom in on different parts of the video, move the frame, and then zoom out again. If the mouse cursor moves between different areas, you also need to create separate animations for each move so viewers can easily follow what you’re doing.
This isn’t limited to tutorial videos, either. In software demonstrations, product feature showcases, and even Talking Head videos, you sometimes need controlled zooms to draw viewers’ attention to specific parts of the image. Creating these movements may seem simple, but when there are many of them, they can take up a considerable amount of editing time.

🔍 What Is Smart Zoom in Video, and Where Is It Used?
Smart Zoom is a technique that adjusts image magnification and movement based on what’s happening in a video. Instead of displaying the footage at a fixed size throughout the entire video, a virtual camera focuses on important areas and uses controlled movements to bring the necessary details into view.
For example, imagine you’re recording a Photoshop tutorial. Initially, the entire software interface is visible, but when the mouse cursor moves toward the settings panel, the image gradually zooms in on that area. Once the adjustments are complete, the camera returns to the full view so viewers can follow the next step.
This type of movement is useful in various projects:
- Software Tutorials: Clearly showing menus, tools, and settings the instructor clicks.
- Product Showcase Videos: Focusing on specific features of a software application or details of its user interface.
- Talking Head Videos: Adding subtle zooms on the speaker’s face to create visual variety.
- Product and UI Demonstrations: Presenting different sections of a website, application, or dashboard more clearly.
Using zoom and camera movements correctly makes it easier for viewers to follow important information. It also gives tutorial videos a better visual rhythm and helps keep the audience’s attention focused on the intended areas.
🛠️ Manual Methods for Creating Zooms and Camera Movements in After Effects
In After Effects, you can create zooms and camera movements without installing any plugins by using the software’s built-in tools. The main method involves animating a layer’s Transform properties, namely Scale and Position. Increasing Scale enlarges the image, while changing Position lets you move the frame toward your desired point.
You also have access to several useful tools and techniques for better control over these animations:
- Keyframe Animation: Set keyframes for Scale and Position to control when and how much the image zooms in or moves.
- Easy Ease: Smooths the start and end of movements, preventing zooms from looking sudden or abrupt.
- Graph Editor: Provides precise control over the speed and acceleration of camera movements.
- Motion Blur: Adds motion blur when the image moves quickly, making the animation look more natural.
- Null Object & Parenting: By linking the image layer to a Null Object, you can manage its movement and zoom through a single control layer.
For example, in a tutorial video, you can set Scale and Position keyframes to zoom in on a specific panel, hold that view for a few seconds, and then use a reverse animation to return to the full view.
⏳ Why Does Manually Animating Zooms Become Time-Consuming in Tutorial Videos?
The main problem becomes noticeable when you have to create many zooms and movements. For example, in a long software tutorial, the mouse cursor might move between different menus, panels, and tools dozens of times. In this situation, you need to find each important point individually, adjust the camera’s position, and create keyframes for zooming in, moving, and returning to the full view.
On top of that, changes to the video’s timing or rearranging clips may require you to readjust some of these animations. Coordinating camera movements with mouse clicks and on-screen interactions also requires considerable precision.
So, while After Effects’ built-in tools are perfectly suitable for custom zooms, this approach can become repetitive and time-consuming on projects with many interactions and mouse movements.
🚀 ClickZoom Pro: Create Smart Zooms in Just a Few Clicks
ClickZoom Pro is an After Effects plugin that simplifies creating zoom animations, camera movements, and mouse cursor tracking in tutorial videos. Instead of manually building every movement, this tool lets you automate some of them or define the camera’s movement path in just a few clicks.
One key feature of ClickZoom Pro is that it isn’t limited to simple zooms. The plugin offers dedicated features for both screen recordings and Talking Head videos. It also provides tools to create ready-made layouts and present recorded content more professionally.
Another important detail: all movements are created as actual After Effects keyframes. This means you can still modify the animations after running the plugin, adjust timing, and customize camera movements to fit your project’s requirements.
🖱️ Auto Zoom: Detect Mouse Clicks and Create Zooms Automatically
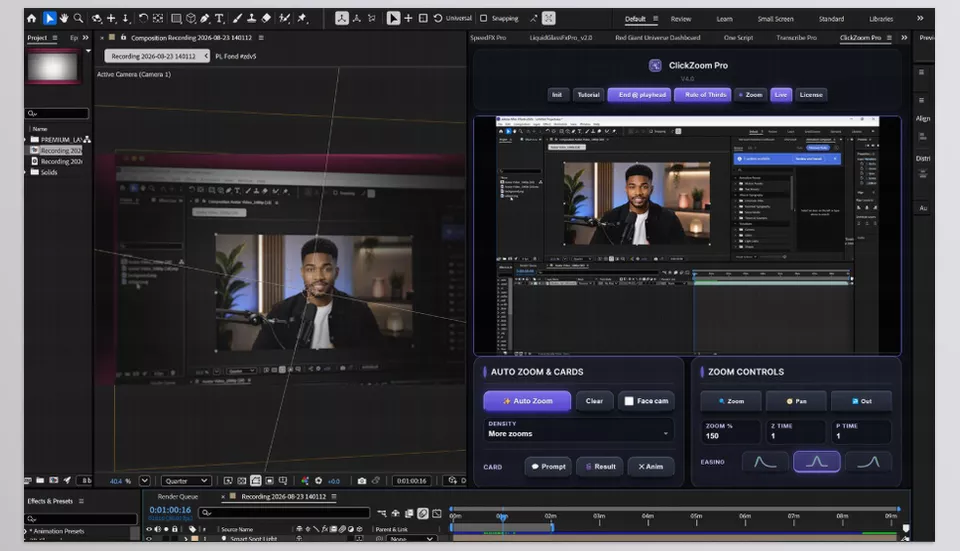
One of ClickZoom Pro’s main features is Auto Zoom, a tool designed for Screen Recording videos. This feature analyzes recorded screen content, tracks the mouse cursor, and detects click locations directly from the footage.
With the traditional method, you have to review the video, find the points that need magnification, and create separate animations for each one. Auto Zoom does this automatically and creates the entire sequence of movements in a single operation.
This feature manages several types of movements together:
- Cursor Tracking: Follows the mouse cursor throughout the video to identify where user interactions occur.
- Click Detection: Detects mouse clicks directly from the recorded footage, so you don’t need to enter click information separately.
- Zoom In: Magnifies the image when it reaches important points, making details easier to see.
- Pan: Moves the frame toward the desired area as the cursor changes position.
- Return to Wide: Returns the image to the full view after an interaction is completed, allowing viewers to follow the rest of the tutorial.
For example, imagine you’re teaching viewers how to use a graphics application. Initially, the entire software interface is displayed. Then, the mouse cursor moves toward an option in the settings panel. Auto Zoom detects the click location, zooms in on that area, and returns to the full view once the task is complete. If the user moves to another section of the interface, the camera movement adjusts accordingly.
This means that even if you move between different panels and menus several times during a tutorial, you don’t have to manually animate every camera movement from scratch.
However, Auto Zoom requires a visible mouse cursor to detect interactions correctly. If the cursor is hidden in the video or has a highly unusual, stylized appearance, the analysis may be less accurate than under normal conditions.
🎯 Click Zoom: Select Zoom Points Directly from the Composition Preview
If you want more control over the camera’s movement path, Click Zoom allows you to create manual zooms through the plugin’s dedicated panel.
When you activate this feature, you’ll have access to a live preview of your composition. Click the point you want the camera to move toward, and the corresponding zoom and image-movement animation will be created.
With this method, you can set the camera’s destination directly from the image without adjusting Scale and Position separately.
The available controls include:
- Zoom Point Selection: Click on the preview to specify the area you want to magnify.
- Zoom Percentage Adjustment: Change the zoom level according to the size of the details you want to display.
- Timing Control: Adjust the movement duration and zoom timing to match the video’s rhythm.
- Movement Between Different Points: Move the camera from one area of the image to another.
- Return to Full View: Create a movement that takes the camera back to the Wide view.
- Three Easing Curves: Choose from three motion curves to control how movements begin and end.
For example, in a tutorial video, you might want to zoom in on the Effects panel first and then move the camera toward the Timeline. By selecting the desired points in the preview and adjusting timing and zoom, you can create these movements without manually building every keyframe.
Three easing curves also help you adjust movements based on the type of content. For instance, you can choose a smoother movement for a slow-paced tutorial or use shorter timing when demonstrating a quick interaction.
👤 Face Cam: Detect Faces and Automatically Create Zooms for Speakers
ClickZoom Pro also includes a feature called Face Cam, designed for Talking Head videos. In this mode, instead of tracking the mouse cursor, the plugin detects the speaker’s face and creates zoom movements based on its position.
What makes this feature different from regular zooms is that the image’s focal point is intelligently positioned between the speaker’s eyes. This means you don’t have to manually adjust the face’s position at every stage to determine the center of the zoom.
The Face Cam movement pattern consists of three main stages:
- Punch-in: The image gradually zooms in on the speaker’s face.
- Hold: The close-up view is maintained for a short period.
- Release: The image returns to its previous view.
For example, if you’ve recorded a tutorial in which the instructor speaks directly to the camera, you can use this feature to introduce subtle changes to the framing. When an important point is being explained, the image gradually moves closer, then returns to its previous view once that section is finished.
Another feature of this section is automatic video type detection. ClickZoom Pro can identify whether the content is a Screen Recording or a Face Cam video and select the appropriate mode accordingly. As a result, you don’t have to configure the analysis process differently from scratch for each video type.
🎞️ Keyframe Output: All Movements Remain Editable as Keyframes
One of ClickZoom Pro’s important features is how it creates and delivers animations. The plugin’s output isn’t just a ready-made effect or a rendered video. Instead, it creates all zoom, pan, and return-to-wide movements as regular After Effects keyframes.
This means that even after running Auto Zoom or Click Zoom, you still have full control to modify the animations.
For example:
- Adjusting Magnification: If the image is zoomed in too much, you can change the Scale value.
- Changing Timing: If the camera movement doesn’t match the instructor’s explanations, you can reposition the keyframes.
- Adjusting Movement Speed: Change the time interval between keyframes to modify the speed of zooms and movements.
- Refining Motion Curves: You can change the Easing to make the beginning and end of an animation smoother or faster.
- Increasing Hold Duration: If viewers need more time to examine a particular area, you can extend the time the camera stays focused on it.
In other words, the plugin handles the initial animation process, and afterward you can modify every detail to fit your project’s requirements, just like any other regular animation in After Effects.
🧩 Dedicated Panel and Direct Access from Within After Effects
ClickZoom Pro is designed as a panel you can use directly inside After Effects. You can place it alongside your Composition panel and access its features without leaving the software.
To open the panel after installing the plugin, use the following path:
Window > Extensions > ClickZoom Pro
The plugin panel has access to the active composition and can read the layer you’re working on. This means you don’t have to constantly switch between different environments when creating manual zooms or analyzing Screen Recordings.
Installation and Compatibility Specifications:
- After Effects: Version 2022 (22.0) and later.
- Operating System: Windows and macOS.
- Installation Format: ZXP.
- Installation Tool: Free ZXP Installer software.
- Number of Devices: One license covers two devices.
- Purchase Type: One-time payment with no monthly subscription.
- Updates: Included with the product purchase.
Ultimately, ClickZoom Pro combines automatic zoom tools, manual camera control, face detection, and layout features to cover different aspects of creating tutorial and product showcase videos. Most importantly, the results remain available as editable keyframes, allowing you to customize the animations according to your project’s details without being limited to a fixed output.
✨ Adjusting Zoom, Timing, and Camera Movement for More Professional Tutorials
Although ClickZoom Pro simplifies much of the zoom creation process, the final quality still depends on how you use its features and animation settings. To make camera movements look more natural and keep viewers focused, consider the following tips:
- Choose the Zoom Level Based on the Details: A small icon or option needs more magnification, but when showing an entire panel, excessive zooming can push important parts of the interface out of frame.
- Avoid Consecutive Zooms: Quick movement for every click can make the video feel nervous and restless. Zoom in only on important interactions.
- Allow Enough Time to View the Details: After zooming in, give viewers enough time to examine the content and understand the changes. Returning to the full view too quickly can make the tutorial difficult to follow.
- Match Camera Movements to the Tutorial’s Rhythm: If the instructor is explaining an important setting, it’s better to synchronize the zoom with the beginning of the explanation.
- Review the Auto Zoom Output: Automatically detecting clicks doesn’t always mean choosing the best zoom timing and magnification level. After running the plugin, review the keyframes and adjust them if necessary.
- Avoid Overusing Zooms in Talking Head Videos: Subtle zooms with appropriate intervals between them usually look more natural when showing the speaker’s face.
- Use Sound Effects in Moderation: Click Sound Effects can make mouse interactions clearer, but playing the same loud sound for every click may distract viewers.
Finally, before rendering your video, watch it from beginning to end and check whether the zooms help viewers understand the content or just make the visuals feel cluttered. Remember that the goal of these movements is to draw the audience’s attention, not to keep the camera moving throughout the entire tutorial!
🎬 From Tracking Mouse Clicks to Creating Professional Demos
If you create software tutorials or product demos in After Effects, ClickZoom Pro focuses on one of the most time-consuming parts of these projects: synchronizing zooms and camera movements with on-screen actions. Auto Zoom detects clicks and tracks the mouse cursor to create sequences of zooms, pans, and returns to the full view. Click Zoom also lets you select zoom points directly from the composition preview. For Talking Head videos, Face Cam creates automatic zooms on the speaker’s face.
On the other hand, the Demo Frame & Premium Layout features go beyond camera movements, providing tools such as Glass Window, Avatar Bubble, Prompt & Result Cards, and Animated Cursor to help you create more engaging visual presentations. Another major advantage of this collection is that all generated movements remain as actual After Effects keyframes, allowing you to adjust their timing, magnification levels, and motion curves.
ClickZoom Pro does more than zoom in and out. It helps you make tutorials, show how software works, and create demos more easily. If you often record your screen and need to zoom in on mouse clicks or different parts of the screen, this plugin can save you time and make editing easier.
Plugins add powerful new features, scripts automate repetitive tasks, and extensions expand the way you interact with After Effects—but that’s only the beginning. Our complete After Effects Tools guide explores every major tool category, making it easier to understand the software and build a workflow that works for you.