


When Green Screen Really Starts Getting on Your Nerves 😅
Are you experienced in using the Despill Maestro Plugin by aescripts? If you’ve ever worked with a Green Screen or Blue Screen, there’s a very high chance you’ve dealt with those annoying green or blue halos around hair, clothes, or even skin. That moment when you think you’ve cleanly removed the background, but suddenly notice the edges of the hair are still green, and the whole image feels weird and artificial 😐
Interestingly, this problem isn’t just for beginners. Even in professional projects, Spill — or color spill — is considered one of the biggest chroma keying headaches. Especially when the lighting isn’t good, or the subject is standing too close to the green screen.
While in some instances the spill can be fixed in only a few minutes of editing, there are occasions where it becomes a nerve-wracking editing battle with your subject’s screen, where every attempt to fix the spill ruins their skin tones. 😅

What Exactly Is Spill? 🤔
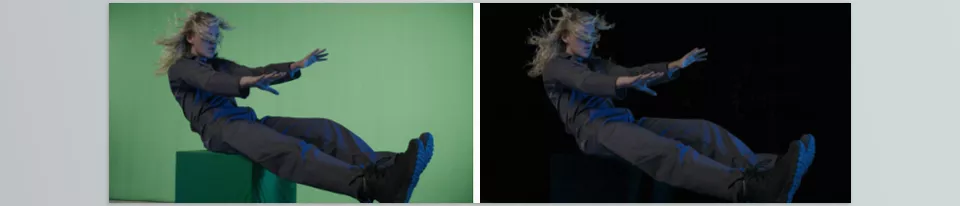
When you shoot in front of a green or blue screen, the light from that screen reflects onto the subject, creating a green or blue tint on areas like hair, skin, clothing, or even the edges of the image. This color contamination is called Spill — the exact thing that makes footage still feel unnatural even after removing the background 😅
This issue is more noticeable on surfaces that reflect light more strongly, such as bright hair, white clothing, or shiny objects. That’s why sometimes even when the Green Screen has been completely removed, the footage still doesn’t look clean or professional.
For example, imagine someone is supposed to appear inside a cinematic or 3D environment, but the edges of their hair are still green 😬 The viewer’s brain immediately senses that something is wrong, even if they can’t exactly tell what it is. That’s why removing Spill is considered one of the most important parts of working with Green Screen footage 🎬
Can You Remove Spill Without Plugins? 🛠️
Yep, absolutely 👍
The reality is that both Premiere Pro and After Effects already have pretty solid built-in tools for Spill removal, and many editors have delivered professional projects for years using only these native tools. These tools can remove a large amount of the green or blue tint and work well for normal projects like YouTube videos, Instagram content, tutorials, or even some commercial work.
Removing Spill in Premiere Pro 🎞️
In Premiere Pro, everything usually starts with the famous Ultra Key effect — a tool that almost every editor uses for green-screen removal. In addition to removing the background, this effect includes a dedicated Spill Suppression section that helps control green or blue color contamination, making the image appear more natural.
With Ultra Key, you can usually:
- Remove the background
- Soften the image edges
- Reduce Spill intensity
- Adjust the Matte
- And even clean up and refine parts of the image
That’s why, for everyday projects like YouTube videos, tutorials, vlogs, streams, or Instagram content, it’s a genuinely fast and practical tool 👌 Especially when you’re in a hurry and want a clean result without too much hassle.
But of course, the more complex the project gets, the more Ultra Key’s limitations start to show 😅 For example, in some shots, the hair may start looking artificial, the skin may develop a gray tint, or even clothing colors may shift. Sometimes the edges become overly soft or damaged, and the image loses its natural feel.
This is where editors usually have to move into manual corrections; for example, using Lumetri Color, Curves, or even separate masks to refine the image and make the final result look more natural 🎬
After Effects: More Control, But More Time 🎨
In After Effects, things become a bit more professional, and you get much more control over the image. Unlike Premiere Pro, which is designed more for speed and day-to-day editing, After Effects includes more advanced tools for chroma keying and Spill removal. That’s why many VFX and commercial projects are usually done inside this software.
Tools like:
- Keylight
- Advanced Spill Suppressor
- Curves
- Hue/Saturation
- Selective Color
help you work much more precisely on colors, edges, and image details. Especially Keylight, which is basically the most famous chroma keying tool in After Effects and has been used by editors and VFX artists for years 👀
But naturally, the more control you have, the more time-consuming and complicated the process becomes 😅 Especially in difficult projects where the lighting isn’t ideal, or the hair and edges contain a lot of detail. That’s usually where tons of manual fixes become necessary; for example, creating separate masks for hair, manually correcting skin tones, constantly checking edges, or even fixing certain frames individually.
So, for lighter projects, this process may be manageable, but when the number of shots increases, or the project becomes heavier, these tiny corrections can end up taking hours 😵💫
This Is Where Despill Maestro Comes In 🚀
When projects are simple, the built-in tools in Premiere Pro and After Effects usually get the job done. But in difficult shots — where hair contains lots of detail or the Spill is very strong — manual corrections slowly become the exhausting part of the process 😅
This is exactly where plugins like Despill Maestro start to shine.
This tool is essentially designed to make Spill removal more professional, faster, and more natural — without forcing you to create tons of masks and manual corrections for every shot.
What Exactly Does Despill Maestro Do? 🤔
Despill Maestro is a professional plugin for After Effects and Premiere Pro that focuses specifically on Spill removal. Its goal isn’t just to remove green or blue color contamination; it also aims to keep the image natural, alive, and clean after the Spill has been removed.
A lot of the time, standard tools remove Spill by:
- Turning skin gray
- Ruining clothing colors
- Or making edges look artificial
But Despill Maestro tries to preserve these details and only fix the problematic areas ✨
Multiple Algorithms for Different Situations 🎛️
One of the most interesting features of Despill Maestro is that it isn’t limited to a single fixed method for Spill removal. The plugin includes several different algorithms, each designed for specific situations. That means, depending on the condition of your project, you can choose the best approach.
For example, some algorithms work better for complex hair and sensitive edges, some are more suitable for poorly lit shots, and others help preserve natural skin tones in projects where accurate color is extremely important.
This variety means you don’t have to manually rebuild everything from scratch for every shot, and you can reach a clean and professional result much faster 😄
More Control Over Image Details
Despill Maestro isn’t just a simple Auto button 😄
It includes multiple controls that let you work more precisely on the image.
For example, you can:
- Adjust Spill removal intensity
- Soften edges
- Increase or decrease the affected area
- Control Saturation
- Or even remove Spill only from specific parts of the image
These controls become especially useful in professional projects.
Protecting Skin Tones and Clothing Colors 👕
One of the most common frustrations during Spill removal is that not only does the green tint disappear, but important image colors are sometimes sacrificed too 😅 For example, skin tones become lifeless and gray, or clothes lose their true colors. This issue becomes especially noticeable in close-up shots and can quickly make the final image lose its natural feel.
Despill Maestro includes a dedicated Color Protection section specifically for this problem. It helps preserve important colors in the image. That means you can specify that skin tones or clothing colors should remain untouched while only the unwanted green or blue contamination gets removed.
This helps the image still feel alive and natural after Despill, instead of looking completely washed out 😄
This feature becomes especially valuable in projects like commercials, music videos, cinematic productions, or close-up footage — because in these types of projects, even the smallest color shift on skin or clothing becomes immediately noticeable and can reduce the overall quality of the final result 👌
Color Replace: Bringing Back the Natural Feel 🎨
After removing Spill, the image edges sometimes feel cold or lifeless.
This is where the Color Replace feature helps restore more natural color to the image.
For example, you can:
- Add a bit of warmth to skin tones
- Restore the natural color of hair
- Or make previously green edges appear more natural
These small details are what make the final result feel much more professional.
Smart Alpha and Mask Generation ✂️
Another interesting feature of Despill Maestro is its ability to generate an Alpha based on Spill intensity.
This feature helps you:
- Isolate problematic areas
- Create more precise masks
- Perform more advanced corrections
- And gain more control over the composite
For people working on VFX projects, this feature is genuinely very useful 🎬
Faster Performance with GPU Acceleration ⚡
Another major advantage of this plugin is GPU support.
That means a large portion of the processing is handled by the graphics card, so previews and rendering feel much lighter.
Especially on heavy projects or under crowded timelines, this can save a significant amount of time.
Who Is This Plugin Most Useful For? 👀
Despill Maestro may not be necessary for every single project, but for some users, it can quickly become a permanent tool in their workflow 😄 Especially for people who work frequently with Green Screen and chroma keying projects and don’t want to spend hours fixing edges and colors every time.
For example, VFX artists, motion designers, and commercial editors usually appreciate the value of this plugin more than most people — because in professional projects, even the smallest issues with hair, skin, or image edges become immediately noticeable.
Even YouTubers and content creators who frequently work with Green Screen footage can use this tool to reach cleaner and more natural-looking results much faster 🎬
Basically, anyone dealing with heavy chroma keying projects, complicated shots, or tight deadlines will probably benefit more than others from this plugin and notice the difference in both speed and quality 👌

A Few Tips That Make Green Screen Results Look Much More Professional 👀
Even the best chroma key plugins and tools deliver great results only when you follow a few simple but important principles. A lot of the time, the difference between an amateur-looking output and a professional image comes down to these small details 😄
- Take Lighting Seriously 💡
The more even the lighting on the Green Screen is, the easier and cleaner the spill removal becomes. Poor lighting usually causes messy edges and makes the green tint much more visible. - Don’t Place the Subject Too Close to the Screen 🚶♂️
When the subject stands too close to the green screen, the spill becomes much stronger and harder to remove. Keeping a proper distance can save you from a lot of problems later. - Don’t Overdo Despill 😅
Sometimes we remove so much Spill that the skin turns gray and the image loses its life. Always try to keep a balance so the image still looks natural. - Zoom In on Hair Edges 👀
Most chroma key issues usually appear around the hair. After Keying, always zoom in on the hair edges and carefully inspect the result. - Use Color Correction 🎨
After removing Spill, some color correction is usually necessary. Tools like Curves or Lumetri Color help make the image look more natural and professional. - Every Shot Needs Its Own Settings 🎬
One fixed setting won’t always work for every shot. Lighting, clothing, skin tone, and even camera angle can all affect the Keying result. - Fix the Matte First, Then Work on Colors ✂️
Many users jump into color correction too early, while the Matte still has issues. First, clean up the edges and Alpha, then move on to Spill correction. - Check the Preview on a Proper Monitor 🖥️
Some Spill issues are invisible on poor-quality displays. It’s always better to review the output on a proper monitor or at least in Full Screen mode.
In the end, the most important thing is not just removing the green screen; the real goal is making the final image look natural and believable 🎬
Sometimes a small adjustment on the edges or skin tones can improve the quality of the entire project dramatically 😎
So, Is It Worth It in the End? 🤝
The truth is, you can absolutely complete Green Screen projects without Despill Maestro, and many editors have been working for years using only Adobe’s built-in tools. Tools like Ultra Key or Keylight are still powerful and work perfectly fine for many projects.
But when projects become more professional, the details start to matter more, too 😅 That’s where hair edges, skin tones, tricky lighting, and messy spills can cause real problems, and having a specialized tool can genuinely save a lot of time and energy. Despill Maestro is not supposed to perform magic or miraculously fix a badly shot Green Screen, but it can reduce a huge amount of tedious manual corrections and help you reach a cleaner and more natural result much faster ✨
If you work on a lot of client projects that have to look professional, you will greatly appreciate tools like Despill Maestro more than anyone else in the world 🎬 In the end, it does not matter how well you remove the green screen from your project. It doesn’t matter how natural, clean, and professional your final project looks when it is done 😎
Whether you work with Adobe After Effects or Adobe Premiere Pro, this plugin can really help speed up and improve your projects. And if you’re not fully familiar with the main tools and features of these two software programs yet, it’s a good idea to check out our “After Effects Tools” and “Premiere Pro Tools” articles first to get a better understanding of the workspace and workflow.





