


When Your Timeline Gets Busy, and Your Nerves Start to Break!
Have you ever worked with the pt_ShiftLayers Plugin? If you work with Motion or video editing, you’ve likely found your timeline a messy crossroad of layered items all needing their opacity to increase or decrease per your final vision. When you want texts to appear one by one, icons to pop in with the beat, or effects to run consecutively, you quickly realize it’s not as simple as you thought.
Initially, you say to yourself, “Not an issue, I will shift them one at a time!” But two minutes later, you’re in a repeat cycle of moving one, moving back, checking, moving one more time, readjusting, and checking again. It’s a nightmare. The more layers there are, the less it’s an issue of just taking a little time, and the more it becomes tedious and frustrating. Readjusting something that moved requires the readjustment of everything else.
This is when you find yourself thinking: “I wish there was something that could do this faster.” Because honestly, you want to spend your time on the important stuff—creativity, ideation, visual effects—instead of manually arranging layers. Like it or not, timeline management is one of those hidden problems that slowly drains the energy of a project. ✨

Traditional Methods – When Only After Effects Is Available
Let’s assume you don’t have any extra tools and that only After Effects is at your disposal. In this case, there are a few common ways to move layers:
- Manual dragging with the mouse
Simple and straightforward, but when the number of layers grows, it becomes tiring and time-consuming. Every small click and drag increases the chance of errors. - Using Alt/Option + Drag
Slightly more precise and faster than the previous method, but with dozens of layers, you still have to adjust each one individually. - Sequence Layers command
Can help organize layers, but it has limitations: it only arranges certain scenarios correctly, and if you want to change the spacing between layers later, you have to reset and adjust everything again.
Problems with these methods:
- In large projects, speed drops significantly, and the timeline becomes full of clicks and drags.
- Human errors increase; a single mistake can ruin the entire layer order.
- Any new change in spacing means going back to square one and readjusting all layers.
- Timeline organization collapses, reducing focus on creativity.
In short, After Effects’ default methods get the job done, but in large, detailed projects, they become a winding, time-consuming path. To save time for creativity and protect your nerves, sometimes you need smarter, faster solutions.
Introducing pt_ShiftLayers Plugin – Simple, Fast, and Precise
After seeing all the traditional and tedious methods, it’s time to meet a professional tool for layer timing management in After Effects: pt_ShiftLayers Plugin. This small but powerful script is exactly what every professional motion designer dreams of. No more spending hours manipulating the timeline or worrying about layer order.
Key Features:
- Shift (Move Layers Simultaneously)
Move all selected layers forward or backward by a fixed amount. You can choose to shift based on time or frames, or align the first in-point or last out-point of the layers exactly to the current time marker. - Stagger (Arrange Layers in Sequence)
Arrange layers one after another with a specified time gap. The gap can be in frames or seconds, and the order of layers follows your selection exactly. Perfect for text entries, gallery items, musical effects, or any animated sequence. - Start Timing from the Current Time Marker
Both Shift and Stagger can start from the current time marker, giving you precise and fast control over your project. - Add Offset to Layers
Add spacing or movement relative to each layer’s current position without rearranging everything from scratch. - Compatible with Crowded, Multi-Layer Projects
When layers are in the dozens or hundreds, the pt_ShiftLayers Plugin acts like a professional assistant, keeping everything organized. High speed and reduced errors are its biggest advantages for large projects. - Supports Grouping and Combined Selections
Layers can be in groups or combined selections, and the script works according to the selection order. - Precise Control over Order and Spacing
Decide exactly how much spacing between layers, which layer comes first, and which comes last—without manually moving everything.
Real-Life Examples You’ll Love
- Text characters appearing in sync with music
- Displaying gallery items, slides, or UI elements consecutively
- Creating sound-based effects, like layer reactions to beats or audio rhythm
- Step-by-step animations of logos or icons
- Detailed advertising or motion graphics projects where timeline order is crucial
With the pt_ShiftLayers Plugin, no more endless clicks or manual errors. Your focus shifts to creativity and engaging design, not timeline management. It turns your timeline from an enemy into a friend. ✨
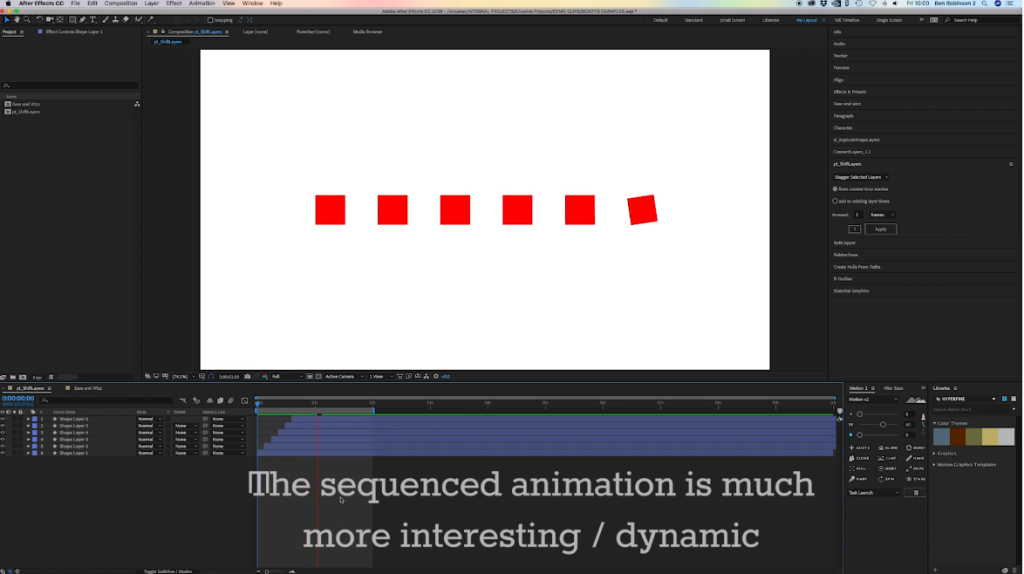
Pro Tips for Using pt_ShiftLayers Plugin
Using the pt_ShiftLayers Plugin is simple, but to get more professional and natural results, here are some key tips:
- Selection order matters
Before applying Stagger, select layers in the exact order you want. This feature works based on selection, so a wrong choice can ruin your animation sequence. - Choose spacing according to project style
Decide if the spacing between layers should be:- Frames: For fast-paced projects or quick, rhythmic layer entries
- Seconds: For minimal, smooth animations or when you want motion to feel fluid
- Short tests to find the right rhythm
Before staggering all layers at once, run a few quick tests to find the best spacing and rhythm, ensuring everything looks natural and appealing. - Combine with the time marker
Starting from the current time marker allows precise placement and prevents mistakes. - Practice and experience
Experiment with each new project to understand how the tool behaves and how spacing affects animation rhythm. Experience makes you faster and more efficient.
Conclusion – A Small Tool with a Big Impact
Sometimes the smallest of tools makes the biggest difference. The pt_ShiftLayers Plugin is one of these. It’s not a large, complicated plugin that will revolutionize your everyday work, but I can tell that on larger, multi-layer, complex projects that it will make a difference for time and energy expenditure.
Using the pt_ShiftLayers Plugin means faster speed, higher precision, and perfect organization. Move, stagger, and arrange all layers with just a few clicks according to your desired rhythm or order. This keeps your focus on creativity and attractive design, rather than repetitive clicks and manual adjustments.
Ultimately, pt_ShiftLayers functions as an almost professional-like aide to get your project completed more efficiently, more effectively, and more professionally. A tool that is small and easy to use, that has such a great impact on the quality of your work and subsequent workflow. It’s worth the time for all multi-layer projects.
Explore the full power of After Effects in our extensive guide about After Effects Tools, which walks you through every tool, extension, and workflow enhancer you need to create high-quality, professional-level projects.



