


The Appeal of Controlled Chaos
Are you familiar with the workflow of the Pixel Sorter Plugin by aescripts? Have you ever been editing in After Effects or Premiere Pro and wondered how you could deliberately “break” an image—yet not only avoid making it look bad, but actually make it more visually appealing? 🤔 Those effects where the image seems to get scratched, pixels stretch, or data appears to fall apart—something you might also look for in DaVinci Resolve, Photoshop, or even Nuke—because they give your work a unique, modern feel. These kinds of controlled imperfections are exactly what take a video out of the ordinary and keep the viewer’s attention.
The truth is, this apparent “damage,” when used consciously and in a controlled way, turns into a completely professional visual style. Many motion designers and editors are specifically looking for this aesthetic: a digital, raw, and unpredictable look that still remains under control and gives their work a distinct identity.
However, achieving these effects isn’t always easy. Without the right tools, you either spend a lot of time experimenting through trial and error, or you end up with a result that doesn’t match what you originally had in mind.

⏳ What Is Pixel Sorting and What Is It Used For?
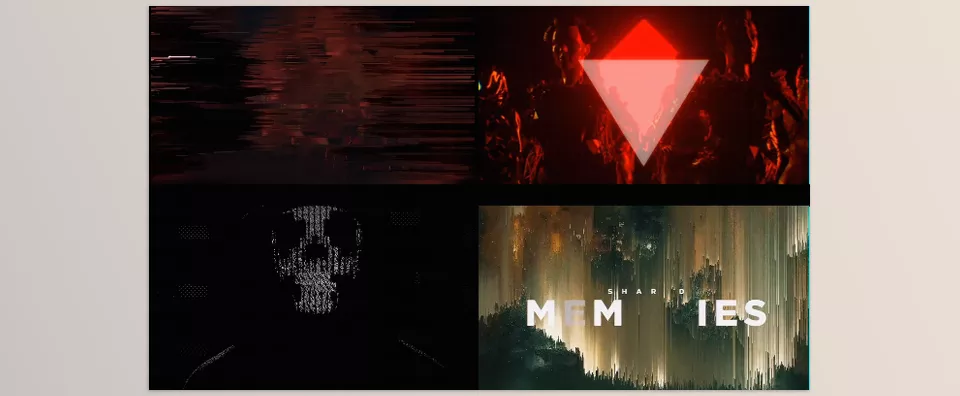
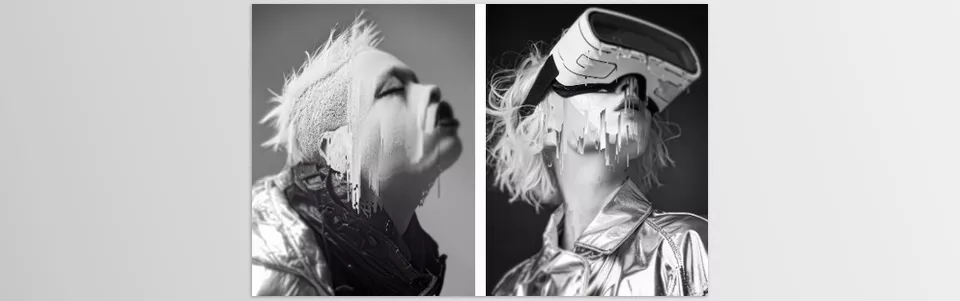
Pixel Sorting is a visual technique in which the pixels of an image are rearranged based on a specific criterion, such as brightness or color. The result is usually effects like stretched visuals, digital streaks, or that well-known glitch aesthetic.
For example, imagine you have a landscape photo. When you apply this technique, brighter areas like the sky or snow start stretching in a specific direction, creating a surreal and unique image. These effects are widely used in music videos, film titles, and even modern advertisements because they quickly grab attention and give the work a digital, contemporary feel.
Its popularity is easy to understand: it helps you move away from clichés and create a distinctive visual signature for yourself.
How to Create This Effect Without Plugins
If you want to create this effect using only After Effects and no additional tools, it’s definitely possible 👌—but the process is a bit complex and time-consuming. You usually have to combine multiple effects to get close to the desired result, and it often feels more like trial and error than a clean, efficient workflow 😄
Here are the most common methods:
- Displacement Map → Using a helper layer (such as a gradient or noise) to shift pixels. This method works well for movement, but it tends to create more of a wavy distortion rather than a true glitch.
- Turbulent Displace + Wave Warp → These are combined to create a stretched and distorted look 🌊, but the result is usually too soft and lacks that sharp digital feel.
- Noise and Gradient → Used to generate motion patterns, meaning you define which areas change more than others.
- Mask + Keyframe → For manually controlling the effect on specific parts of the image 🎛️, though this approach is very time-consuming.
The main problem is that these methods don’t give you precise control over individual pixels. On top of that, you spend a lot of time tweaking settings ⏳, and the results are not always predictable. In the end, you might not fully achieve the authentic glitch look you’re aiming for.
In fact, for every project, you have to build everything from scratch, which makes this approach better suited for practice and experimentation rather than professional work.
Introducing Pixel Sorter 4: A Simpler and More Professional Approach
This is where a specialized tool like Pixel Sorter comes in and simplifies the entire complex process. This plugin is specifically designed for creating Pixel Sorting effects, and what previously required multiple effects and lots of trial and error is now available in a direct and controllable way.
🎛️ Precise Control Over Pixels
One of its biggest advantages is the level of control it gives you over pixel behavior:
- Defining the sorting criteria (brightness, color, etc.)
- Specifying the direction of pixel movement
- Controlling the intensity and spread of the effect
This means instead of guessing, you can implement exactly what you have in mind 🎯
⚡ Better Speed and Performance
Compared to manual methods, everything here is more optimized:
- Faster processing compared to combining multiple effects
- Better performance on heavy projects and high resolutions
- Significant time savings ⏳
🎚️ Simple Mode for Quick Start
If you don’t want to deal with complex settings, Simple Mode is very useful:
- Access only the main controls
- Achieve fast and clean results
- Ideal for testing ideas or quick projects
🎨 Variety of Effects and Outputs
With Pixel Sorter, you can create different styles:
- Soft and minimal glitches
- Heavy stretching and distortion
- Noisy and digital effects
- Particle-like separations from the image 🌌
🎬 Use in Real Projects
These effects are not just for ideas or practice—they are widely used in real projects. From modern music videos seeking a unique and different feel, to film and series titles that aim to capture attention from the very beginning. They are also used in digital advertising and branding, especially when the goal is to create a technological, modern, and distinctive aesthetic.
Ultimately, Pixel Sorter 4 allows you to skip the process of building effects from scratch and go straight to creativity and personal style 👌
Tips for More Professional Results
To make your output more natural and visually appealing, keep these simple but important tips in mind:
- 🎯 Don’t apply the effect to the entire image → Use masks to target specific areas for a cleaner and more professional result.
- 🎬 Animate the effect → Use keyframes on parameters to create changes over time and make the result feel more dynamic.
- 🎨 Use noise → Adding noise helps the effect feel more natural and digital.
- ⚖️ Maintain balance → Don’t overdo it! Glitch effects are attractive, but excessive use can quickly become tiring.
In the end, it’s these small details that make the difference between an average piece and a professional result. With a bit of care and experience, you can easily take your effects to the next level 👌
A Tool for Standing Out
In the end, Pixel Sorting is one of those techniques that can quickly set your work apart. You might be able to achieve it using manual methods, but the reality is that it takes a lot of time and doesn’t always produce the results you want. When you use a professional tool like Pixel Sorter, everything becomes easier—you gain more precise control, reach results faster, and your output becomes cleaner and more reliable.
More importantly, your mind is no longer occupied with building effects from scratch. Instead of spending time on complex settings, you can focus on creativity, idea development, and crafting a unique style for yourself. That’s exactly what makes your work stand out and stay in the viewer’s mind.
If you feel like your projects are missing something, or you’re looking for a serious change in your style, it’s time to try these kinds of effects. Work with Pixel Sorter once, and you’ll quickly realize how much personality it can add to your work—maybe it will even become the visual signature you’ve been looking for 😉
If you’re ready to elevate your After Effects expertise beyond foundational skills, our comprehensive After Effects Tools guide provides the depth and structure you need



