

When the Video Looks Good but Has No “Feel”… 🎬
Have you ever looked into the Niklas Christl Signature LUTs? It’s probably happened to you: you record a video, and when you watch the final output, it feels like something is missing. Everything seems technically fine—the lighting is acceptable, the framing is good, and even the subject is interesting… but it lacks that professional feel or the kind of appeal you see in high-end videos 🤔
One of the most common reasons for this is that your video has not been processed. In other words, the video was recorded by your camera and exported in its raw form, without any alterations or enhancements being made to it. While your video may technically contain all of the elements necessary to tell your story, it may not be visually appealing to your audience in its current state.
The truth is, a large part of a video’s appeal is created not during filming, but in the editing and color grading stage—where raw footage is transformed into something that engages the viewer and creates a mood ✨
What Is a LUT and How Does It Help? 🎨
A LUT (Look-Up Table) is essentially a ready-made tool used to change the color and mood of a video. With a LUT, you can quickly apply a specific style to your work without having to start from scratch and tweak numerous settings.
For example, imagine you’ve shot a simple sunset video. With a LUT, you can make the same footage warmer, more emotional, or even more cinematic 🌅
Or if you have a city video, you can adjust the colors to create a more dramatic feel 🎥
In motion graphics and video production, color isn’t just about beauty—it’s actually a tool for conveying emotion. By changing colors, you can transform the entire mood of a project and engage your audience more effectively 💡
How to Achieve This Without LUTs 🛠
If you don’t have access to LUTs, you can still achieve professional results using the built-in tools in editing software. Programs like Premiere Pro and DaVinci Resolve offer comprehensive features for color correction and creating different styles. In this approach, you essentially build everything from scratch and have full control over the image.
Some of the most important tools used in this process include:
- Color Wheels: For adjusting color in shadows, midtones, and highlights
- Curves: For precise control over brightness, contrast, and even color shifts
- HSL Adjustments: For modifying the Hue, Saturation, and Lightness of each color individually
- Lumetri Color (in Premiere): A complete panel for color correction and grading
- Color Page (in DaVinci): A professional and advanced environment for full color control
These tools allow you to work precisely and in a fully customized way on color and lighting to create your desired style 🎨
Challenges and Limitations
Although this method is fully professional and powerful, it’s not without challenges. First of all, working with these tools requires experience and a proper understanding of color, and achieving a good result often involves a lot of trial and error. On the other hand, since you adjust everything from scratch for each project, the process can be time-consuming and slow down your workflow.
Another major issue is maintaining a consistent style across different projects. Each output might end up slightly different, which can be a serious challenge for those producing content regularly. Ultimately, it’s fair to say that achieving professional results without LUTs is entirely possible—but the path is longer, more sensitive, and requires more experience ⏱
Introducing a Ready-Made Tool to Simplify the Process 🚀
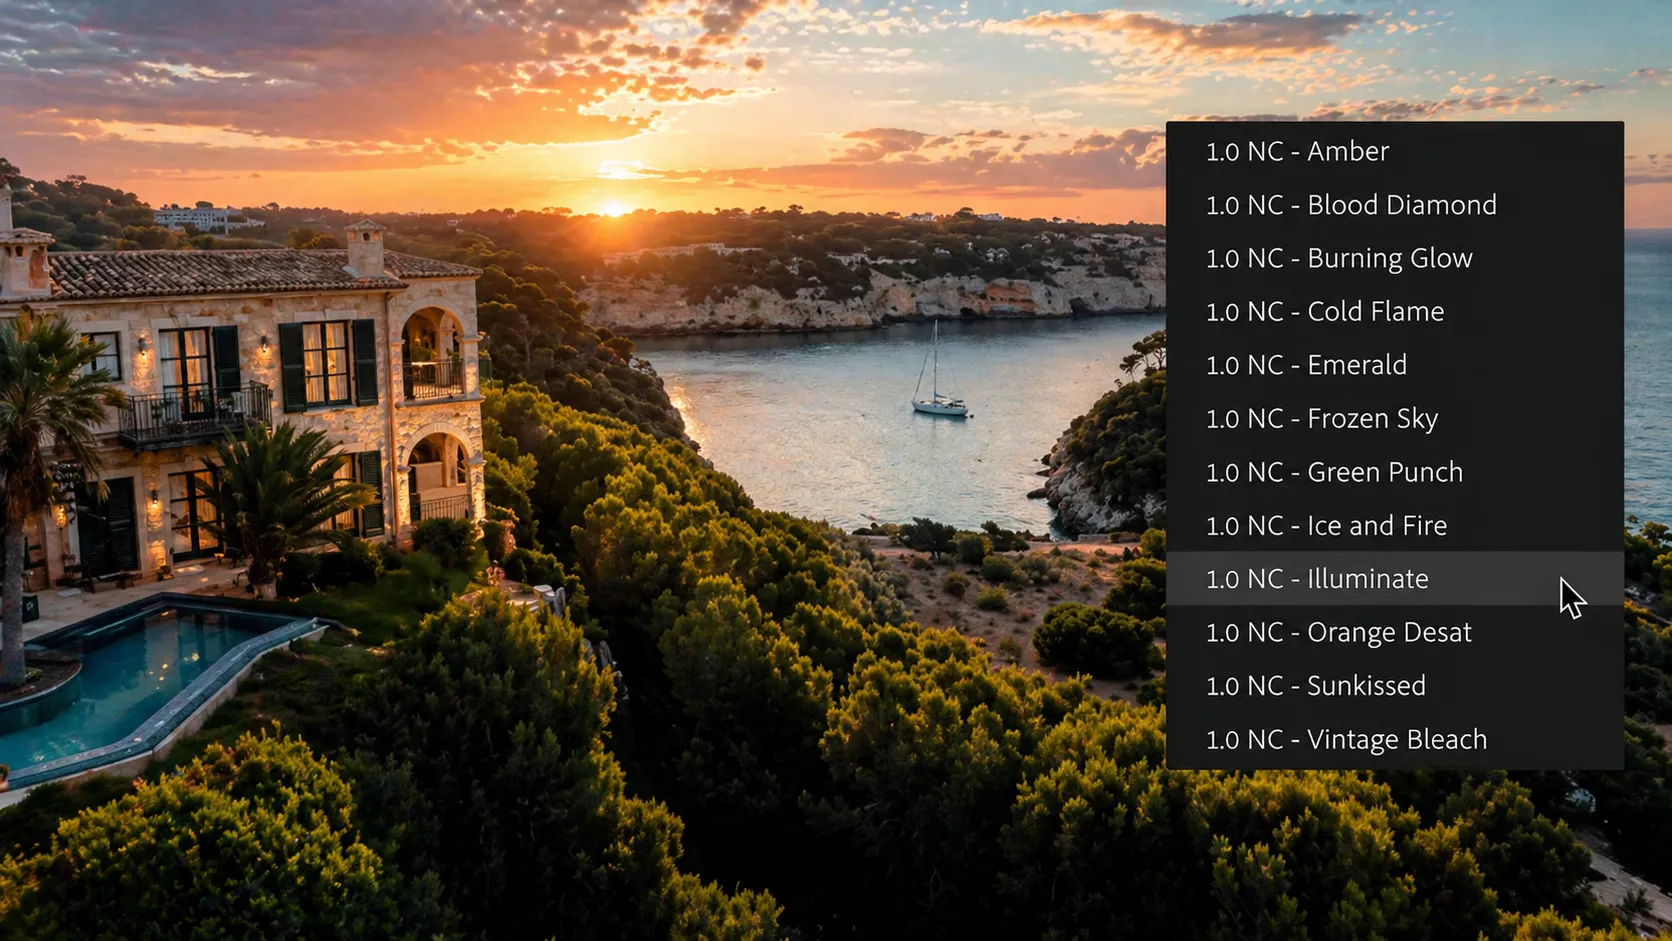
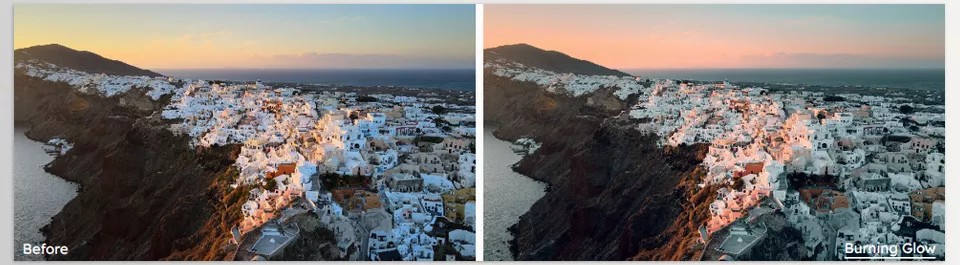
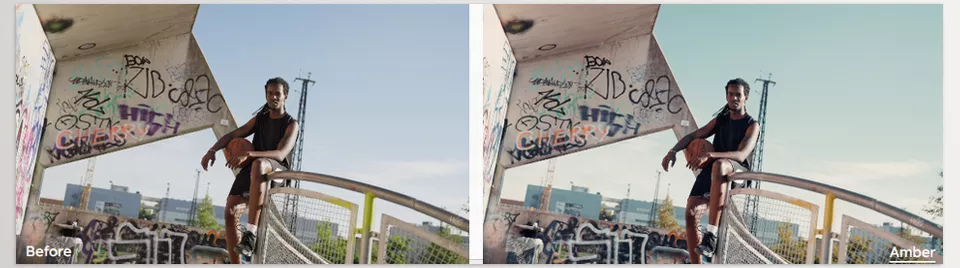
This is where tools like Signature LUTs by Christl Visuals come in—designed specifically to simplify one of the most complex parts of editing: color grading. This product is a collection of 12 professional LUTs that help you quickly achieve an appealing visual style without dealing with complicated settings.
Unlike many LUT packs that overly distort the image, this collection is designed to deliver results that are both professional and natural 👌
🎨 Focus on Color, Not Breaking the Image
One of the key features of Signature LUTs is that their main focus is on color grading—not heavy manipulation of brightness and contrast.
This means:
- Colors change, and the mood of the image transforms
- The original lighting and details are preserved
- The final output remains natural and reliable
👉 The result? A vibrant and professional image without looking artificial
⚙️ Compatible with Most Videos (Rec.709)
Signature LUTs are designed for the Rec.709 color space—the standard format used for most video recordings and exports.
This means:
- They work with most cameras
- They’re not limited to a specific brand or model
- They’re ideal for everyday videos, vlogs, and various projects
📌 Important note: Signature LUTs perform best when basic color correction is done beforehand.
🌈 A Variety of Styles for Different Situations
One of the strengths of this pack is its wide range of styles. Inside the collection, you’ll find options for almost any type of project:
- Cinematic styles (like teal & orange) 🎥
- Natural and earthy tones 🌿
- Soft, desaturated greens
- Vintage and nostalgic looks
- Minimal and low-saturation styles
This variety allows you to choose the right mood for each scene and avoid repetitive visuals.
🧠 Designed with a Professional Approach
Signature LUTs are created using tools like Adobe Lightroom, resulting in more unique color transformations.
What does that mean?
- Colors not typically available in default editing tools
- Unique and distinctive color combinations
- Styles that feel closer to professional and cinematic work
💻 Compatible with Popular Software
There are no limitations in terms of usage—you can use Signature LUTs in most editing software:
- Premiere Pro
- Final Cut Pro
- DaVinci Resolve
- And similar programs
Installation and usage are simple, and the product usually includes a setup guide and LUT catalog 📘
🎯 Why Is This Tool Useful?
Ultimately, what makes this product valuable is that it increases your speed without taking away your control. With Niklas Christl Signature LUTs, you can quickly—even with a single click—apply an appealing style to your video, adjust its intensity to keep it natural, and combine it with other tools if needed to achieve a more precise and professional result.
This flexibility allows you to reach a fully customized output without getting overwhelmed by complexity 😎
Tips for Better and More Professional Use 💡
To get more natural and professional results from LUTs, keep these key tips in mind:
- Do basic color correction first:
Adjust exposure, white balance, and contrast before applying the LUT. LUTs perform much better on a properly balanced image. - Keep LUT intensity below 100%:
Using it at full strength often makes the image look artificial. Slightly reduce the intensity for a more natural look 👀 - Choose the right LUT for each scene:
One LUT doesn’t fit all situations. Lighting conditions and scene type greatly affect the result. - Make adjustments after applying the LUT:
Use tools like Curves or Color Wheels to fine-tune and personalize the result.
These simple tips can have the biggest impact on your final quality without making the process complicated 😎
A Smart Shortcut, Not a Necessity 🎯
While LUTs can be a necessity in some cases, they are actually a smart shortcut that can be used to speed up the process. Even without LUTs, it is possible to create professional results for your projects; however, using a ready-made LUT pack will allow you to approach your project with less effort and complexity.
Another of the major advantages of tools such as Signature LUTs is the ability to provide consistent results. If you are producing many different projects, using the same LUT will provide your projects with a similar look and feel, which is one of the markers of professional work.
For those who work with video editing, motion graphics, or other forms of content creation, both of these tools can significantly enhance your project. Often, the difference between average and standout videos can be as simple as a few smart color adjustments ✨
We previously explained what color grading is and how it differs from color correction in a dedicated article. To better understand the role of LUTs, it’s helpful to first review the fundamentals of color grading in our article.


