

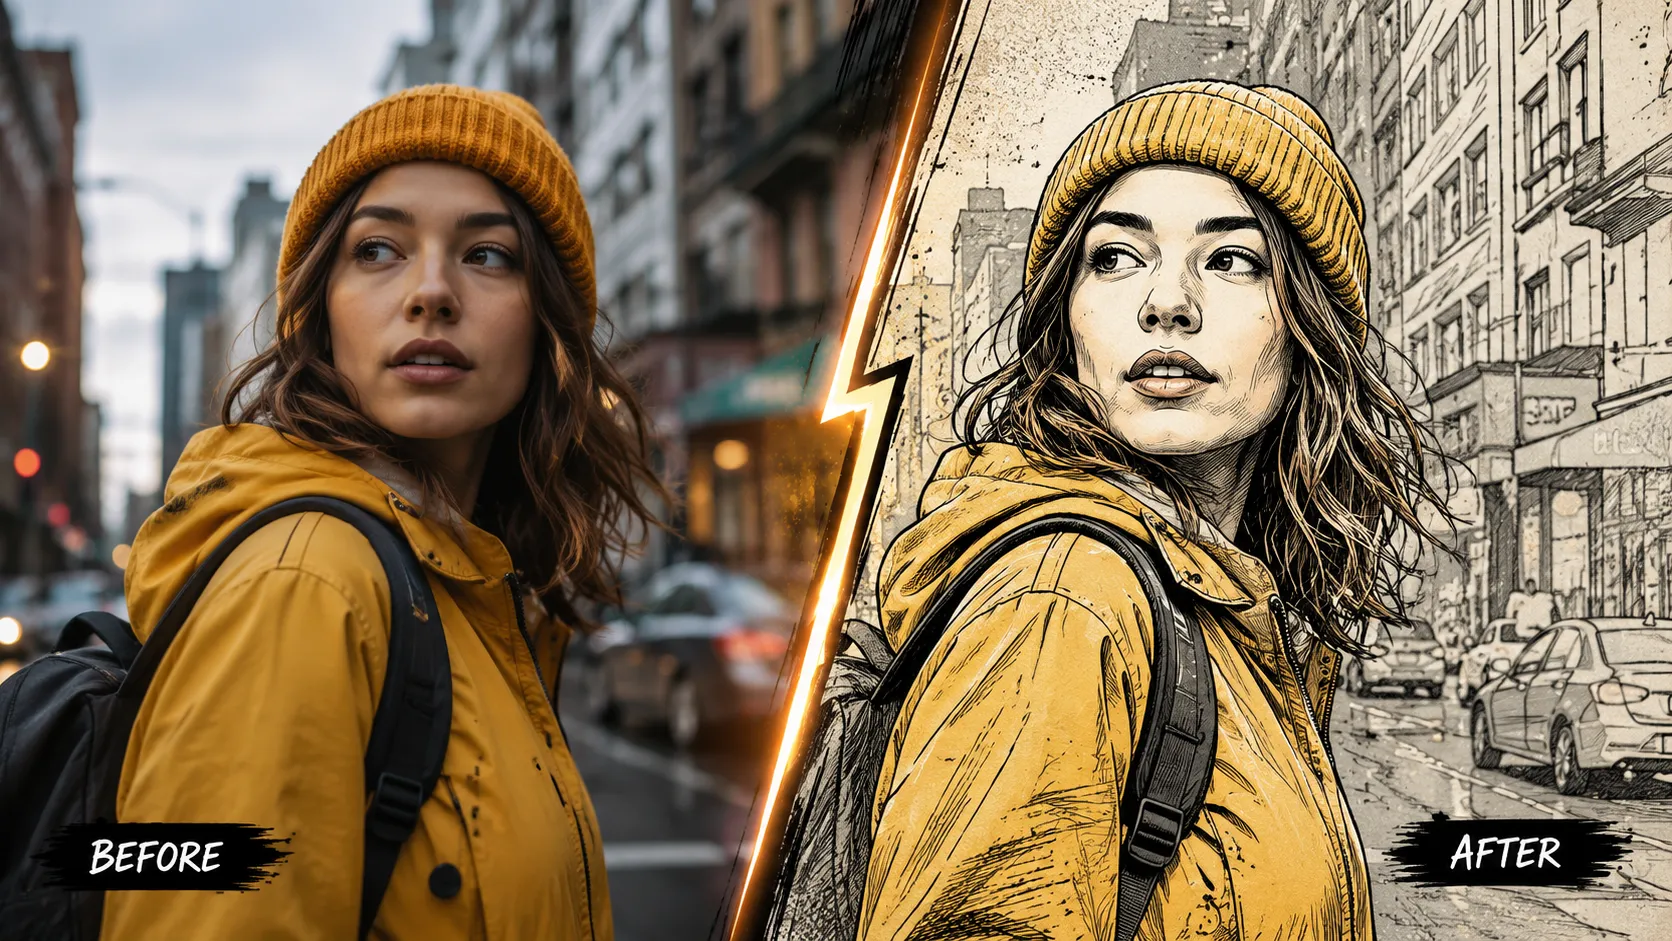
How Does an Ordinary Video Turn into a Comic? 💥
Have you seen or used the XDoG Studio Plugin by aescripts before? Before viewers even see the video’s content, its appearance is what grabs their attention. Some videos don’t just look realistic—they appear as if they were sketched with a pencil, drawn with ink, or pulled straight from the pages of a comic book. This distinctive visual style makes the image more memorable and gives it a unique feel. 🎨
Creating these visual styles is not as simple as it seems. To create a professional sketch or comic effect, a video editor will need to apply various visual effects to achieve the desired outcome.
When you’re working with many shots or a more complex project, this process can become time-consuming and exhausting. That’s why many motion designers and video editors look for tools that can create these graphic styles faster, more accurately, and with greater control—without having to build everything from scratch every time.

What Exactly Are Sketch and Comic Effects? ✏️
Sketch, Ink, Toon, and Comic effects are collections of image-processing techniques that transform the appearance of a video or photo, turning it into something that resembles a drawing, painting, or illustration. Instead of preserving every real-world detail, these effects retain the main outlines, shapes, and key colors, resulting in an image that resembles a work of art.
These styles have a wide range of applications. They are commonly used for promotional videos, music videos, intros, motion graphics, educational content, social media videos, and even cinematic projects that require a distinctive visual style.
The biggest appeal of these effects is that they completely change the mood and atmosphere of a video without altering its actual content. A simple shot can be transformed into a comic-style frame, an ink drawing, or even a cartoon animation, making it far more engaging for the audience.
Getting Familiar with After Effects’ Built-in Tools 🎬
If you prefer not to use a dedicated plugin, After Effects includes several built-in tools that can be combined to create Sketch, Comic, or Toon effects. However, none of these effects can produce these styles on their own, so you usually need to stack multiple effects together to achieve the desired result.
The most commonly used tools include:
- Find Edges for extracting image edges and outlines.
- Cartoon for creating a simplified cartoon-style appearance.
- Posterize for reducing the number of colors and tonal values.
- Threshold for converting the image into a high-contrast black-and-white version.
- Tint and Levels for adjusting colors, contrast, and line intensity.
- Gaussian Blur for softening the image before or after edge processing.
- Blend Modes and Adjustment Layers for combining multiple effects and achieving better control over the final result.
Why Isn’t This Method Always the Best Choice? ⏳
Although these tools provide plenty of flexibility, achieving a professional-looking result usually requires a significant amount of trial and error. You have to stack multiple effects, adjust each one individually, and constantly switch between layers until the lines, colors, and details reach the right balance. As projects become larger or contain more shots, this workflow becomes increasingly time-consuming, and managing all those settings becomes more difficult. That’s why creating graphic styles this way isn’t always fast, simple, or easily repeatable.
XDoG Studio: Everything You Need for Graphic Styles in One Plugin 🚀
If your goal goes beyond simply outlining objects and you want your videos to genuinely resemble hand-drawn sketches, comics, or digital illustrations, XDoG Studio is built specifically for that purpose. This plugin brings all the tools needed for creating Sketch, Ink, Comic, Manga, and Toon styles into a single panel. Instead of combining multiple effects, it gives you complete control over your visual style from one place.
✏️ More Natural Lines with the XDoG Algorithm
At the core of the plugin is the Extended Difference of Gaussians (XDoG) algorithm—a sophisticated edge detection and image processing method that produces cleaner, more natural-looking lines than standard After Effects effects. Instead of simply outlining objects, the algorithm analyzes the image structure and generates lines that look much closer to pencil or ink drawings.
It also provides several controls for fine-tuning the result:
- Detail Scale for controlling how much image detail is included in the lines.
- Edge Width for adjusting line thickness, from delicate sketch lines to bold comic-style outlines.
- Sharpness for increasing or reducing line clarity and strength.
- White Point for determining which bright areas remain visible or are removed.
- Transition Hardness for controlling whether color transitions appear smooth or take on a more posterized, graphic appearance.
🎨 Simplify Colors for a More Graphic Look
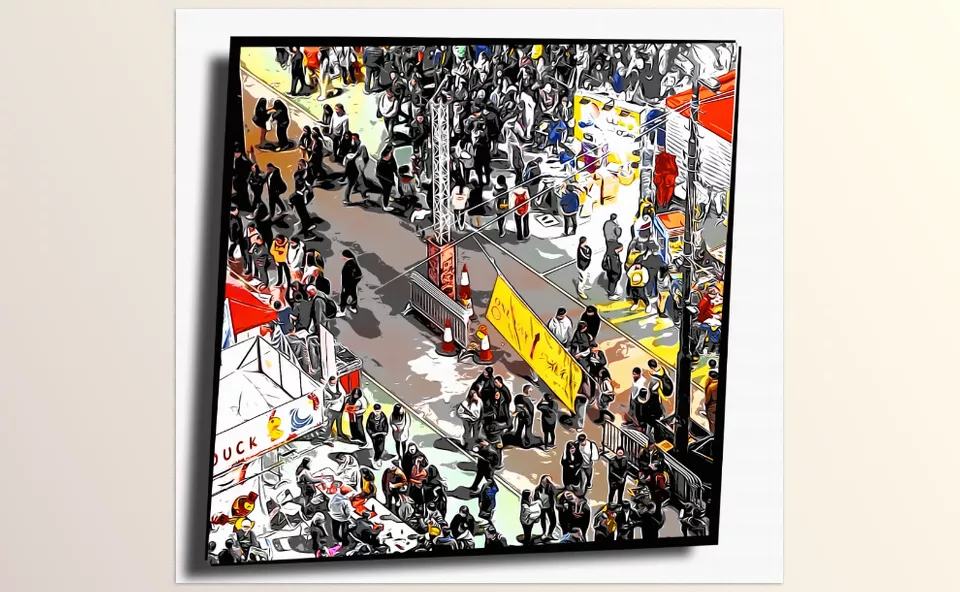
One of the most important features of XDoG Studio is Posterize. This function reduces the number of colors and tonal values in the image, giving the final result a stronger graphic appearance. Whether you want a subtle cleanup or a full Cel Shading, Comic, Manga, or Poster Art style, everything can be adjusted using just a few sliders.
With Posterize, you can:
- Reduce the number of colors in the image.
- Make color boundaries more distinct.
- Create cartoon and comic-style visuals.
- Remove unnecessary details for a cleaner image.
- Combine simplified colors with line work to achieve an illustrated look.
🌊 Lines That Follow the Flow of the Image
One feature that’s rarely found in similar plugins is Flow Guided Smoothing. Instead of drawing lines solely from detected edges, this feature allows lines to follow the natural direction and structure of the image.
Whether it’s a face, hair, clothing, a car, a building, or even a landscape, the lines follow the subject’s natural flow, producing a much smoother, more professional-looking result. This feature is especially noticeable in complex images or subjects with great detail.
🌈 It’s Not Just Black and White—Create Color Styles Too
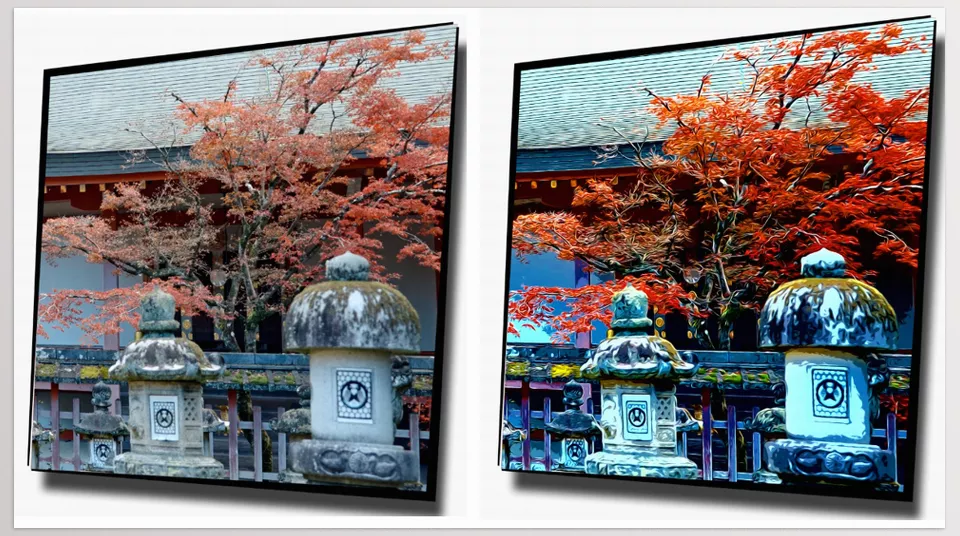
If you want to preserve the original colors of your footage, DoG RGB is one of the plugin’s most impressive features. In this mode, XDoG processing is applied to the color channels, producing more than just line art—it also creates colorful graphic effects.
With this feature, you can:
- Preserve the original colors of the image.
- Create colorful artistic edges.
- Make the image resemble digital paintings or professional illustrations.
- Generate colorful Toon and Comic effects.
- Blend the final result with the original footage for a more natural-looking style.
⚙️ Complete Control Over the Effect
One of XDoG Studio’s biggest strengths is that almost no part of the effect is locked or fixed. Nearly every aspect is customizable—from line intensity and detail levels to edge detection thresholds, Posterize intensity, color saturation, brightness, blending with the original image, and even the way colors are processed. This makes the plugin equally suitable for creating subtle stylistic enhancements or fully customized visual styles.
⚡ High Performance with GPU Processing
Unlike many computationally intensive effects that take a long time to render, XDoG Studio uses CUDA and OpenCL to accelerate rendering on GPUs. As a result, parameter adjustments appear almost instantly in the Preview window, making it much smoother to work on complex projects, especially high-resolution videos.
If your system doesn’t have a compatible graphics card, the plugin also supports CPU processing. However, the developer recommends using GPU acceleration whenever possible, since CPU processing is considerably slower.
🎬 What Types of Projects Is It Suitable For?
Whether you’re creating an artistic music video, designing a promotional commercial, or producing unique content for social media, XDoG Studio can transform your footage into Sketch, Comic, Manga, or Toon styles while quickly giving your project a distinctive visual identity. It also works seamlessly with still images and pre-compositions, making it a solid choice for intros, motion graphics, and illustration-style effects.
The real strength of the plugin isn’t just the variety of effects—it’s the flexibility it offers. You can apply a subtle hand-drawn look or push the settings until the image resembles a comic book page, a digital painting, or a modern graphic artwork. That makes XDoG Studio more than just a preset effect; it’s a creative tool for building unique visual styles inside After Effects.
A Few Tips to Get Better Results with XDoG Studio 💡
Even with its default settings, XDoG Studio can produce impressive results. However, by following a few simple tips, you can make the lines, colors, and overall visual style look more natural and professional. These adjustments may not take much time, but they can make a noticeable difference in the quality of the final output.
- Start with high-quality footage. The sharper and cleaner your original video is, the cleaner and more accurate the extracted lines will appear.
- Don’t make the lines excessively thick. Overly thick lines can obscure important image details and make the result look cluttered or artificial.
- Keep Posterize balanced. Reducing the number of colors too aggressively can make certain parts of the image appear flat and unnatural. Moderate settings usually provide a strong graphic look while preserving important visual details.
- Enable Flow Guided for complex subjects. On faces, hair, clothing, architecture, or natural landscapes, this feature allows the lines to follow more natural directions, resulting in a more polished and professional appearance.
- Apply a small amount of Color Correction at the end. After applying the effect, making subtle adjustments to contrast, saturation, or brightness can help balance the image and create a more visually pleasing final result.
These simple tips help you use XDoG Studio as more than just a ready-made effect—they allow you to create results that genuinely convey the look and feel of professional illustration or artwork.
When Visual Style Matters as Much as the Content 🎯
Most designers don’t struggle with creating these effects. The real challenge begins when they need to reproduce the same level of quality consistently across multiple projects. When every shot requires adjusting multiple effects and constantly moving between layers, a large portion of your time is spent on repetitive tasks rather than creativity. The larger and more professional the project becomes, the more noticeable this workflow limitation is.
That’s where XDoG Studio truly proves its value. Rather than simply providing a collection of preset effects, the plugin brings together nearly every tool you need for creating Sketch, Comic, Manga, and Toon styles within a single unified workspace. From controlling line quality and color processing to adjusting line thickness, line flow, color simplification, and graphic effects, everything can be fine-tuned with just a few sliders, allowing you to achieve your desired look much faster than with traditional workflows.
If creating promotional videos, motion graphics, music videos, or creative content is part of your work, XDoG Studio can easily become one of those tools you’ll find difficult to work without after using it a few times. It doesn’t just improve the visual quality of your projects—it also reduces production time, gives you greater control over your visual style, and lets you focus your energy on creativity and ideas rather than repeatedly adjusting the same effects.
Whether you are a new motion graphics editor or an experienced professional in the field, it is always helpful to have a better understanding of the different types of tools available in Adobe After Effects. Read our guide to the most popular Adobe After Effects tools to find out more about editing and design tools that can improve your projects.



