Why Do Simple Motions Take So Much Time?
Are you familiar with the features of the Motion Essentials Pack for DaVinci Resolve by NeoEditFX? You’ve probably experienced this while editing a video: you just want to create a smooth zoom, a controlled shake, or a simple movement on text, but that “simple motion” turns into several minutes of keyframing and adjusting settings. Especially when you have multiple clips one after another and need to repeat the same movements over and over, your workflow can slow down very easily.
At the same time, good motion isn’t just about moving an element from one point to another. The speed of the movement, the beginning and end of the animation, the amount of shake, motion blur, and even the way clips enter and exit all affect the final feel of the video. This is where having ready-made motion tools can make the workflow much faster and easier.

Where Exactly Is Motion Used in DaVinci Resolve? 🎯
When we talk about motion in editing, we don’t only mean complex animations. Many of the movements we see in professional videos are actually simple, but when they’re executed properly, they make the video look more engaging and professional.
For example, a smooth Zoom can emphasize an important part of the image, a controlled Camera Shake can add more energy to a moment, and a simple movement on text can prevent titles from looking dry and static.
This is also very important for YouTube and Talking Head videos. Repositioning and scaling the Facecam, bringing text in and out, moving logos, and using suitable Transitions can all improve the rhythm of the edit.
The problem starts when you need to apply these movements to dozens of different clips. At that point, something that looks like a simple movement on paper turns into a lot of adjustments and repetition.
Creating Motion in DaVinci Resolve: From Keyframes to Fusion 🎬
To create these types of motions without ready-made tools, DaVinci Resolve itself gives you almost everything you need. For example, for a simple zoom, you can use Keyframes; set the Scale value at the beginning of the clip, move forward a few frames, and change the value so the movement takes shape. You can use the same method for other movements by applying it to Position, Rotation, and different parameters.
If you want more control over the movement, the Inspector and especially Fusion give you much more flexibility. For moving between clips, DaVinci also includes a collection of built-in Transitions. So in terms of tools, you’re not missing anything; you just have to build and adjust a large portion of the motion yourself.
- Keyframe: For creating movement on Position, Scale, Rotation, and different parameters.
- Inspector: For controlling and adjusting the properties of clips and different elements.
- Fusion: For creating more complex and customized animations and motions.
- Built-in Transitions: For creating movement between two clips without building everything from scratch.
- Motion Blur: For making fast movements look more natural and preventing a dry, artificial appearance.
The Real Effort Starts When the Work Becomes Repetitive 😅
As long as you’re only working with one clip, adjusting a few Keyframes really isn’t a big issue. The trouble starts when those same simple movements keep repeating. One time you need to adjust the timing, another time you need to tweak the speed and Easing, somewhere else you need to change the zoom amount, and if the movement is fast, you also need to pay attention to Motion Blur. Now repeat this same process for dozens of clips; very quickly, you’ll realize that a significant portion of your editing time is being spent on tasks that aren’t technically complicated, but doing them over and over again is genuinely tedious.
Motion Essentials Pack: Not Just Effects, but a Complete Motion Toolbox ⚡
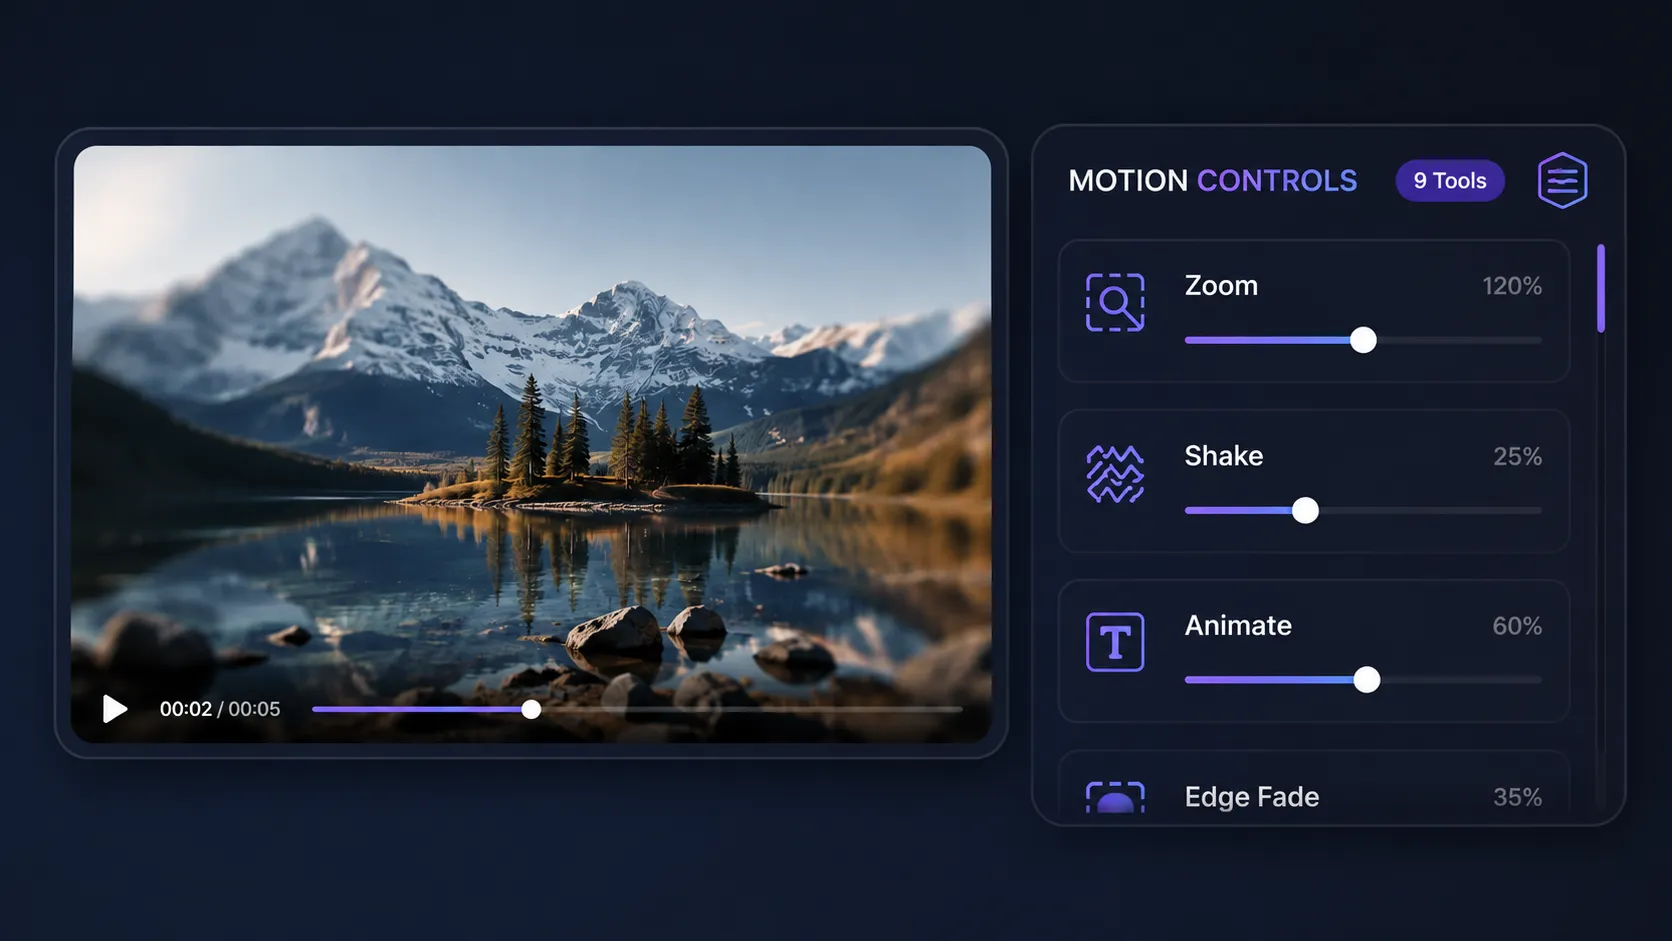
This is where Motion Essentials Pack can make the motion-building process much faster. This product is a collection of 9 motion tools for DaVinci Resolve 20 and above, designed for a large portion of everyday movements in editing; from zooms and shakes to text animation, Facecam control, and transitions between clips.
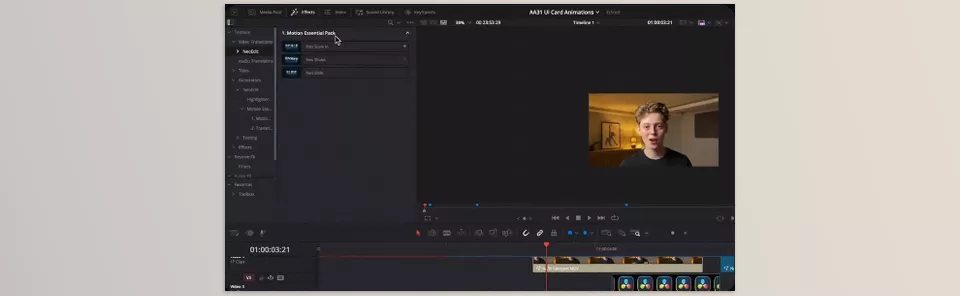
The important point is that this isn’t just an effects pack. The tools in Motion Essentials Pack are divided into three categories: some work as Effects on existing content, some are Generators, and some are used as Video Transitions between clips. Neo Anim can even be used in the Fusion Page.
The main idea behind the pack is simple: for common motions, you don’t need to start from scratch every time. You choose the right tool, place it in your project, and adjust the ready-made movement without building a collection of Keyframes.
Neo Zoom Pro: Zooms With More Control 🔍
Neo Zoom Pro is designed to create smooth, controlled zooms and can be used as both an Effect and a Generator. This means you can use it to create a zooming movement on the image without having to manually build the zoom with multiple Keyframes.
One of the important features of this tool is the ability to control the Speed and Easing of the movement. As a result, the amount of zoom isn’t the only thing that matters; you can determine how fast the movement happens and how it enters or exits so the result doesn’t look dry and mechanical.
For example, in a tutorial video, you can slowly zoom in on an important part of the image, or in a social media video, you can use a faster zoom to emphasize a specific moment.
Neo Gradual Zoom: A Subtle Movement for Static Shots 🎥
Neo Gradual Zoom is designed for situations where you don’t want the zoom to be completely noticeable and only want to add a subtle, continuous movement to the image.
This tool is also available as both an Effect and a Generator and can be used on relatively static shots so the image doesn’t remain completely still. The result can give the shot a more cinematic and dynamic feel, especially in videos that stay on one image or static shot for a longer period of time.
The main difference between this and a regular zoom is its subtlety; the audience isn’t necessarily supposed to notice a “zoom effect.” Instead, the image moves smoothly and continuously.
Neo Anim: Text, Logo, and Icon Animation Without Keyframes ✨
Neo Anim is designed for animating Text, logos, and icons, and it’s one of the most practical parts of the Motion Essentials Pack for simple, everyday motion graphics.
This tool works as an Effect and can also be used in the Fusion Page. So for creating simple animations on graphic elements, you don’t need to build every movement manually with Keyframes.
For example, imagine a title needs to enter the frame, a logo needs to move, or an icon needs to appear at a specific time. Instead of creating multiple points in time for Position, Scale, or other parameters, you can use Neo Anim to create these types of movements more quickly.
Neo Facecam: Easier Camera Image Control 👤
For YouTube content creators, video tutorials, and Talking Head videos, the Facecam image is usually a constant part of the edit. Neo Facecam is specifically designed for this type of use and makes it easier to control and animate the Position and Scale of the camera image.
For example, you can make the Facecam larger in one section of the video, change its position, or give it a specific movement so it matches the content displayed on screen.
This is especially useful for videos where the speaker and the main content are shown on screen at the same time and you need to change the position or size of the Facecam throughout the video.
Neo Shake Pro: Controlled Shake for High-Energy Visuals 🎬
Neo Shake Pro is designed for creating Camera Shake and is available both as an Effect and as a Generator.
Image shake can be used to emphasize a moment, create a sense of energy, or synchronize the image with an important event in the edit. The important point is that the shake isn’t meant to simply move the image around without purpose; controlling the movement and using Ease In / Ease Out helps make the beginning and end of the shake cleaner and more natural.
For example, at the moment of an impact, an important cut, or a visual emphasis, you can create a short shake to make that section stand out more.
Neo Edge Fade: Helping Graphic Elements Stand Out More Clearly 👌
Neo Edge Fade is a somewhat different tool compared to Zoom and Shake and is designed to create edge fades and gradients along the edges. It can be useful when text or an icon is placed over an image, and you need more control over the visibility of the image around that element.
This type of fade can help graphic elements stand out better in the composition and give the image a cleaner look without forcing you to build multiple layers, masks, or separate adjustments.
Neo Shake Transition: A Higher-Energy Transition ⚡
Neo Shake Transition is a ready-made Video Transition for moving between two clips using a shaking motion.
Instead of separately adjusting the movement of the first and second clips to create a shake transition and then synchronizing everything together, this tool gives you the main Transition structure ready to use.
This type of transition is more suitable for fast-paced edits, social media videos, and sections where you want the change between two shots to feel slightly more energetic and noticeable.
Neo Slide Transition: Clean and Modern Movement 🎞️
Neo Slide Transition is another Video Transition in the Motion Essentials Pack and is designed for moving between two clips with a sliding motion.
Slide transitions are useful when you want the change between two shots to be noticeable while keeping the overall look clean and simple. Especially in modern content, tutorial videos, and social media edits, this type of movement can be a good alternative to completely simple cuts.
Neo Scale In Transition: A Smooth Entrance for the Next Clip 🔎
Neo Scale In Transition is the third Video Transition tool in Motion Essentials Pack and transitions between clips using a Scale-based movement.
In this case, the shot change is accompanied by a scaling-up movement, creating a smoother and more dynamic feel compared to a simple cut. For projects that need minimal, modern transitions, this tool can be a practical option in the pack.
One Important Shared Feature: Without the Hassle of Keyframes 🎯
One of the most important features of Motion Essentials Pack is that the tools in this collection don’t rely on manually creating Keyframes to execute ready-made motions. In other words, for every zoom, Shake, or simple animation, you don’t need to create several points in time and then adjust each parameter individually.
Instead, you add the tool and change the settings related to that specific motion. This becomes especially valuable when you repeat the same type of movement many times throughout a project.
Of course, this doesn’t mean removing Keyframes from your workflow completely. If you want a fully custom and unique animation, you can still use DaVinci Resolve’s own features and Fusion. The advantage of this pack is that for common movements, it shortens the path to the final result.
Smart Motion Blur: Smoother Movement Without Unnecessary Extra Rendering
Another shared feature of the Motion Essentials Pack is Smart Motion Blur. This feature makes movements look more natural, and the interesting point is that Motion Blur is rendered only while the animation is running.
This means that instead of motion blur being permanently applied to every part of the image, it focuses on the sections that are actually moving. The result is smoother and more natural motion without requiring you to manually deal with complicated settings to create that effect.
Overall, what makes Motion Essentials Pack practical isn’t just the number of tools it includes; the combination of Zoom, Shake, Facecam, Text Animation, Edge Fade, and Transitions helps you complete many repetitive editing motions more quickly. At the same time, working without Keyframes, having Smart Motion Blur, and supporting both Edit and Fusion mean you can spend less time dealing with technical settings to achieve clean, professional movement and focus more on the editing itself and your creativity.
A Few Tips to Make Motions Look More Natural 🎯
To make motions not just “animated” but actually look professional and natural while using Motion Essentials Pack, a few simple tips can make the result much better. Especially when using ready-made tools, it’s important to know where to use movement and where it’s better to use less.
- Use movement in moderation. You don’t need to have a Zoom, Shake, or Transition on every clip. Sometimes a very slow and subtle zoom looks more professional than several movements used one after another.
- Match the movement speed to the rhythm of the video. For a calm video, a fast zoom or intense Shake can create the wrong feeling; on the other hand, for fast-paced edits, you can use more energetic movements.
- Don’t use a Transition just to make the image more attractive. The transition should match the rhythm and content of the two clips. If that connection doesn’t exist, even an attractive Transition may make the result feel cluttered and unnatural.
- Don’t forget Motion Blur. In fast movements, motion blur can make the animation look smoother and more natural and reduce the dry, digital feeling of the movement.
- Don’t stack several heavy movements on top of each other. Combining an intense zoom, strong Shake, and several other motion effects at the same time usually doesn’t make the result look more professional; on the contrary, it can make the image cluttered and distracting.
- Use ready-made tools as a starting point. You don’t need to keep the default settings exactly as they are. Adjust the intensity, speed, and timing of the movement based on the project so the result matches the rhythm and atmosphere of your video.
In the end, professional-looking motion depends less on the number of movements and more on their timing, intensity, and where they are used. A ready-made tool only makes the work faster; your choices determine how clean and natural the final movement looks.
When Repetitive Motions No Longer Take Up Your Time 🎬
In editing, the main problem often isn’t that a movement is complicated; the problem is that you have to repeat the same simple movement over and over again. Creating a zoom or text animation once may not take much time, but when that task is repeated across several parts of a project, it can take up a significant amount of your time.
Motion Essentials Pack is designed specifically for this part of the workflow; a collection of ready-made Effects, Generators, and Transitions that give you faster access to movements such as Zoom, Shake, text animation, Facecam control, and transitions.
If most of your editing work happens inside DaVinci Resolve and you regularly deal with these types of everyday motions, what Motion Essentials Pack adds to your project is more than just a few ready-made effects; it means you don’t have to start from scratch again for every small movement, allowing you to spend your time on the parts that actually require your own creativity and decision-making.
If you’re also a DaVinci Resolve user and you’re looking for ways to make your editing workflow faster, smoother, and more professional, we strongly recommend checking out our detailed article on the DaVinci Resolve tools and features you shouldn’t miss.