

When Slowing Down a Video Doesn’t Give You the Result You Want 🎬
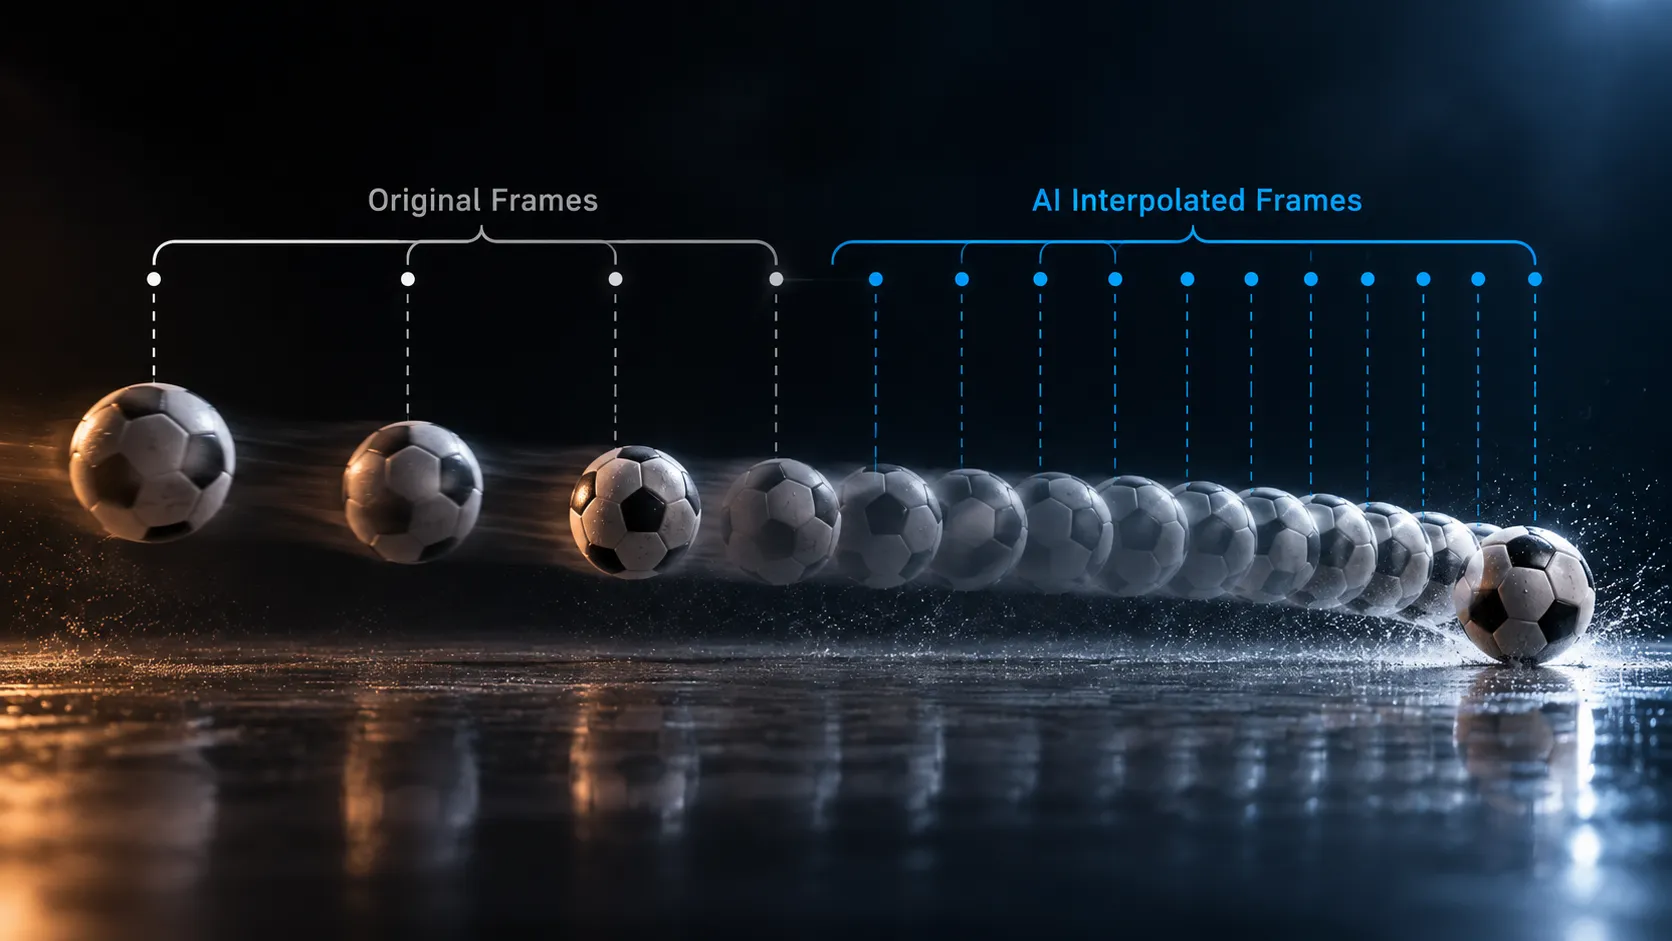
Are you aware of the Bullet Time Plugin by aescripts? You’ve probably had a great shot and wanted to slow it down to make fast movement stand out—for example, splashing water, a hand movement, throwing an object, or even a fast camera move. But when you reduce the video speed too much, the original frames no longer contain enough information to display the motion smoothly, and the result can look choppy and fragmented.
The problem is that slowing down a regular video too much doesn’t create smooth motion simply by stretching time. For example, if your footage was recorded at 30 frames per second, you still only have that same limited number of frames available for extreme slow motion. As a result, a large gap is created between two original frames, and the subject’s movement loses the smoothness you expect.
The solution is to create new frames between existing frames of video footage. By analyzing the footage and creating new frames between existing frames, you can use regular video footage to create slow-motion video stretched out to fill more of the screen’s time.

What Exactly Is Frame Interpolation? 🧩
Frame Interpolation, or “frame interpolation,” means creating new frames between the original frames of a video. Suppose you have a video at 30 frames per second. If you want to play it back very smoothly and slowly, there isn’t enough information to display every stage of the movement. By examining the surrounding frames, the system analyzes the movement of subjects and inserts new frames between them.
For example, imagine a drop of water is on the left side of the image in one frame and is a few centimeters farther ahead in the next frame. The system can estimate the path that the drop traveled between those two frames and generate the intermediate frames.
This technique is useful in different projects, from Slow Motion for sports and advertising videos to stretching the duration of a shot, creating smoother movements, or creating transitions between two different image states.
Common Methods for Creating Slow Motion 🎞️
Before using specialized tools, several methods are available for creating slow motion. The simplest way is to reduce Speed/Duration and slow down the video. But if you want the movement to be smoother, you can use methods that create new frames between the original frames. The main options available in Adobe software include:
- Frame Sampling: Displays the original frames without creating new ones and is more suitable for moderate speed reductions.
- Frame Blending: Blends adjacent frames together so that changes in speed are less noticeable, but it may create a blurred appearance during fast movements.
- Optical Flow in Premiere Pro: Analyzes subject movement between frames and creates new intermediate frames for smoother slow motion.
- Pixel Motion in After Effects: Generates new frames by analyzing pixel movement and is useful for Time Stretch and Slow Motion.
When Slow Motion Becomes Too Extreme ⚠️
These methods work perfectly well for many projects, but the more you reduce the video speed, the greater the chance of problems. Especially when the subject has complex movement or several elements pass in front of one another, the system may not be able to detect the motion path correctly, and the result may appear as stretching and deformation of the subject, broken edges, blurring, or strange artifacts. On the other hand, to get the best possible result, you may need to try different settings and render the output several times, which can take a significant amount of time on heavy projects.
Bullet Time: New Frames With the Help of AI 🚀
Bullet Time, a product by Blace Plugins, is a tool for After Effects and Premiere Pro that uses AI models to create new frames between the original frames of a video. As a result, you can convert regular footage into a higher-frame-rate video and then slow it down to achieve smoother, more natural slow motion. The tool essentially tries to reconstruct motion information that wasn’t captured between the existing frames.
Frame Rate Conversion for Creating Professional Slow Motion 🎬
One of the main uses of Bullet Time is increasing the frame rate of footage. For example, suppose you have a 30fps video and want to increase it to 120fps. The tool generates intermediate frames to fill the gaps between the original frames so that you can later play the video at a much lower speed without the movements becoming noticeably choppy.
This feature is especially useful when you didn’t have the option to record at a high frame rate during filming. For example, instead of recording at 120fps from the start, you can use footage recorded at 24, 30, or other common frame rates and then generate the frames needed for slow motion during editing.
Creating Extremely Smooth Slow Motion 🐌
Bullet Time isn’t limited to regular slow motion and can also be used for more extreme speed reductions. When you slow a shot down significantly, the gaps between the real frames become more noticeable. But by adding AI-generated frames, the subject’s movement can have greater continuity.
For example, imagine an athlete moving fast, splashing water, a vehicle moving, an object being thrown, fabric moving, or a fast camera move. When these shots are slowed down, the details of the movement become more visible, and if there aren’t enough frames, the result can look choppy. Bullet Time helps these movements appear smoother by generating intermediate frames.
Two-Frame Interpolation: Creating Motion Between Two Frames 🔄
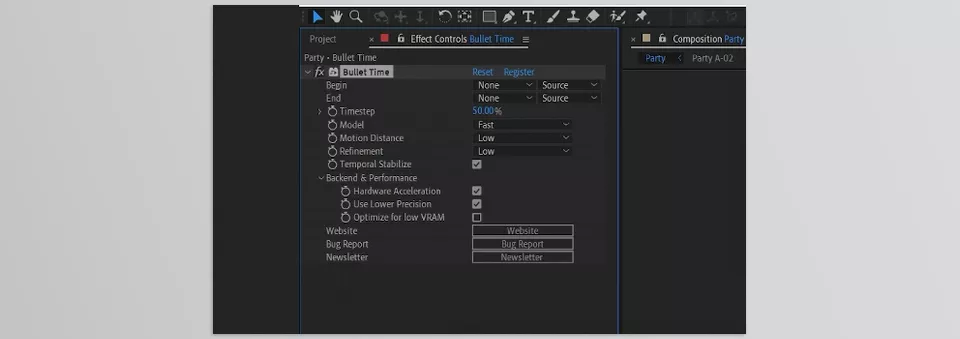
One of Bullet Time’s different features is Two-Frame Interpolation. In this mode, you don’t necessarily have to process an entire video just to increase its frame rate. You can specify a starting frame and an ending frame, and the tool creates the intermediate frames between the two.
For example, suppose the subject is in a specific position in one frame and, a few moments later, is in a completely different position in another frame. Bullet Time tries to reconstruct what happened between these two states and create continuous movement between them. For this reason, this feature can be useful for creating specific movements, Time Stretch, and even creating freeze-frame shots that generate movement between two image states.
AI Models for Motion Analysis 🧠
Bullet Time doesn’t simply blend the previous and next frames together. Its processing relies on AI models that analyze motion in the image and generate intermediate frames. According to the developer, the tool uses up-to-date AI models for Frame Interpolation and provides various settings that let users control the final result based on the type of footage.
This is especially important for projects where movement is more complex and simpler methods, such as frame blending, can’t deliver the desired result.
Fully Local Processing; No Files Sent to a Server 🔒
One of the key aspects of Bullet Time is that blace.ai’s proprietary C++ engine processes footage directly on the system. This means you don’t need to upload your footage to an online service to generate new frames. According to the developer, project data never leaves the system.
This feature can be especially important for personal or professional projects involving sensitive video files, because all processing takes place on your own system and doesn’t depend on uploading files or cloud processing.
Optimized for High-Resolution Videos 🖥️
Bullet Time is also optimized for processing high-resolution videos, and according to the developer, footage up to 4K can be processed on systems equipped with suitable GPUs. Of course, processing speed depends on system hardware; the higher the resolution, the longer the video, or the heavier the processing, the more resources it will require.
On Windows, NVIDIA GPUs with at least 8GB of memory support hardware acceleration, while on Mac, Apple Silicon with at least 16GB of RAM is supported. Windows systems without NVIDIA can also run the tool, but according to the developer’s specifications, processing on those systems can be significantly slower.
Support for After Effects and Premiere Pro 🎞️
Bullet Time is available directly for two major editing and motion graphics applications: After Effects and Premiere Pro. So, depending on your Workflow, you can use Frame Interpolation in the same environment where you’re working on your project, without transferring the video to separate software or a separate service to create slow motion or stretch time.
This dual support is especially useful for those who edit part of a project in Premiere Pro and move to After Effects for compositing or more detailed work, because the tool is available in both environments and can be integrated into the existing workflow.
A Few Tips for Getting Better Results 🎯
Even the best Frame Interpolation tools may not produce ideal results when used with unsuitable footage or incorrect settings. By following a few simple tips, you can reduce the likelihood of artifacts and get a more natural Bullet Time result.
- Start with high-quality footage. The cleaner and sharper the original frames are, and the less severe the motion blur, the easier it will be for the tool to analyze movement, reducing the likelihood of generating unnatural frames.
- Don’t make the slow motion excessively extreme. Just because you can slow a video down significantly doesn’t mean every level of speed reduction will necessarily produce a good result. The greater the time gap between real frames becomes, the higher the likelihood of artifacts.
- Carefully examine complex movements. One subject passing in front of another, the movement of hair and fabric, water, smoke, or rapid changes in camera angle can make motion analysis more difficult. Examine these sections more carefully after processing.
- Watch the output at normal speed as well. Some artifacts aren’t particularly noticeable in Slow Motion, but become more visible when you play the video at normal speed. So before the final output, check both playback modes.
- Don’t use the same settings for every shot. Every piece of footage has its own conditions. A setting that works well for fast movement may not suit a shot with complex motion. Choose the amount of Interpolation and the intensity of Slow Motion based on the shot itself.
Ultimately, the best results come from using Bullet Time for shots that genuinely need more frames, rather than running all your footage through the process without a reason. This way, you have greater control over quality, and the project’s processing time doesn’t increase unnecessarily.
When a Few Extra Frames Can Change the Entire Shot 🎬
If most of your projects involve regular slow motion, tools such as Optical Flow in Premiere Pro or Pixel Motion in After Effects can still meet your needs. But for extreme slow motion, significant time stretching, or creating motion between two specific frames, the quality of the intermediate frames matters more.
Bullet Time is built specifically for this part of the process. With AI, it generates new frames, making movements smoother and more usable. With simultaneous support for After Effects and Premiere Pro, plus local processing, you can use this capability directly within your Workflow.
If you frequently work with fast-paced footage, advertising videos, sports shots, or projects where slow motion is an important part of the appeal, Bullet Time may be worth trying.
If you’re building your After Effects toolkit, don’t miss our beginner-friendly After Effects tools guide that explains the purpose of plugins, scripts, presets, templates, and other popular resources used by motion designers.





