

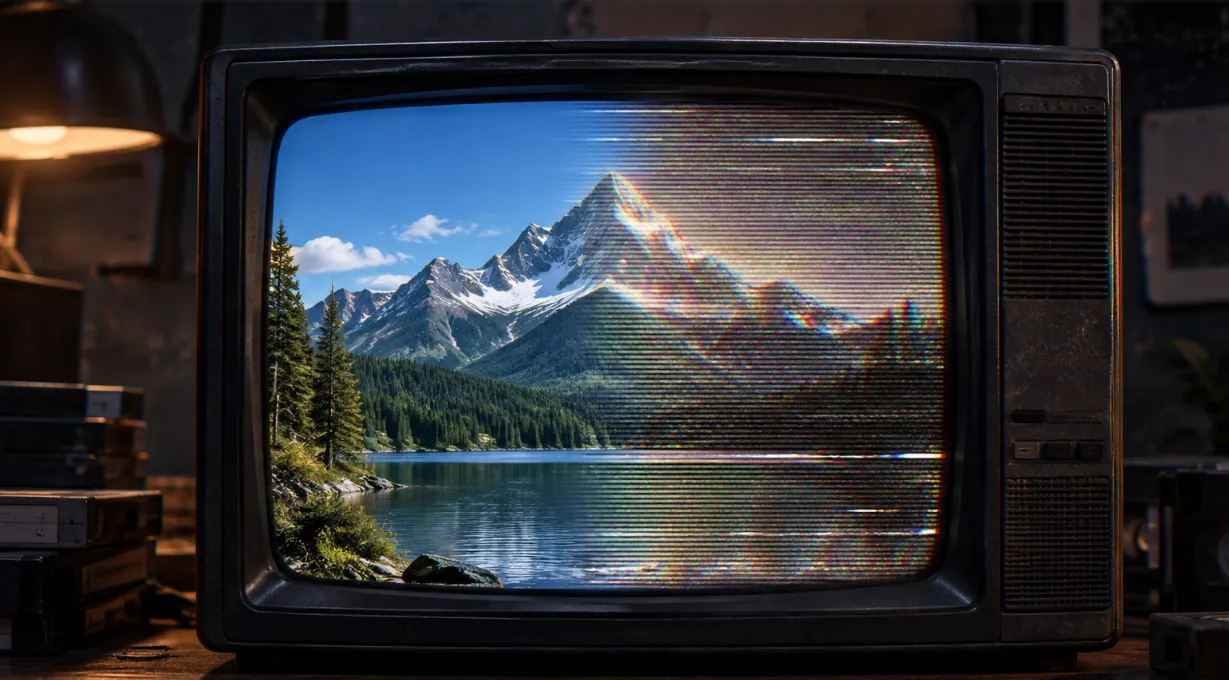
Is Your Digital Image Too Clean? Maybe That’s the Problem 📺
Are you aware of the CRTX Plugin by aescripts? You’ve probably wanted a video to have that unmistakable 80s or 90s feel—the look of old CRT televisions with soft scanlines, bleeding colors, and pleasant noise that gave the image character. But no matter how much grain or how many effects you add, something still seems to be missing. ✨
The truth is that the CRT look isn’t merely some horizontal lines and arbitrary noise. Several elements contribute to the analog charm of a CRT image, including color bleeding, glowing phosphors, signal noise, and on-screen light. 📼
That’s why creating this style with conventional methods is both time-consuming and doesn’t always produce natural-looking results. If your goal is to make viewers believe the image is actually being displayed on an old television, you need to think beyond a few simple effects. 🎬

Is Your Digital Image Too Clean? Maybe That’s the Problem 📺
Have you ever wanted a video to look exactly like it’s playing on an old CRT television? That warm, nostalgic image where scanlines, bleeding colors, and VHS noise all feel completely natural. But in the end, no matter what effects you add, the result looks more like a ready-made filter than a real CRT. 🎞️
The problem is that the analog look isn’t just about noise or a few horizontal lines. A lot of details work together to create that authentic feel, such as:
- Scanlines and phosphor: Texture that makes the image feel more alive.
- Color bleeding: Those soft halos around bright areas.
- Signal distortion and jitter: Subtle irregularities that make the image feel more realistic.
- Screen bloom and glow: Light that looks completely different on CRT displays.
That’s why creating a professional CRT effect with conventional methods takes a lot of time, and controlling all these details isn’t easy. If your goal is a believable result, all of these behaviors need to be simulated together—not just a few effects stacked on top of the image. ✨
How Can You Create a CRT Television Effect Without a Plugin? 🛠️
If you want to create this style using only After Effects’ built-in tools, it’s possible—but you’ll need to combine several different effects to get close to the appearance of a CRT display. Most designers use a collection of built-in effects to achieve this result, with each one simulating a different aspect of CRT television behavior.
Where Should You Start with After Effects’ Built-In Tools?
To create a simple CRT effect, these tools are usually the most useful:
- Noise & Grain: Adding analog noise and texture to the image
- Venetian Blinds: Creating horizontal scanlines similar to old displays
- Glow: Creating glow and light spread in bright areas
- Wave Warp and Turbulent Displace: Simulating image waves and distortion
- Channel Blur and Shift Channels: Separating color channels and creating color bleeding
- Optics Compensation: Creating the subtle curvature of a television screen
Why Doesn’t This Method Always Produce the Desired Result?
The main challenge is that each of these effects works completely independently. This means that to adjust the intensity of noise, scanlines, bloom, or distortion, you constantly have to move between multiple effects and change different parameters. Even then, the natural behavior of analog signals, the way light reacts to the image, and the authentic feel of a CRT are still difficult to achieve. As a result, this method is flexible, but it takes a lot of time for professional projects.
CRTX: Realistic CRT Display Simulation Inside After Effects and Premiere ✨
This is where CRTX stands out. This plugin is built for After Effects and Premiere Pro and brings almost all the behaviors of a CRT display into a single effect—from signal type and phosphor structure to bloom, glass, distortion, and analog failures.
Instead of stacking multiple effects and spending hours adjusting parameters, you choose a preset and customize every part of the image like a real television. The result doesn’t just recreate the CRT look; it also simulates its actual behavior.
More Than 150 Ready-Made Presets for Every Style 🎛️
One of CRTX’s strongest features is its library of more than 150 ready-made presets. These presets aren’t just a few color filters; each one is designed based on real display models and analog sources to help you reach your desired style faster.
- Consumer TVs: Warm colors, soft scanlines, and the nostalgic feel of consumer CRTs.
- Broadcast Monitors: Sharp and precise images for simulating professional studio monitors.
- Arcade and Gaming: Suitable for classic games, arcade cabinets, and retro environments.
- VHS and Analog Horror: Presets with noise, tracking, signal failures, and a creepy analog feel.
- Terminal and Neon: The appearance of old computer monitors and green or neon displays.
The best part is that none of these presets are fixed; you can choose one as a starting point and then modify every detail to match your own project.
Realistic Simulation of Different Analog Signal Types 📡
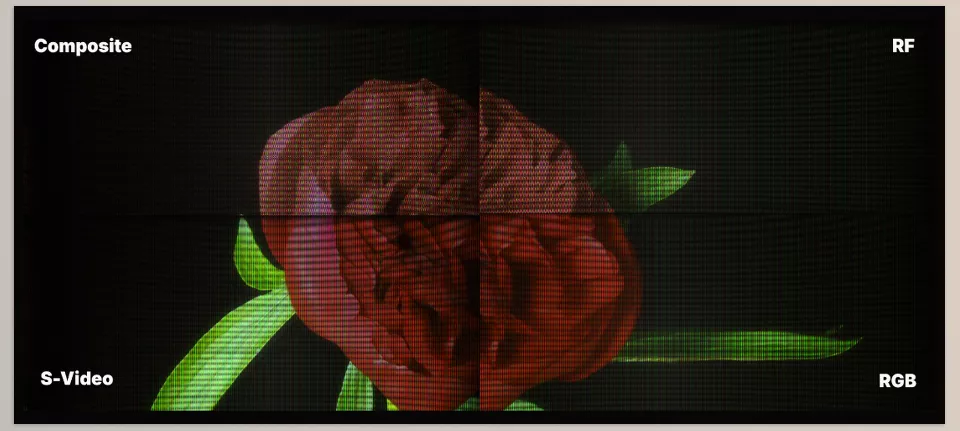
Not all CRT displays had the same image quality, and much of their appearance depended on the type of device connection. CRTX fully recreates these differences and gives you access to four main signal types.
- RF: The most noise, interference, ghosting, and lowest quality; suitable for antenna-based televisions.
- Composite: Color bleeding and soft edges; exactly the look of old consoles.
- S-Video: More detail while preserving the analog feel with less noise.
- RGB: The clearest and cleanest image for professional monitors such as PVM and BVM.
These differences allow a VHS music video, an arcade game, and a studio monitor to each have a completely different visual character.
Scanlines, Phosphor, and Bloom That Actually Feel Alive 🌈
Most CRT effects simply place a few horizontal lines over the image, but CRTX simulates how an image is actually displayed on a CRT screen. In other words, each frame is drawn across the screen like an electron beam, and the phosphors react to the image’s brightness.
In this section, you can independently control important details such as scanline thickness and spacing, Phosphor Mask type (Aperture Grille, Slot Mask, and Shadow Mask), bloom intensity, light spread, phosphor persistence, and Afterglow. The result is more natural-looking highlights, while the image loses that sterile digital feel.
Analog Failures: From VHS to a Broken Television ⚡
If your goal is to create a retro or analog horror atmosphere, this section will probably be the one you use the most. CRTX includes almost all the common failures of old displays and VHS tapes, with separate controls for each one.
VHS Tape Failures
- Head Switch
- Tracking Lines
- Tape Stop
- Worn Oxide
Television Signal Interference
- RF Interference
- Ghosting
- Weak Signal
- Broadcast Failure
CRT Display Distortions
- Sync Tear
- Vertical Roll
- Jitter
- Degauss
The main advantage is that you don’t need to add a separate effect to the timeline for every type of failure; all of these are available inside a single panel and can easily be combined.
Glass, Curvature, and the Physical Details of the Display 🪞
One feature that makes CRTX more realistic is its attention to the display screen itself. This plugin doesn’t just change color and noise; it also recreates the feeling of looking at a real CRT monitor.
You can adjust screen curvature (Curvature), Overscan, subtle color-channel displacement (Convergence), reflections on the glass, haze, dust, and the display’s surface texture so the output looks like footage recorded from a real television.
Real-Time Rendering for a Faster Workflow 🚀
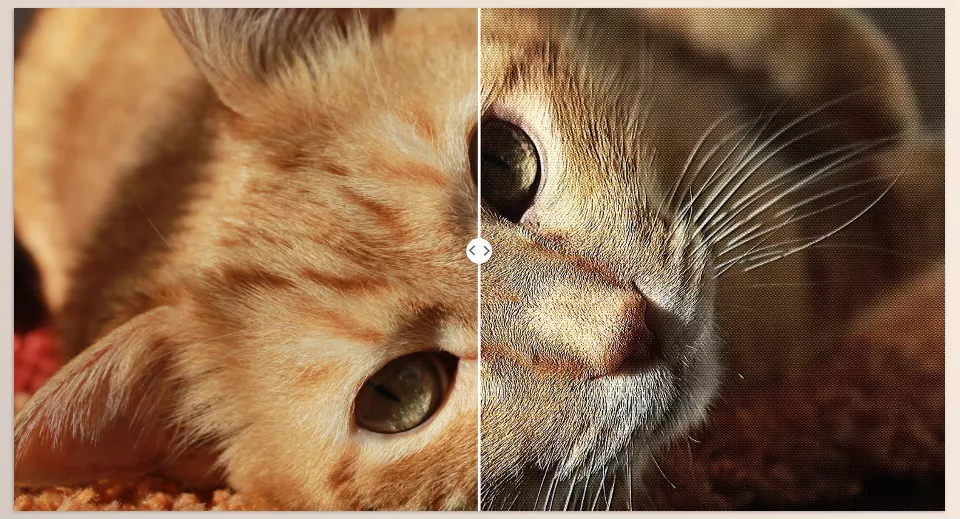
Newer versions of CRTX support Real-Time Rendering, which means that on compatible systems, changes you make to the signal, bloom, scanlines, or image failures appear in the Preview almost instantly.
In practice, all you need to do is apply the effect to your footage, choose a preset, and then customize the image details. This fast workflow means you can spend more time designing your project’s look instead of waiting for test renders.
A Few Techniques for Making the Result Look More Natural 🎯
Having a powerful plugin alone isn’t enough; what makes the output professional is how you use the details. CRT effects usually look more believable when they’re adjusted subtly.
- Start with a close preset: Choose a style that fits your project first, then tweak the details.
- Don’t exaggerate the bloom: A small amount usually looks more natural than an intense glow.
- Take the signal type seriously: Use Composite or RF for VHS and RGB for a professional monitor.
- Keep the failures animated: Static noise and glitches quickly start to look artificial.
- Use glass reflections subtly: The goal is to create a realistic feel, not make the image hazy and cluttered.
Finally, remember that a real CRT is always slightly imperfect; tiny jitters, soft light, and small flaws are exactly what make the image feel alive and nostalgic.
One Step Beyond Nostalgic Effects 💡
If you’ve had to combine multiple effects to create a CRT look until now, you probably know how much of the project time goes into adjusting details rather than designing. Even a small change means going back to multiple layers, multiple sliders, and a lot of trial and error until the image finally looks natural.
CRTX makes this much simpler because, rather than simulating component by component, it provides full CRT behavior in a single tool. Things like signal type, scanlines, phosphor, bloom, glass, and analog faults all interact, and that interaction is what makes the results feel closer to a real CRT rather than just a CRT filter.
If you create content for music videos, motion graphics, retro advertising, or Analog Horror projects, this plugin doesn’t just improve image quality; it also makes this style much faster to create. That means you spend less time adjusting effects and more time on creativity and designing the project itself.
Learning After Effects is easier when you understand the tools professionals use every day. Our After Effects tools guide provides a friendly introduction to plugins, scripts, and extensions, showing how they help streamline projects and unlock new creative possibilities.



