


When Paths Slow Down, Ideas Fall Behind
Are you aware of the Crazy Shapes Plugin by aescripts? If you’ve worked with Shape Layers in After Effects, you’ve probably experienced this moment: your idea feels alive, smooth, and “stretchy” in your head—but when you try to execute it in AE, the motion turns out stiff and mechanical. It’s not that you can’t build it; you can… but the process is full of small complications. Every time, you go back and forth between multiple keyframes, helper layers, and different tricks until that living feeling finally takes shape.
The issue is that in vector motion, a Path isn’t just a line—it’s where the personality of the movement is built. And when controlling a Path is difficult and time-consuming, you unconsciously sacrifice quality for speed: “This is fine for now,” and you move on. This article is exactly about that bottleneck—and how to get past it.

What Is Path Control and Where Is It Used?
Path Control means being able to manage the behavior of a shape’s points and curves so that the motion feels “plastic and flexible,” not like a rigid object that simply moves from point A to point B. In motion graphics, many professional-looking details come precisely from this level of control: squash, stretch, subtle waves, or even a controlled vibration that gives life to the frame.
To make it more tangible, here are some common real-world uses of Path Control:
- Squash & Stretch for characters, playful icons, or objects like balls and jelly
- Wavy Motion for smoke, water, fabric, decorative lines, and organic transitions
- Secondary Action, such as subtle vibrations, motion trails, or delayed reactions, for more natural movement
- Rigging on Path when you want parts of an illustration to move in a “dependent” way
The important point is that these features aren’t just decorative. When used properly, they make motion more believable, smoother, and visually more “premium”—the exact thing that separates an average output from a professional one.
If We Don’t Have Extra Tools, What Can We Do with After Effects Itself?
The truth is, After Effects doesn’t leave you empty-handed. Many of these tasks can be done with default tools, but you usually need a combination of techniques—which makes the workflow longer and the project heavier.
Common approaches inside After Effects include:
- Creating controls with Nulls and linking them to Paths using methods like Create Nulls from Paths
- Using the Puppet Tool for deformation and flexibility
- Building waves and motion with Wave Warp or expression tricks like
wiggle - Creating a delay and a secondary action with
valueAtTimeand delay expressions - Manually keyframing Path points for precise control
But where do the limitations and frustrations appear? This is where many people get tired:
- Setup is time-consuming: Every point, every controller, every state must be configured separately.
- The project gets messy quickly: Too many Nulls, too many expressions, too many helper layers.
- Last-minute changes become difficult: When a client says “a bit softer / less / faster,” you have to tweak multiple places.
- The result isn’t always repeatable, especially when you manually keyframe or use non-structured expressions.
So yes, it’s possible. But the real question is: How much time and mental energy are you spending to reach that feeling?
Crazy Shapes Plugin: When Path Finally Becomes Controllable
If you’ve spent time working with Shape Layers in After Effects, you’ve probably realized that the main issue isn’t “creating motion”—it’s managing deformations. Adjusting Path points, coordinating curves, adding waves or secondary action—all of it is doable, but usually through extra steps, manual expressions, and helper layers.
Crazy Shapes Plugin focuses exactly on this point:
Simplifying and professionalizing Path workflows—without disrupting the natural structure of After Effects.
This tool offers two main animation approaches:
- Looped Animations: Creating loop animations directly inside the Path, without keyframes
- Half-Automated Animations: Adding secondary action and motion details to your existing animation
Let’s break down the features by category.
Rig Tools: When a Path Needs to Behave Intelligently
Rigging vector illustrations is often the most complex part of the process—especially when importing files from Illustrator. Connecting Path points to controllers and keeping the project organized can quickly become time-consuming if done manually.
Crazy Shapes Plugin provides a set of rigging tools to structure this process:
- Linking Nulls to Path points in five different methods
- Creating custom rigs to control complex deformations
- Managing internal Path coordinates inside the Shape Layer space
- Resetting Position, Rotation, and Scale inside Shapes
- Displaying and precisely managing Path points
These features are especially useful in character projects or multi-part illustrations, where form changes must remain precise and controlled.
Waves & Path Animation: Creating Organic Motion Directly on the Path
Normally, creating waves and organic motion on a Path requires secondary effects or multiple settings. Crazy Shapes Plugin allows these changes to be applied directly to the Path itself.
In this section, you can:
- Create wavy motion directly on the Path
- Control intensity, speed, and wave behavior with sliders
- Build loop animations that run without keyframes
- Manage all settings inside the same Shape Layer
This is particularly useful for smoke, water, decorative lines, animated typography, and smooth transitions—because the motion becomes part of the Path structure, not a separate effect.
Stretch; Real Deformation, Not Just Scaling
One of the key differences in professional motion is how Squash & Stretch is executed. Changing Scale alone usually doesn’t create a natural elastic feeling. When the Path itself deforms, the result becomes more believable.
Crazy Shapes Plugin enables direct stretching on the Path and allows you to:
- Stretch the Path using dedicated controllers
- Adjust the style and intensity of the Stretch
- Synchronize Stretch with the main motion
This feature is highly effective in character animation, soft objects, and playful motion styles.
Decay & Secondary Actions: The Details That Complete Motion
Adding secondary action usually requires expressions like valueAtTime or manually building delays. This process is both time-consuming and dependent on trial and error.
With Crazy Shapes Plugin, you can:
- Create a secondary action linked to the main motion with one click
- Control intensity and reaction level
- Add natural vibrations and responsive motion
This adds depth and realism without making the project structure more complex.
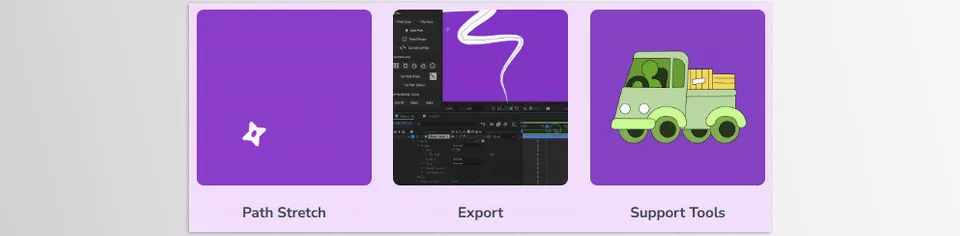
Export & Support Tools; Clean Project Management and Professional Output
Since many internal systems are expression-based, managing output becomes important. Crazy Shapes Plugin provides tools to keep projects clean and deliverable:
- Converting all expressions to keyframes with one button
- Converting Parametric Shapes to Paths
- Cleaning and managing expressions
- Hiding or disabling unnecessary internal groups
- Resetting and precisely adjusting internal Shape coordinates
These features are especially essential when exporting for web, apps, or lightweight projects.
Overall, Crazy Shapes Plugin is less a collection of effects and more a control system for Paths. Its focus is reducing technical complexity and increasing control during the motion design phase—where small details create big differences.
Professional Tips for More Natural Results
When you have strong Path tools, it’s easy to add waves everywhere, push stretch too far, and fill everything with motion. But the difference between professional work and messy work is exactly here—knowing where to stop and how much to add. These tips help your output look smoother, more natural, and well-crafted:
- Set wave and stretch intensity slightly lower than what initially feels “cool.” Usually, the first exciting version is a bit too much. Reduce it by 10–20% for a cleaner result.
- Fix the main motion first, then add details. If timing and rhythm aren’t right, extra secondary action only makes things busier.
- Keep secondary action dependent on the main motion. Slow movement = subtle reaction. Fast movement = stronger reaction. Not everything needs to shake all the time.
- For stretch, think about weight—not just deformation. The stretch direction should align with the motion path; it feels artificial.
- Don’t add waves to every Path. Some forms are naturally rigid and don’t benefit from heavy motion. Let the design guide you.
- Adjust loops so they don’t feel repetitive. If the viewer can predict the rhythm, the motion looks mechanical. Add a slight variation.
- If exporting for web or apps, convert expressions to keyframes at the end. It’s a small step that prevents many problems.
- Test on a small section first—like just a character’s hand or a secondary object. Once you gain control, apply it to the whole project.
- Keep your project clean. Hide extra groups, remove unused expressions. Clean project, clean mind.
- If the motion draws more attention than your message, step back. The tool should enhance the motion—not become the star of the scene.
Ultimately, professionalism is less about the tool and more about your level of control. Whenever you’re unsure, create a simpler version and compare—many times, the softer version is stronger.
What Value Does Crazy Shapes Plugin Actually Add?
Crazy Shapes Plugin does not add value by saying, “You can’t animate without me.” It helps with Paths to allow your energy to focus on aspects of animation that are more about designing motion than fighting the execution of it.
If your motion work is vector-based, you live inside Shape Layers, or you want your movements to look softer and more alive, this tool can be a serious and practical shortcut—not in a promotional way, but in the sense of reducing real workflow friction.
If efficiency matters to you, our After Effects Tools guide introduces tools and plugins that professionals use to speed up production without sacrificing quality.



