


✨ When Lighting Feels More Like Guesswork Than Design
Are you experienced in using the Light Wrangler? If you’ve worked with Blender, this experience is probably familiar: you move a light, take a render, realize it’s not where you wanted, adjust it again… and this cycle repeats several times. Especially when you’re trying to get a precise highlight on a glossy surface, it starts to feel more like guessing than designing.
The problem is that instead of focusing on the beauty of the image, you get caught up in technical settings. Now imagine being able to simply point at a surface and have the light placed exactly there—without all the trial and error. That’s exactly the kind of change many artists are looking for.

🎨 Interactive Lighting: Direct Control Instead of Guessing
Interactive lighting means that instead of working with numbers and parameters, you control the light directly inside the scene with your eye. You see where the light falls and decide right there, instead of guessing.
This type of control is extremely useful across different projects. For example, when creating a product render, you can quickly place a highlight exactly on the edge of a bottle or the body of a product. Or in character work, you can shape facial lighting without ruining the shadows. Even in reflective scenes like metal and glass, controlling reflections becomes much more natural.
In the end, light is not just for illumination; it helps guide the viewer’s attention. When control becomes simpler and more precise, the result becomes both more professional and faster to achieve.
🧱 Traditional Lighting Methods in Blender
Without using add-ons like Light Wrangler, Blender itself provides a complete set of lighting tools, and technically, you have almost no limitations. You can add different types of lights, move them around, and tweak various settings to get closer to your desired result. These methods are the foundation of every artist’s workflow, but they usually require more precision and time.
The most common methods include:
- Using Point Light, Area Light, and Spot Light to create different light sources
- Moving and rotating lights using the Gizmo in the viewport
- Manually adjusting parameters like Power, Size, and distance
- Constantly testing with Render or Viewport Preview to evaluate the result
- Using HDRI for environmental lighting and adjusting its angle
These tools are fully functional and can produce professional results, but the path to that result is not always direct or simple.
Why Do These Methods Sometimes Become Frustrating?
In practice, working with these methods takes more time and energy than it seems. Finding the exact position of a light usually depends on trial and error—you constantly move the light, check the result, and adjust again. This back-and-forth shifts your focus away from the creative side and pulls you into technical adjustments. Often, instead of “designing” the lighting, you’re just searching for an acceptable result.
Light Wrangler; When Lighting Finally Makes Sense
If you’ve experienced traditional methods, you quickly realize that the problem isn’t a “lack of tools,” but rather how you interact with light. Light Wrangler Blender Lighting Add-On steps in exactly here and fundamentally changes the entire lighting experience.
Instead of guessing and moving lights around, you design lighting directly inside the scene. Everything becomes faster, more predictable, and most importantly, more creative.
🎯 Direct Light Placement by Pointing
The most important difference with this tool is that you no longer need to drag lights around, hoping they land in the right place. You simply point at the surface where you want the light to hit.
You have three main modes for this:
- Reflect Mode → For creating precise highlights on glossy surfaces
- Direct Mode → For soft lighting and shaping forms (Diffuse)
- Orbit Mode → For rotating light around the subject and final fine-tuning
This means instead of trial and error, you are implementing exactly what you have in mind.
🎛️ Fast Control Without Breaking Your Workflow
One of the things you quickly get used to is that you no longer need to constantly dive into panels.
Almost all important settings are accessible via shortcuts:
- Scroll → Adjust light intensity
- Shift + Scroll → Change light size
- Alt + Scroll → Adjust distance
- Ctrl + Scroll → Control light spread
Additionally:
- Key I → Isolate the light for precise evaluation
- Key F → Activate False Color to check exposure
This workflow makes lighting feel more like sketching rather than parameter tweaking.
🎨 Lights With Real Shape (Not Just a Simple Source)
In the real world, lights have shape—softboxes, reflectors, windows, and more.
But in standard Blender, lights often feel too “clean” and artificial.
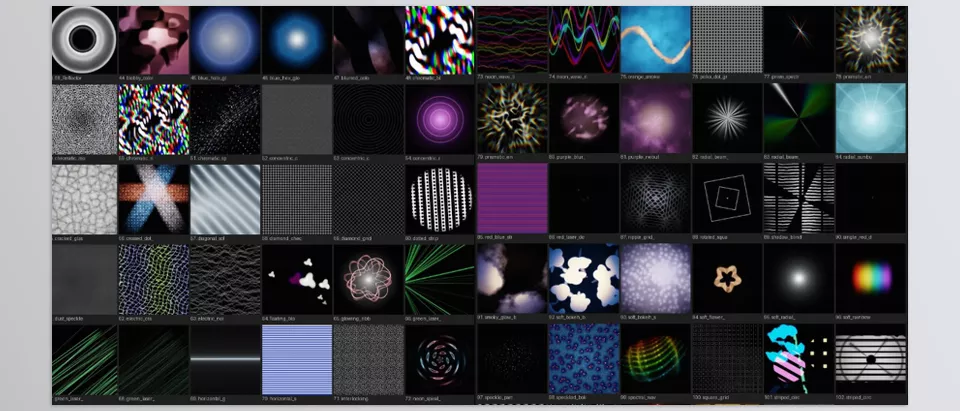
Light Wrangler solves this with a powerful library:
- Real HDR textures for Area Lights
- Simulation of studio equipment like Softboxes and Octaboxes
- Gradients and light shapes for better reflection control
And beyond that:
- Creative patterns like colored lights, lasers, and abstract effects
- Animated versions (HDR Video) to introduce motion into lighting
The result?
Reflections no longer feel “CG-like”—they gain a more realistic quality.
🌗 Professional Control Over Light and Shadow
Light Wrangler isn’t just about placing light—it’s about controlling how light behaves.
Some very useful features:
- Light Linking → Choose which objects are affected by the light
- Shadow Linking → Separate control over shadows
- Flags → Block or shape light like in a real studio
Also:
- Independent control over Diffuse and Glossy
- Removing highlights without eliminating light
- Or emphasizing reflections instead
This level of control is usually very difficult to achieve without add-ons.
🧱 Fast Creation of Shadows and Patterns (Gobo and Flag)
If you want to create specific shadows like window light or tree leaves, you usually need a lot of setup. Here, everything is ready.
- A library of shadow patterns (Gobo)
- Static and animated versions
- Ability to apply them to lights or even Flags (Stencil Mode)
An interesting point:
With Flags, you can create shadows without adding new lights—very clean and controlled.
⚙️ Additional Tools That Speed Things Up
Alongside the main features, there are tools that enhance the overall experience:
- False Color → Accurate exposure checking
- IES Profiles → Real-world engineered lighting
- Bake to HDRI → Convert lighting into environment maps
- Viewport HDRI Rotation → Quickly rotate environment lighting
- Auto Power Adjustment → Maintain intensity when changing distance
These might seem minor, but in real workflows, they save a significant amount of time.
🎬 The Result in Practice
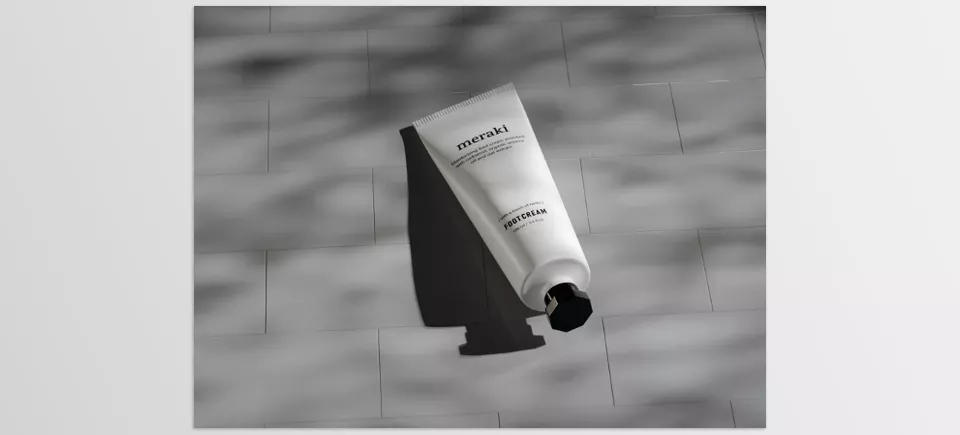
Imagine you’re working on a glossy product render. Normally, you’d have to move the light multiple times to achieve a clean highlight, checking the result each time and refining it again. But here, you simply point at the desired surface, and the light is instantly placed exactly where you want it. This simple change significantly increases your speed, makes results more predictable, and most importantly, keeps your focus on the visual quality and final feel of the work instead of technical adjustments.
Tips to Make Your Work More Professional
To get the best results, keep these simple but important tips in mind:
- Light placement first, details later
Quickly define the overall light position first, then move on to fine adjustments. This helps you avoid getting stuck in details too early and gives you a better overview of the scene. - Take Flags seriously
Often, the problem is excess light, not lack of it. With Flags, you can control unwanted light and shape shadows more precisely. - Design highlights, don’t create them accidentally
Think of highlights as a graphic element. Their placement can completely change the form, material, and mood of your work. - Less, but more precise
A few well-placed and controlled lights usually give better results than many scattered lights that only clutter the scene.
In the end, by following these simple tips, lighting transforms from a complex and time-consuming task into a controlled, fast, and fully creative process.
✨ When Lighting Finally Becomes Enjoyable
Lighting has always been one of the most defining aspects of 3D work, but the reality is that for many people, it’s more exhausting and time-consuming than exciting. Not because we lack ideas, but because the tools pull us so deeply into technical details that our creative energy gradually fades. This is where the difference between a standard tool and a smart tool becomes clear.
Light Wrangler fills this gap perfectly. It allows you to focus directly on the result you have in mind instead of spending your time on repetitive adjustments and tests. When light falls exactly where you want it, when control is fast and frictionless, the entire process shifts from “doing a task” to “designing.”
In the end, Light Wrangler is not just an add-on—it’s a change in mindset. When the tool gets out of your way, creativity flows much more easily. And if lighting is an important part of your work—whether in product rendering, animation, or any other project—it becomes very hard to go back to traditional methods after experiencing something like this.
If your goal is to master Blender tools and improve your workflow, our Blender Tools article provides step-by-step guidance on every tool and its practical applications.



