

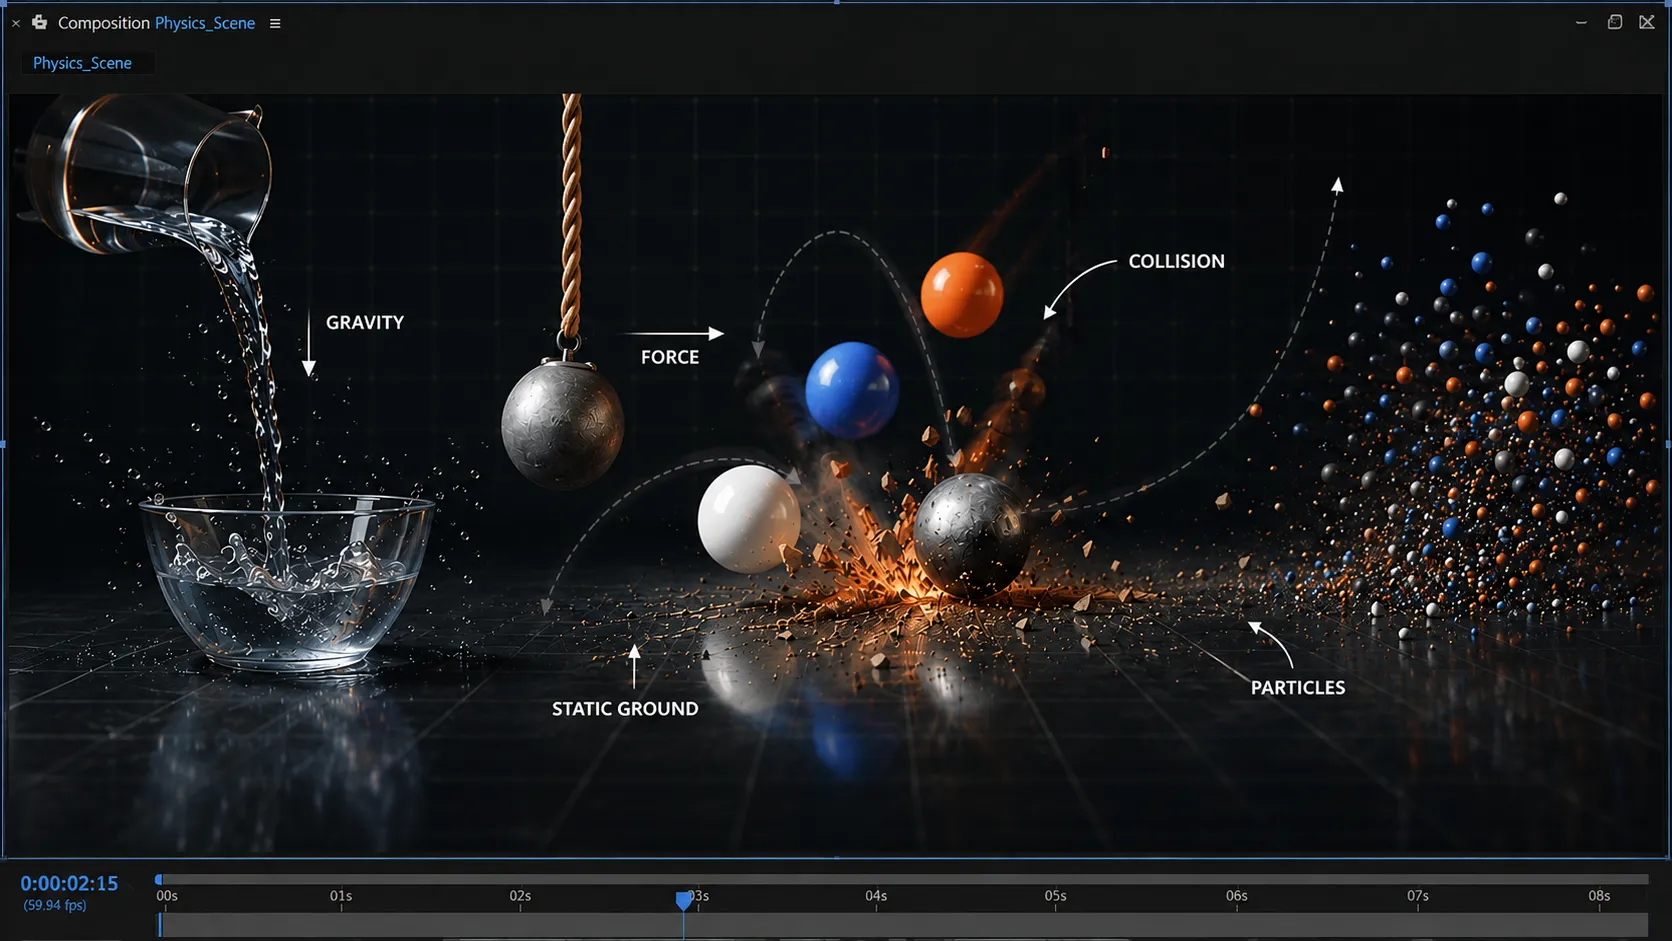
When Motion Feels More Real: Physics Simulation in After Effects 🎯
Are you experienced in using the PhysicDesk Plugin by aescripts? Have you ever been in the middle of creating a motion project and felt that the animation looked correct, yet something was still missing? For example, an object moves, but it feels weightless. A ball falls, but its impact with the ground looks artificial. Or an object moves without reacting to the environment around it.
The truth is, many of the differences between an ordinary animation and a professional motion design come down to these small details. How an object falls, how much speed it gains, how it bounces after impact, or how it responds to different forces are the elements that make movement believable.
However, creating all of these details manually isn’t always easy. For a simple motion, you might spend a few minutes adjusting a handful of keyframes and achieve a good result. But once the number of objects increases or the project requires collisions, stretching, gravity, particles, or fluids, controlling everything by hand becomes extremely time-consuming. That’s where physics simulation can make the entire workflow much simpler.

How Does Physics Simulation Help in Motion Graphics? ⚙️
Physics simulation means that instead of manually defining every aspect of an object’s movement with keyframes, you allow it to behave according to the laws of physics.
For example, when you drop a real ball onto the ground, it doesn’t simply travel in a straight line from top to bottom. It has weight, gains speed, collides with the ground, loses some energy, and bounces back up. All of these behaviors result from physical laws.
The same concept applies to motion graphics. Physics engines give objects properties such as weight, friction, elasticity, and collision, making their movement appear much more natural.
This is especially useful for projects such as product advertisements, logo animations, intro sequences, cartoon-style motion graphics, and even destruction scenes. Very often, what makes an animation look professional isn’t the number of effects you’ve used, but these subtle and natural physical reactions.
Traditional Ways of Creating Physical Motion in After Effects 🎬
Before physics simulation tools became part of motion designers’ workflows, most animations were created manually. After Effects itself provides powerful tools for this, and by combining several techniques correctly, you can create many natural-looking animations.
For example, by using:
- Position & Rotation Keyframes: Define the movement path and object rotation.
- Graph Editor: Precisely control speed, acceleration, and deceleration.
- Easy Ease: Smooth the beginning and end of animations.
- Motion Blur: Make movement feel more realistic.
- Expressions: Create repetitive motions such as bouncing, shaking, or oscillating.
You can recreate many simple physical behaviors. For instance, if you want a ball to fall from above, you can animate the falling path with keyframes, adjust its speed using the Graph Editor, and make a few small tweaks to give it a stronger sense of weight and acceleration.
For simple projects or scenes containing only a few objects, this approach works perfectly well, and sometimes manual control can even produce more precise results.
When Manual Animation Becomes Difficult and Time-Consuming ⏳
The main challenge begins when the number of elements and interactions inside a scene increases. Imagine a project where several objects need to fall simultaneously, collide with each other, a rope needs to swing, particles must spread throughout the scene, and each element should react differently to its surroundings. Under these conditions, creating every detail with manual keyframes quickly becomes complicated.
Even if the initial result looks good, achieving natural movement usually requires repeatedly adjusting timing, speed, spacing, and object reactions. By default, After Effects doesn’t know how a heavy object should fall or how it should react after impact—those behaviors must all be created manually. As a result, projects involving collisions, gravity, elasticity, or fluid simulations can consume a significant amount of animation time.
This is exactly where physics simulation tools become valuable. Instead of manually building every behavior, you simply define the initial conditions, and the system calculates the natural movement and reactions for you.
PhysicDesk 2: Bringing Real Physics into After Effects 🚀
PhysicDesk 2 is a 2D physics simulation tool for After Effects that helps you create motion that doesn’t simply move—it actually behaves. Instead of spending hours building keyframes for every collision, fall, stretch, or natural reaction, you define the physical rules and let the physics engine calculate the results.
The main idea behind PhysicDesk is to provide a complete simulation environment directly inside After Effects. You can import objects directly from your composition, create new shapes, or even design them inside the panel itself. Then, you define how each object should behave. Whether an object should be heavy and fall quickly, be lightweight and slide across a surface, behave as a soft body, or connect to other elements, everything is fully controllable.
One of the most impressive features of PhysicDesk is that the simulation results aren’t just fixed outputs. Once you’re satisfied with the motion, you can convert it into actual After Effects keyframes or even use Expressions. This means that after the simulation, you can still adjust timing, speed, easing, and movement details while keeping the project fully editable.
Creating Natural Motion with Different Physical Behaviors 🎯
One of the most important parts of PhysicDesk is its object behavior system. In a traditional animation, you typically define the movement path yourself. Here, in addition to the path, you also define how each object interacts with the world around it.
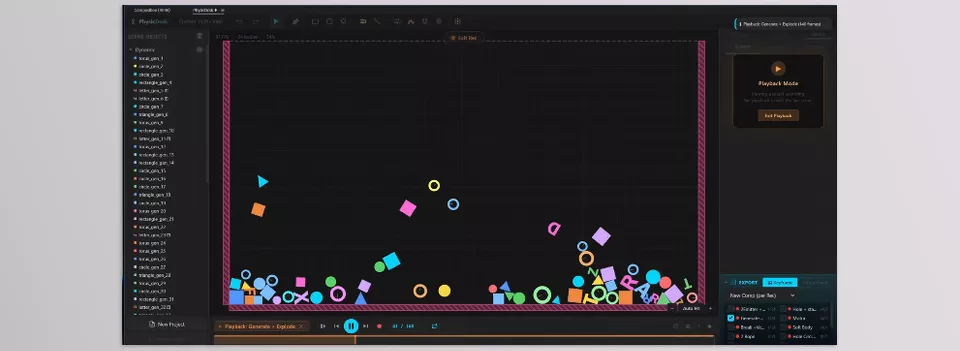
For example, you can set an object to Dynamic mode so it’s affected by gravity, collisions, and various forces. In this mode, the object behaves like a real physical body—it falls, collides with other elements, and reacts naturally.
On the other hand, Static mode is designed for creating fixed surfaces and obstacles. You can build floors, walls, or any solid surface that other objects can collide with while remaining stationary.
For repetitive motion, there’s Motor mode, which lets you create continuous rotations, oscillations, or back-and-forth movement. This is ideal for wheels, pendulums, or mechanical components that are constantly in motion.
Another interesting option is Soft Body, designed for soft, flexible objects. With this feature, you can create jelly-like, rubber, or cartoon-style objects that deform upon impact and then return to their original shape.
There are also modes such as Elastic for spring-like movement, Path Follow for motion along predefined paths, and Keyframed/PhysLink for combining manual animation with physics. This allows you to design a movement yourself and then let physics influence it.
More Precise Control Over Collisions and Object Reactions 💥
One of the key factors that makes movement appear realistic is how objects react after collisions. PhysicDesk provides various controls for fine-tuning these reactions.
You can define how much an object bounces, how much it slides across a surface, or how strongly it resists external forces. By adjusting properties such as Mass, Friction, and Bounce, you can give each object unique physical characteristics.
For example, a rubber ball should behave very differently from a metal object. One should bounce significantly, while the other should feel heavier and more solid.
You can also define custom reactions to collisions. For example, when two objects collide, a specific event can be triggered, or a sound can play. This feature is especially useful for motion graphics that need to synchronize with audio or environmental events.
Simulating Water and Fluids with Greater Control 💧
One of the biggest additions in PhysicDesk 2 is its fluid simulation system. Creating water, other liquids, or any material with flowing behavior has always been one of the most challenging aspects of motion graphics, because liquid movement involves far more than simple translation. Surface shape, splashes, foam, waves, and deformation all need to work together.
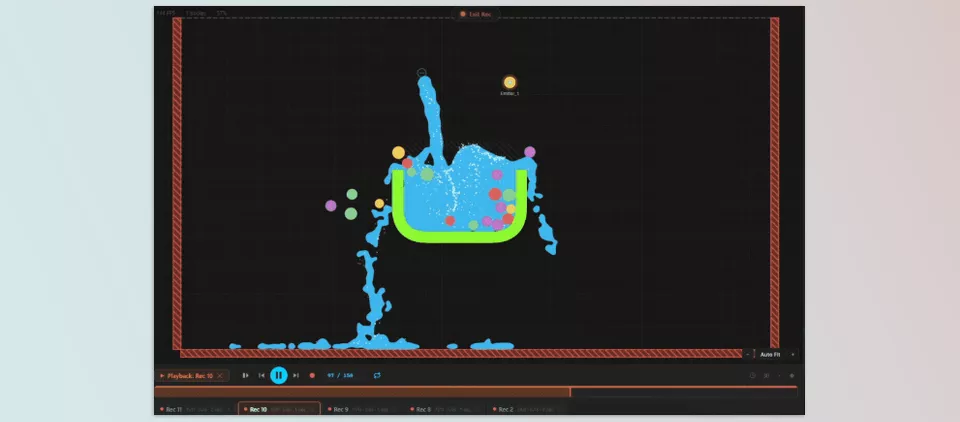
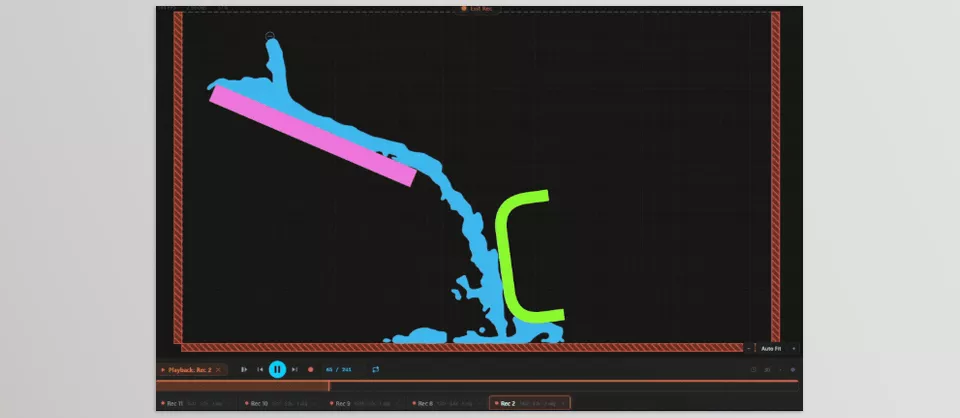
With the Liquid Simulation system, you can create scenes such as pouring water, collecting liquid inside a container, liquid flowing across a surface, or splashing droplets.
This system also lets you control properties such as viscosity, liquid size, splash intensity, foam, and surface details. As a result, you can create either exaggerated cartoon-style motion or move toward a more realistic simulation.
Most importantly, just like the rest of PhysicDesk, fluid simulation outputs remain editable and are imported into After Effects as fully controllable elements.
Creating Cartoon Animations with Squash & Stretch 🎨
One of the new features in version two is Squash & Stretch, the same animation principle used in professional animation for decades to make movement feel more lifelike.
With this feature, objects can stretch while moving, squash when they collide, and then return to their original shape.
For example, a cartoon ball can flatten slightly when it hits the ground, then bounce back up. Or a simple character can become much more flexible while moving.
This feature is especially valuable for fantasy motion graphics, creative advertisements, and cartoon-style animations because it gives movement a much stronger sense of life.
A Particle System That Interacts with the Environment ✨
PhysicDesk isn’t limited to primary objects. It also includes a built-in particle system for creating various visual effects.
You can emit particles from points, lines, circles, or custom paths, and even use your own text or shapes as particle emitters.
For example, a logo can transform into thousands of particles as it enters the scene, scatter through space, and then reform into its original shape.
Unlike a standard particle effect, these particles don’t simply move—they can collide with the environment, respond to physical forces, and behave much more naturally.
Building Complex Motion with Ropes, Springs, and Joints ⚙️
Some motion graphics cannot be created with a single object alone. Sometimes multiple elements need to be connected and influence each other.
PhysicDesk includes a Joint system that lets you connect objects in several ways.
Using Rope and Chain, you can create ropes and chains with realistic movement. With Spring, you can generate spring-like motion, while connectors such as Pivot, Weld, and Wheel let you build more advanced mechanical systems.
For example, creating a hanging object, a mechanical device, a gear mechanism, or a moving chain becomes much easier with this system.
Moving Objects Toward Specific Goals 🎯
One of the interesting additions in version two is Goal Solver. This feature helps an object reach a specific target while allowing physics to compute the most natural path of motion.
For example, if you want a ball to hit a particular point, instead of manually animating the entire trajectory, you simply define the target, and PhysicDesk calculates the appropriate path.
Additionally, with Path Spring, you can draw a custom path and have objects move along it while maintaining spring-like, physics-driven motion.
Driving Motion with Audio and Sound Effects 🎵
PhysicDesk also supports linking motion to audio. With Sound Driven Physics, you can connect different object or particle properties to audio frequencies.
For example, in a music video, you can make objects move, particles emit, or a logo react to the bass beats of the soundtrack.
This feature is especially useful for creating music-driven motion graphics, visualizers, and projects that need to synchronize with rhythm.
Creating Destruction, Fractures, and Explosions 💥
For scenes that require destruction effects, PhysicDesk includes tools such as Explosion and Breakable.
You can configure an object to shatter upon impact or explosion, allowing its fragments to move according to real-world physics.
For example, you can create shattered glass text, an exploding logo, or a collapsing wall without manually animating every individual fragment.
A Faster Workflow for Building and Refining Projects 🚀
Beyond the simulation itself, PhysicDesk also focuses on improving workflow speed. You can create shapes directly inside the panel, import objects from your composition, save multiple simulation variations, and choose the best result.
There’s even a feature called Record Pool that lets you keep multiple simulation runs and compare versions without having to rebuild everything from scratch.
Finally, once you’re happy with the result, you can transfer everything directly into the After Effects timeline and continue working using the application’s standard tools.
This level of control makes PhysicDesk much more than a simple tool for creating a few physical movements—it becomes a complete environment for building motion graphics with more believable behavior, reactions, and realism.
A Few Tips for Getting Better Results with PhysicDesk 💡
PhysicDesk is a powerful tool, but, like any simulation tool, the final result depends more on how you use it than on the settings alone. A few simple tips can help make the motion look more natural and reduce the time you need to spend on final adjustments.
- Don’t Overexaggerate the Physics Settings: Increasing values such as Bounce, speed, or forces might make the movement look more exciting at first, but it can often make the result feel more like an artificial effect than realistic behavior. It’s better to start with reasonable values and gradually work toward the result you want.
- Focus on the Motion First, Then Work on the Appearance: Before getting involved with colors, effects, and visual details, make sure the movement itself looks correct and natural. A simple but well-designed motion usually has more impact than a crowded scene filled with effects.
- Don’t Be Afraid to Run Multiple Tests and Simulations: Especially in scenes involving liquids, collisions, or destruction, the first result isn’t always the best one. Create several versions, adjust the settings, and choose the best behavior to gain more control over the final output.
- Make the Final Adjustments After Baking: One of the advantages of PhysicDesk is that you still have full control over the project after the simulation. Once you convert the result into After Effects keyframes, you can adjust the timing, movement speed, or even certain details and fine-tune the animation exactly according to the project’s needs.
Ultimately, the best result comes when you see the simulation as a starting point, not the end of the process. PhysicDesk simplifies the difficult part of creating physical behaviors, but it’s your creativity that makes the final result unique and professional.
When Motion Is More Than Just Movement, It Gains Emotion 🎯
Very often, the difference between an ordinary motion design and a professional result doesn’t come down to major things such as the number of effects or the complexity of the project. Instead, it’s these small details that allow the audience to connect with the movement. An object reacting slightly upon impact, a liquid behaving naturally, or an object still carrying a sense of weight and energy after moving are what make a simple animation believable.
The problem is that creating these details manually can easily take up a lot of your time. Instead of spending hours adjusting hundreds of keyframes for collisions, stretching, falling objects, or particle movement, PhysicDesk 2 helps you complete this more complex part of the process faster and keep your focus on the project’s idea, design, and creativity. In other words, instead of struggling with motion settings, you have more time to improve the animation itself.
For anyone who works seriously with After Effects, motion graphics, advertising, or logo animation, having a physics simulation tool can make a major difference. Some movements, no matter how much experience and keyframing are used to create them, are still difficult and time-consuming to make feel natural and alive. PhysicDesk 2 shortens this process and helps you create motion that feels more realistic, professional, and impactful without requiring complex calculations.
Are you searching for a clear explanation of After Effects tools and their categorization? Our After Effects tools guide covers the most common tools in After Effects and explains the differences among types of tools, such as plugins, scripts, presets, and templates.



