

Your Model Is Missing Something…
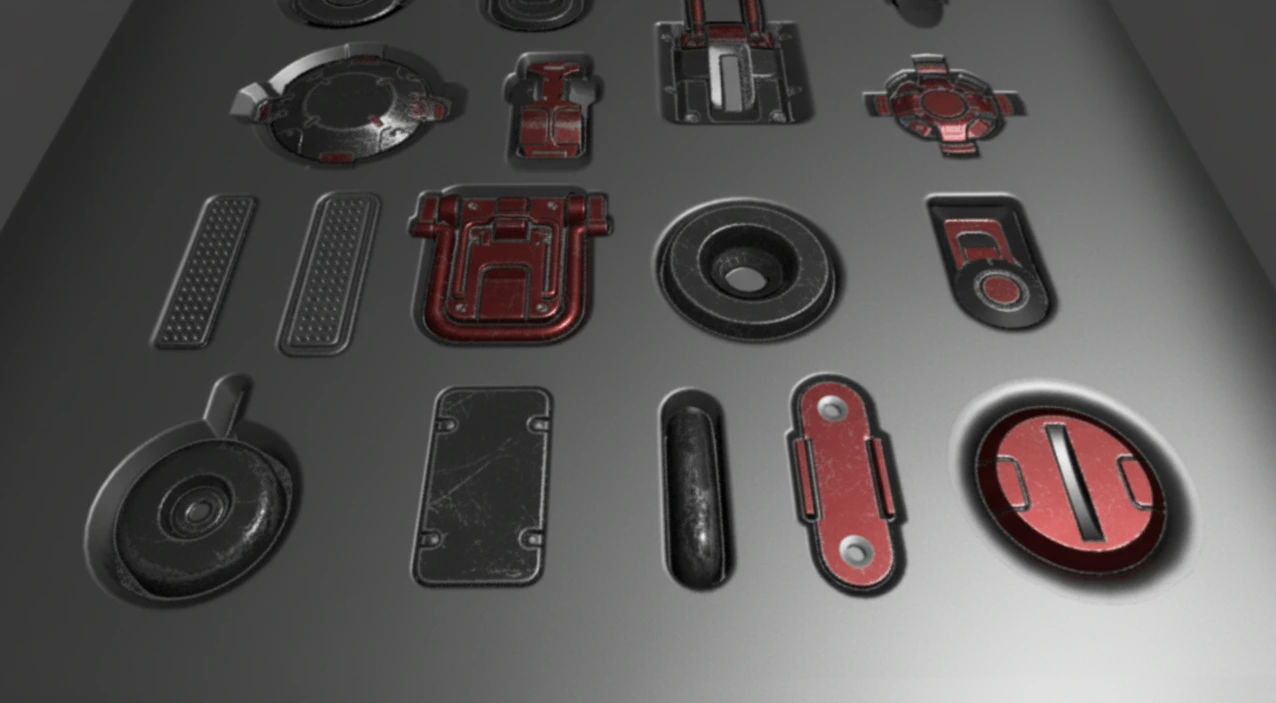
Are you familiar with how the DECALmachine works? Have you ever built a 3D model and felt like something was missing? Those tiny lines on a spaceship’s hull, small panels on a robot, or industrial bolts that make the model look more realistic and alive. Even when a model seems complete, the absence of these small details can make it feel empty and plain.
Yet it’s not always simple to add these details. Spending hours hand modeling every panel and bolt increases poly count for the model and panel/texture/UV workflows hardly ever work as expected – even for professionals – let alone for those with even less experience, not to mention on it’s much harder to get results on curved areas.
You feel there must be a way to add these details quickly, accurately, and effortlessly, without spending hours or compromising your main model. Something simple enough for beginners but flexible enough for pros. This is when every 3D artist’s mind starts searching for a solution…

Learn These Concepts Before Adding Details!
Before we dive into tools, let’s get familiar with some basic concepts to make adding details to 3D models easier and more intuitive.
1️⃣ What Is UV?
- UV is the method of unwrapping a 3D model’s surface onto a 2D image.
- When you want to apply textures to a model, you need to “unwrap” the surface onto a flat plane so that the image maps correctly.
- This process usually requires precision and experience and can confuse beginners.
2️⃣ What Is a Decal?
- A Decal is like a sticker, but designed specifically for the 3D world.
- It can be a logo, tiny lines, bolts, panels, or any small detail that makes a model look more realistic and engaging.
- The key feature of a Decal is that it can be applied directly to the model without needing UVs, and it works easily even on curved or complex surfaces.
UV ensures textures sit properly on the model for a clean, precise appearance, while Decals offer a fast and flexible way to add fine details like lines, bolts, or logos without dealing with UVs or complex workflows. Understanding these two concepts prepares you to add real, captivating details and makes professional toolsets much easier to grasp.
Before the Quick Way Existed…
Before modern tools, artists had two main methods for adding hard-surface details to 3D models:
1️⃣ Manual Modeling of Details
This method involved creating every single detail in 3D. Every bolt, panel, hole, or tiny line had to be modeled separately. On flat surfaces, and especially on curved surfaces, this process was extremely time-consuming and required high precision. Each added detail also increased file size, making scene management harder.
2️⃣ Using UV and Textures
This approach relied on UV mapping and texturing. First, the model was UV unwrapped, then textures were designed and baked onto the model. For beginners, this could be confusing, and even professionals often spend hours making small details look accurate. Any subsequent changes required redoing the UVs and textures.
Problems with traditional methods:
- Time-consuming: Both manual modeling and UV workflows could take hours.
- Complex and error-prone: Especially on curved or complex surfaces.
- High file size and difficult scene management: Manual detailing increased polycount and clutter.
- Low flexibility: Moving or editing details after creation was tedious.
Traditional methods were precise but slow, complicated, and prone to errors. Artists always sought a faster and easier way to add surface-level details.
Easily Stick on Details With DECALmachine
Now let’s talk about a tool that can truly make 3D modeling faster and more appealing 😎
Imagine adding tiny details like spaceship hull lines, robot bolts, or small logos on vehicles. With DECALmachine, you can “stick” these details onto your model just like applying stickers—without damaging the main mesh or needing UVs and baking. Everything sits precisely and cleanly, whether on flat or curved surfaces.
Why DECALmachine Is Amazing:
- Add details without UV: Apply professional details without dealing with complex settings. Just select a Decal and stick it onto the model.
- Supports Trim Sheets and Atlasing: Perfect for game projects and large environments; place grouped, optimized details without increasing file size.
- Non-destructive and editable: Rotate, move, or remove Decals anytime without harming the original model.
- Game engine-friendly: Export easily to Unity and Unreal, ready for games or simulations.
Key Features:
1️⃣ Types of Decals:
Flat, Curved, Panel, and Info — each type serves a specific purpose; straight lines, curved panels, or information on a spaceship hull.
- Quick creation from image folders: Add multiple logos or stickers at once.
2️⃣ Professional Control:
- Adjust height, rotation, panel type, and other settings.
- Modal Adjust tool: Apply changes directly to the model and see results instantly.
3️⃣ Library Management:
- Organize Decals in Collections for easier access.
- Show/hide Decals in the viewport to keep scenes clean.
4️⃣ Parallax and Depth Support:
- Realistic details even in the Eevee viewport.
- Decal clarity is maintained at any scale; zooming in or out doesn’t affect details.
5️⃣ Use of Modifiers:
- Mirror, Array, Join, and Split without harming models or Decals.
- Full flexibility for repeating or applying details to multiple model sections simultaneously.
💡 DECALmachine combines speed, precision, and flexibility. Anyone can easily add professional details, maintain full control over appearance, and produce outputs ready for games or renders.
Small Changes, Big Impact
🎨 Before Using the DECALmachine:
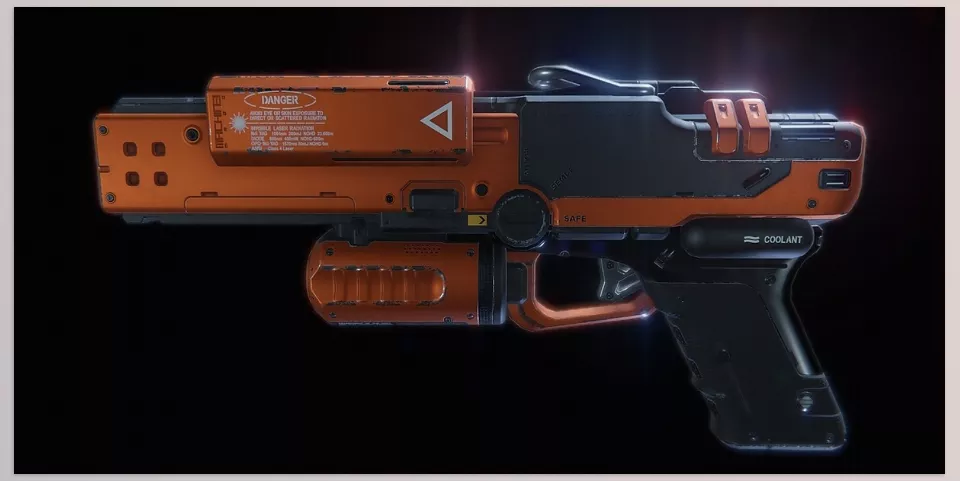
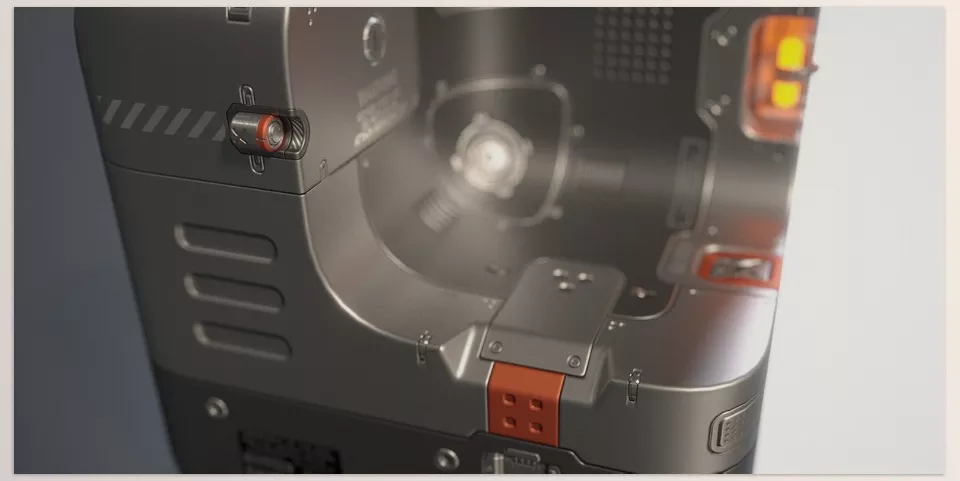
- Manual modeling of lines and panels: For example, spaceship hull lines had to be modeled in 3D. This was very time-consuming and increased the file size.
- Textures on UVs: Adding details via UV and baking was sometimes inaccurate; any change required significant time.
Result: Accurate but slow and error-prone, especially on complex or curved models.
✨ After Using the DECALmachine:
- Select Decal or panel from library: Simply pick the detail and paint it onto your model’s surface.
- Easy editing: Rotate, reposition, or remove Decals quickly without damaging the main model.
Final result: Models with realistic, clean, and lightweight details, ready for rendering or game use.
💡 Adding a before-and-after image or GIF can clearly demonstrate the difference and the tool’s impact.
Pro Tips and Techniques
- Use and customize Decal libraries: Start with ready-made Decals to speed up workflow, then rotate, resize, or tweak each to fit perfectly.
- Shrinkwrap Projection for curved surfaces: Ensures Decals stick precisely to curved surfaces without distorting either the Decal or the model.
- Trim Sheets and Atlas for game projects: Keep file sizes low while preserving detail quality. Especially useful when many models share similar details.
- Decals are independent objects: Use modifiers like Mirror or Array to copy or repeat details across multiple sections without damaging the original mesh.
- Learn Modal Adjust: Save a lot of time by adjusting height, rotation, panel width, and Decal type directly on the model and seeing instant results.
Following these techniques makes working with Decals faster, more flexible, and precise, resulting in more professional and realistic 3D models.
Adding Details Has Never Been This Easy
In the end, DECALmachine is an incredible tool for adding fast, realistic, and non-destructive hard-surface details. You can easily stick small details like lines, bolts, or logos onto your model without harming the main mesh or needing UVs.
It’s perfect for those who value speed and convenience, as well as those who need precise control, Trim Sheet and Atlas support, and game-ready outputs.
💬 If you’ve ever wanted to get incredible details on your meshes but never had the time, or couldn’t be bothered with UVs, DECALmachine is the perfect companion you’ve always needed! 3D modeling is quicker, easier and much more fun now.
So far, we’ve explored how to add details efficiently using DECALmachine. If you’re interested in mastering professional UV workflows and optimizing your UV layouts, don’t miss our full guide on UVPackmaster.



