

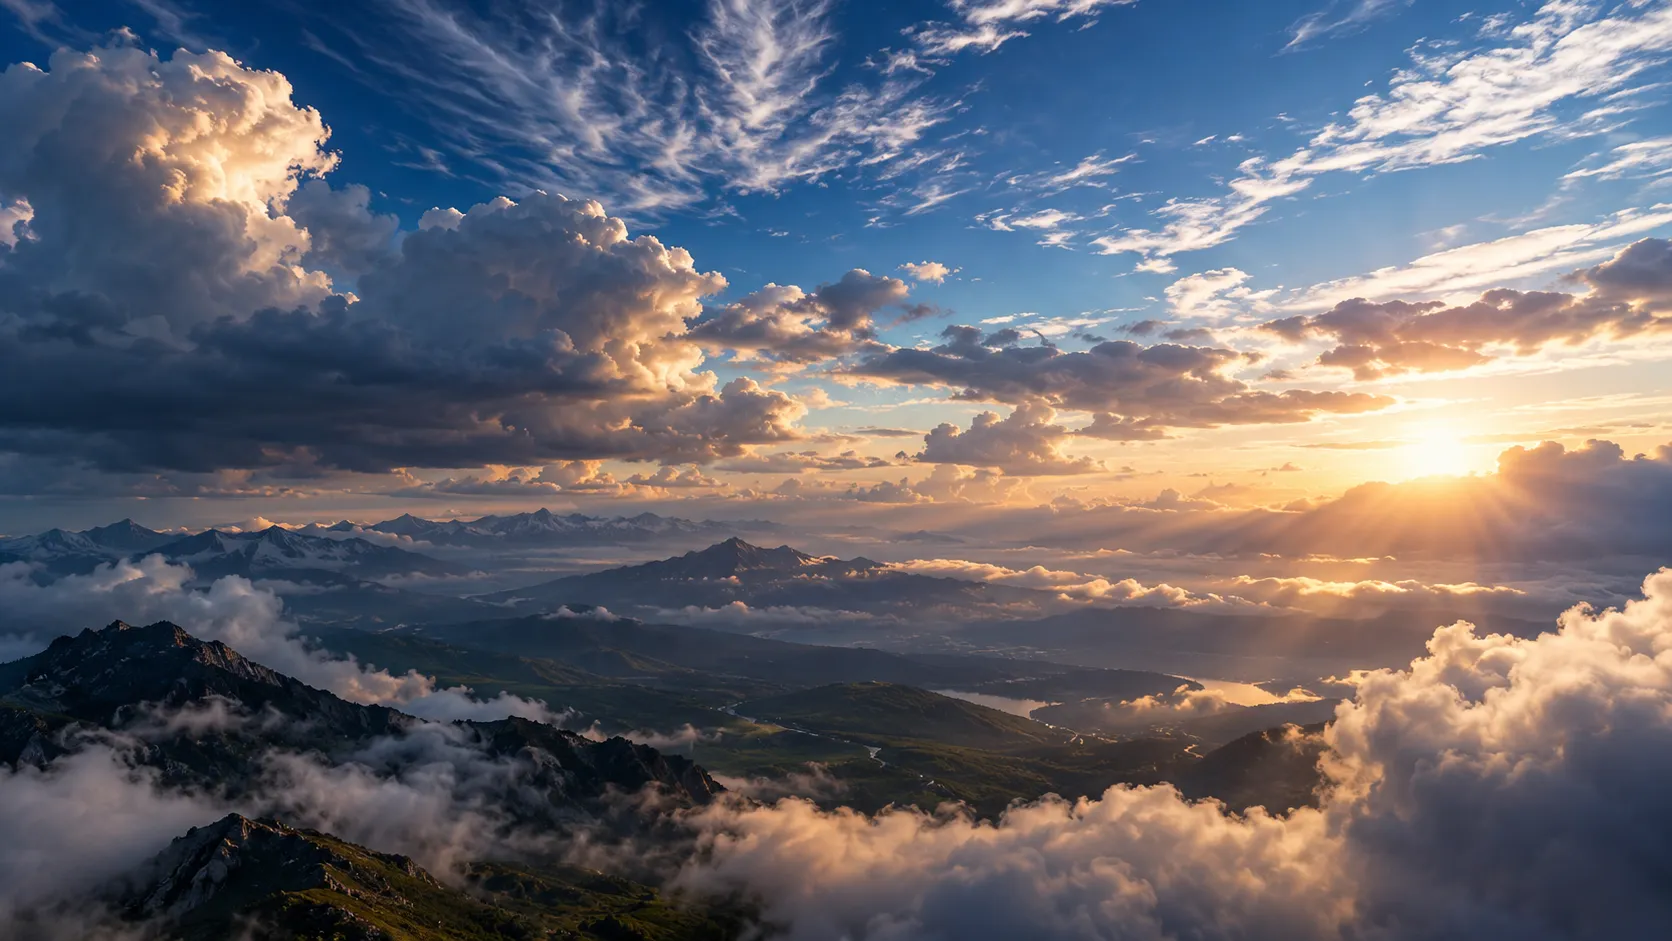
🌤️ When the Sky and Lighting Ruin the Realism of a Scene
Are you familiar with the True SKY by Superhivemarket? Have you ever created a detailed 3D scene, but the sky and lighting still don’t look as natural as you wanted? Maybe the sunlight looks too artificial, the clouds don’t fit the scene, or the sky looks unrealistic when the camera moves from the ground to a higher altitude.
Making a realistic sky is not just about adding blue colors and a few clouds. You also need to think about sunlight, sunset colors, and fog. All these things change how your sky looks. If they don’t look right together, even a detailed 3D scene can look fake.
On top of that, if you want to transition from daytime to nighttime within a project or move the camera from ground level into outer space, keeping all these details consistent can take a lot of time. That’s where having an integrated system for creating the sky, atmosphere, clouds, and lighting becomes important.

🌎 How Does a 3D Atmosphere Help Make a Scene More Realistic?
In 3D, the sky isn’t just a background that fills the empty space behind your models. The atmosphere affects how distant objects appear, ambient light color, image contrast, and even a scene’s sense of depth.
For example, when the sun is near the horizon, its light travels farther through the atmosphere, changing the light’s color and the sky’s appearance. On a cloudy day, direct sunlight is largely diffused, making shadows appear softer. These changes, combined with fog, clouds, and moonlight, make a 3D scene feel more natural.
When you create the atmosphere in 3D, these changes happen as the scene changes. This means that when the camera moves or the lighting changes, the sky and its surroundings can change too, instead of staying the same.
This capability is useful in various types of projects:
- Architecture and exterior rendering: Show a building in midday sunlight, at sunset, or under cloudy skies without creating a separate sky for each condition.
- 3D animation and filmmaking: To move the camera through clouds, show a city at night, or create sequences that travel from the Earth’s surface into the sky and space.
- Motion graphics and advertising: To create cinematic product shots or environments where natural lighting and atmospheric effects play an important role in visual appeal.
- Science fiction scenes: To depict planets, sunrises from orbit, travel through near-Earth space, or space environments with greater control over lighting and the atmosphere.
The more coordinated these elements are, the easier it becomes to maintain visual continuity between shots.
🛠️ Creating a Realistic Sky in Blender Without an Add-on
Blender has several built-in tools for creating skies, lighting, and fog. So, you don’t always need an extra add-on to make a natural-looking environment. But for more complex scenes, you may need to use several tools together.
Creating a Sky with Sky Texture and Sunlight
One simple way to create a sky in Blender is by using the Sky Texture node in the World Shader. You can change how the sky looks and use a Sun Light to control the direction and strength of the sunlight.
This method works well for buildings, landscapes, and many other 3D scenes. You can also create different times of day by changing the sky settings and moving the Sun Light.
This method falls short when you need a more comprehensive system to control multiple cloud layers, volumetric fog, auroras, and camera movement across extremely large scales at the same time. In such cases, you’ll need to configure more parts of the environment separately.
Using HDRI for Environment Lighting
Another option is to use HDRI images. These images provide environmental lighting information to the scene and can significantly improve reflections, surface illumination, and the sky’s appearance.
The main advantage of HDRI is that it lets you achieve attractive lighting quickly. However, because an HDRI is usually a static image of an environment, it offers less direct control over the 3D structure of clouds or physical changes in the atmosphere during camera movement. For shots captured from a fixed angle, this usually isn’t a major problem, but it matters more in extensive animations.
Creating Clouds and Fog with Volume
To make 3D clouds and fog in Blender, you can use tools like Principled Volume, meshes, and Noise Textures. These tools let you control how thick the clouds are, how light passes through them, and how they look.
However, making several layers of clouds at different heights can take a lot of time. You also need to adjust their lighting to match the sun’s position. Complex clouds and fog can also make rendering slower.
Blender’s built-in tools work well for many projects. But if you often create large environments, move the camera from the ground into space, or work with changing weather, a special add-on can make these tasks much easier.
🚀 True SKY: Complete Control Over the Sky, Atmosphere, and Lighting in Blender
True SKY is a Blender add-on that lets you create a 3D sky and atmosphere at Earth’s real-world scale. Instead of relying only on a sky image or a simple environment lighting system, you can manage atmospheric light scattering, volumetric clouds, fog, auroras, the sun, the moon, and other celestial bodies within a unified system.
One of the add-on’s main features is its ability to maintain the atmosphere’s scale and behavior across distances. The system uses Earth’s actual radius as its basis, while the atmosphere is represented by a volumetric layer approximately 100 kilometers deep. This lets you move the camera from Earth’s surface to high altitudes and into outer space without building a separate sky system for each region.
This capability is especially useful for space animations, camera movements through clouds, architectural renders with changing weather, and cinematic sequences that transition from day to night.
☀️ Physical Simulation of the Atmosphere and Light Behavior
One of True SKY’s most important features is its atmospheric light simulation system. The sky’s appearance and how the environment is illuminated depend on more than just light color and intensity. Atmospheric particles and composition also affect how light scatters.
The add-on provides three important parameters for controlling this behavior:
- Rayleigh Scattering: Rayleigh scattering occurs when light interacts with small air molecules and plays an important role in making the sky appear blue and changing its color around sunrise and sunset. By controlling this parameter, you can change how light scattering appears in the atmosphere.
- Mie Scattering: This type of scattering involves larger particles suspended in the air, such as dust and tiny droplets. Adjusting it can affect atmospheric haze, halos around light sources, and how light spreads under different weather conditions.
- Ozone Absorption: Ozone absorbs light, affecting the spectrum of light passing through the atmosphere. This parameter fine-tunes the atmosphere’s color and optical behavior in the atmospheric model.
The default values for these parameters are based on real-world Earth conditions, but you can change them when needed. For example, in an architectural render, you can use the default settings to achieve a natural-looking sky. By contrast, when creating a fictional planet, you can change the atmospheric composition to achieve a different appearance.
True SKY also uses physically based values for sunlight and sky illumination derived from photometric measurements. This means that light intensity is linked to physical values, and exposure settings can be aligned with real-world units. As a result, you’re less likely to rely on randomly changing values just to achieve the lighting you want.
☁️ Creating Multiple Volumetric Cloud Layers in a Scene
True SKY lets you use several 3D cloud layers at once. Instead of being limited to a single cloud layer or a ready-made image, you can combine different cloud structures to create a sky with greater depth and variety.
The cloud types mentioned in the product description include:
- Cirrus: Thin, high-altitude clouds that can be used to create calm skies or add subtle details at higher elevations.
- Cumulus: Puffy clouds with a more pronounced shape, suitable for daytime skies with clearly defined clouds.
- Stratus: Layered clouds that can cover large areas of the sky and create an overcast or gloomy atmosphere.
- Nimbus and storm clouds: Create denser clouds and large cloud walls for scenes with more severe weather.
- Hero Fog Volumes: Fog volumes that you can use to create layers of haze and gain better control over the atmospheric environment in a scene.
This system’s advantage isn’t limited to cloud variety. You can place multiple layers at different heights and positions at the same time. For example, you can combine a thin, high-altitude cloud layer with denser cloud formations and fog near the ground to create the atmosphere of a coastal city or mountainous region.
Because these layers are processed as 3D volumes, light can interact with their structure, and the clouds’ appearance changes with the camera’s viewing angle. This feature is especially important for shots where the camera moves through clouds or travels from above a cloud layer down to Earth’s surface.
🌅 Setting the Sun’s Position Using Coordinates, Date, and Time
In True SKY, you can set the sun’s position using geographic and time information. This section includes controls for latitude, longitude, time of day, and day of the year, letting you match lighting conditions to the sun’s actual position.
For example, suppose you want to render a building at a specific time of day, with the shadow angles based on the sun’s position in a particular city. By entering the location and time, you can use the calculated sun position instead of adjusting the light entirely by hand.
This feature is useful for architectural rendering, recreating a location’s lighting conditions, and creating animations where the time of day changes.
These controls can also be animated. For example, you can change the time of day throughout an animation to show the sun’s movement, changes in sky color, and shifting shadows in a timelapse.
If you need specific coordinates, the Manual Coordinates section lets you enter geographic data manually.
🌙 Automatically Transitioning the Sky from Day to Night
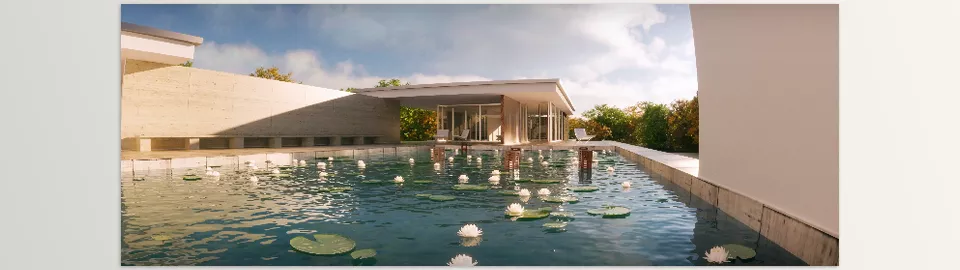
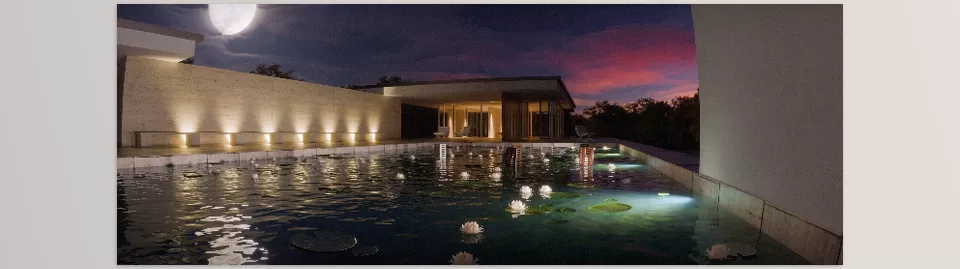
In scenes where changes in the time of day matter, you don’t need to build all the sky and atmospheric settings from scratch for nighttime. In True SKY, placing the sun below the horizon automatically updates the sky color, atmospheric conditions, and ground fog.
This is useful for long animations or gradual time-of-day changes because different parts of the environment can respond to the sun’s position without requiring you to manage each one as a separate system.
A moonlight system is also included for nighttime scenes. Moonlight and ambient illumination keep surfaces such as rocks, vegetation, and water visible without requiring numerous artificial lights to illuminate every detail.
For example, in a nighttime architectural render, you can combine the building and its surroundings with moonlight and practical environmental lights. In a cinematic shot, you can also use nighttime illumination to create a calm, mysterious, or science-fiction atmosphere.
🌌 TrueAURORAS: Animated 3D Auroras
TrueAURORAS is one of True SKY’s standout features, designed to create animated auroras.
In this system, the aurora isn’t just a flat background image. Instead, it sits around the planet, above the cloud layers. This helps the aurora integrate more naturally into the 3D environment in shots where the camera moves or views the sky from different altitudes.
You can adjust the aurora’s color, intensity, and movement to match your project’s atmosphere. For example, in an animation set in polar regions, you can create an aurora with slow movement and controlled colors. Alternatively, in a science-fiction project, you can use different colors and intensity levels to create an otherworldly environment.
Because the aurora is animated, you can use it in animations and video sequences rather than limiting it to a single static frame.
🪐 From the Earth’s Surface to Orbit and Distant Celestial Bodies
True SKY is designed to work at Earth’s real-world scale, letting you create scenes where the camera travels from the Earth’s surface into orbit and farther into space.
At this scale, the atmospheric system, Earth’s curvature, and changes in the horizon’s appearance are taken into account. As a result, you can design a continuous camera movement that begins with a close-up view of a city, passes through the clouds, and reaches a view of Earth from space.
The following features are available for celestial bodies:
- Sun and Moon: Use for daytime and nighttime lighting and to create terrestrial or space scenes.
- Planets: Place planetary bodies in a scene and use them for space shots.
- Asteroid Belts: For creating denser space environments and science-fiction sequences.
- Adjustable Sizes: You can change the sizes of celestial bodies to suit your scene’s visual needs.
- Orbital Positions: The system supports real orbital positions for celestial bodies, allowing you to control their placement in the scene.
- Custom Emitters: The system also supports custom light sources or emissive objects, giving you greater control over the scene’s light sources.
According to the developer’s description, all nine major bodies of the Solar System, including Pluto, are ready to use in scenes. This feature is particularly useful for creating space animations. For example, you can place Earth in the background, add another planet, and control the size and position of the celestial bodies to create your desired composition.
However, having an atmospheric system and celestial bodies doesn’t mean that the camera path and entire animation are generated automatically. You still need to adjust camera movement, timing, and composition for each project.
✨ Lighting Effects in the Compositor
True SKY also provides custom compositor effects, letting you add lighting effects directly in the image-processing workflow.
The main effects introduced include:
- Sun Glints: Light glints associated with intense light sources, which you can use to emphasize the sun’s presence or create cinematic effects.
- Glows: Create halos around bright areas and soften intense lights.
- Ghosts: Create ghost-like reflections similar to those caused by internal light reflections inside a camera lens.
- Dispersion and Related Lighting Effects: Create dispersion effects and change the appearance of intense lights in the compositor.
For example, in a space shot, you can use sunlight glints to emphasize the light source, or in an advertising shot, you can add controlled light halos to the image.
The advantage of this section is that you have a set of controls provided by the add-on itself for adding these effects. However, adjust the intensity to match the image’s lighting and atmosphere, so bright areas don’t spread too much and details aren’t lost.
🎨 ACES and AgX Support for Color Management
True SKY supports ACES and, according to the developer’s description, also provides AgX acceleration.
ACES is a color management system used in professional image and film production workflows to maintain color consistency across different stages. Support for this system helps the add-on’s output integrate more effectively into projects that use an ACES-based workflow.
AgX is also one of Blender’s color management options, designed to control highlight appearance and transform colors for display output. The developer-mentioned AgX acceleration capability is part of the product’s advertised optimization features. However, its impact on speed and final output depends on the project conditions.
These features matter when you want to create multiple shots under different lighting conditions while keeping their color appearance consistent in the final output. However, using these features correctly also depends on Blender’s color management settings and how well they align with the post-production workflow.
⚙️ TrueSPEED: Choosing Between Render Speed and Quality
Simulating the atmosphere and volumetric clouds can make rendering more computationally demanding. To manage this, True SKY provides a set of performance and quality presets called TrueSPEED.
These settings let you balance speed and quality based on your workflow stage. For example, while adjusting the camera, cloud positions, and lighting, you can use preview-suitable settings. Once the scene is finalized, you can switch to higher-quality settings.
The developer claims that, under suitable conditions, using performance presets can increase rendering speed by up to 50%. This is a developer claim, and actual improvement depends on hardware, volume complexity, scene settings, and output quality.
These presets are especially useful for projects that use multiple cloud layers, fog, and atmospheric effects, where you don’t need the highest render quality at every stage of the workflow.
🌐 Creating HDRIs for Use in Other Tools
One additional feature of True SKY is the HDRI Builder tool, located in the Misc section. This tool allows you to export HDRIs with a simple setup.
An HDRI is a high-dynamic-range image used for environment lighting and reflections in 3D software. By creating an HDRI from an environment, you can also make the scene’s lighting information available for use in other workflows.
According to the product description, HDRI output can be used in Eevee or other 3D software and engines, including game engines. So, although the add-on runs only in Cycles, you can still use its HDRI output in a different workflow.
However, the exported HDRI isn’t a complete replacement for True SKY’s volumetric system, because an HDRI image alone cannot reproduce the 3D behavior of clouds and atmospheric changes as the camera moves.
💡 Controlling Multiple Light Sources
The Luminous Bodies section allows you to add multiple primary light sources alongside the default sun. For each source, you can adjust its color, size, and light output.
This feature helps you create science-fiction scenes or environments with multiple celestial light sources. For example, you can define multiple light sources with different colors for a fictional planet or add extra light sources in a space shot to achieve the desired look.
These controls allow you to change the lighting beyond what a single default sun can provide. However, to keep it natural, match each light source’s color and intensity to the project’s composition and visual goals.
🪨 Controlling Planetary Surface Displacement and Irregularities
The Primary Body section includes settings for controlling Displacement. These settings control how much a planet’s surface protrudes and how irregular it is.
For example, if you’re creating a stylized planet, you can keep the surface smoother. By contrast, for a close-up shot of a rough planet, you can increase the protrusions to match the project’s style.
This feature is useful when you want to control the main celestial body’s appearance, as well as the sky and atmosphere. However, the final level of detail also depends on the surface settings and other modeling elements.
🧭 Coordinate Settings and Manual Controls
In addition to setting the sun’s position based on geographic data, True SKY also lets you enter coordinates manually.
This feature is useful when you want to use a specific location or when the default data isn’t suitable for your project. By entering your desired coordinates, you can configure the lighting conditions for that location.
Combining this control with date and time settings allows you to create scenes with specific lighting conditions. For example, you can set the sun’s position for a particular time and use it in an architectural render or animation.
🖥️ A Simpler User Interface for Managing Settings
Although True SKY uses physical parameters and various controls, the developer designed its interface to simplify setup. Instead of building every component independently to create a sky and atmosphere, you can use the add-on’s controls to adjust environmental conditions.
The settings are organized into different sections, such as Misc, Primary Body, Celestial Objects, and Luminous Bodies. Each section controls a specific group of features, ranging from performance settings and HDRI creation to planetary surface controls, scattering coefficients, and light sources.
This structure makes it easier to find related settings in complex projects. However, a basic understanding of lighting and 3D rendering is still useful for accurately working with physical parameters and controls for space-scale environments.
⚠️ Important Note About the Render Engine
True SKY is designed exclusively for Cycles and doesn’t support its volumetric features in Eevee. According to the developer, this is because the volumetric features used by the add-on depend on Cycles’ capabilities.
So, if you’re creating a project with True SKY, plan to use Cycles. Volumetric renders may take longer than rendering a static HDRI or a simple sky system.
If you want to use the environment you’ve created in other workflows, the HDRI Builder tool lets you export environmental lighting. This is useful for reusing environment lighting, but it doesn’t transfer all the original system’s volumetric and interactive features to the target render engine.
🎯 Adjusting Lighting, Clouds, and Rendering in True SKY for More Natural Results
An advanced atmospheric system doesn’t automatically guarantee a natural, attractive final render. Camera angles, lighting adjustments, color management, and detail control still play a major role in the result.
- Start with a specific lighting condition: First, create a simple setup, such as a clear midday sky, and evaluate the lighting. Then gradually add clouds, fog, and color changes so you can more easily understand the effect of each adjustment.
- Match the sun’s position to the composition: If the sun is directly behind the subject, its details may become too deeply shadowed. Adjust the light angle to match the building’s shape, the environment, or the shot’s main subject.
- Combine cloud layers with a purpose: You don’t always need every type of cloud in one scene. For a calm day, thin clouds may be enough, while denser formations suit a storm sequence.
- Use faster presets for previews: During camera and lighting adjustments, use lighter settings. Once the composition is finalized, increase the render quality.
- Use lighting effects carefully: Glow and lens reflections can give an image a cinematic feel, but excessive intensity may reduce detail and contrast.
- Check lighting changes in long animations: If you’re animating the time of day or camera position, render several keyframes separately to ensure that changes in sky color, shadows, and clouds remain consistent throughout the camera movement.
Another important point: True SKY only works with the Cycles render engine. Its volumetric features aren’t supported in Eevee, so if your workflow is entirely based on Eevee, you should consider this limitation before choosing the tool.
🌍 From Volumetric Clouds to a Camera Journey from Earth to Pluto
Creating an aerial view of a city, moving the camera through storm clouds, or designing a journey that begins at Earth’s surface and continues into outer space requires a sky that stays consistent as the camera moves and lighting changes. In these projects, combining several static HDRIs or manually adjusting lighting and fog for every shot can complicate the workflow.
True SKY is designed to create these expansive environments in Blender. The add-on simulates Earth’s atmosphere at real-world scale, lets you use multiple 3D cloud layers at once, and adjusts the sun’s position based on geographic coordinates, time, and day of the year. You can change the sky’s lighting and color from midday to nighttime, create animated auroras, or move the camera from Earth’s surface to Pluto without building a separate sky for each section.
Features like TrueAURORAS for auroras, orbital-position control over celestial bodies, and TrueSPEED presets for faster rendering make this add-on well-suited for space shots, day-to-night timelapses, and expansive environments. However, True SKY only works with Cycles, and rendering volumetric clouds and atmosphere can take longer than rendering a simple sky or HDRI. So, choose it when you need this level of detail and scale.
If you want a thorough understanding of Blender’s tools and how to use them effectively in your own projects, our Blender Tools article is the perfect resource for you.