

🧩 Introduction
What is Blender Software?
Blender tools are addons and elements that work in conjunction with the functionalities of Blender to make 3D rendering. Blender itself is a free, open-source software for 3D modeling, sculpting, texturing, rendering, animating, editing, and game creation. It is a popular choice among 3D artists and developers for its powerful features, large community support, and flexibility. The software is highly popular among artists and developers due to its powerful features, large user community, and great flexibility.
Blender Tools
Blender alone is already amazing, but when combined with addons and extra content—like plugins, node groups, ready-made materials, and more—both your workflow speed and output quality improve significantly.
Understanding the different Blender tools categories helps you use these resources effectively.
Who Should Know These Categories?
Almost anyone using Blender and operating within these realms could benefit from an understanding of this collection of Blender features:
- 🎨 3D creators (modeling, texturing, character design, animation, etc.)
- 🎬 Video editors and animators (for video projects or motion graphics)
- 🧪 Programmers (creating addons, custom tools, scripting)
- 🛠️ Video game creators and those who create VR/AR components
- Beginners who have just started and are looking for faster, easier ways to learn
Knowing these categories helps you find answers faster, access the right tools, and manage your projects more cleanly, quickly, and professionally.
Basic Overview of Blender Tools and Content Categories
This overview introduces the main categories of Blender tools, providing a clear guide to what each type is and how it can be used.
| # | Category | Description |
|---|---|---|
| 1 | Add-ons | Scripted tools that add new capabilities to Blender. |
| 2 | Assets | Ready-made files (models, materials, rigs, characters, etc.) used in projects. |
| 3 | Node Groups | Pre-built node groups that perform specific functions (e.g., Shader Editor, Geometry Nodes). |
| 4 | Custom Shaders/Materials | Ready-made materials with advanced node setups for appearance and rendering. |
| 5 | Presets | Ready configurations for specific Blender sections (lighting, rendering, compositing, etc.). |
| 6 | Templates/Starter Files | Pre-made .blend files to start projects with predefined structure or settings. |
| 7 | Scripts/Operators | Lightweight scripts and automated commands (usually Python) to perform specific tasks. |
| 8 | Render Engines | Third-party render engines that replace Cycles or Eevee. |
| 9 | Brushes & Sculpt Tools | Custom brushes and tools for sculpting and painting. |
| 10 | Themes/UI Customization | Appearance and interface customizations for Blender (colors, windows, fonts, etc.). |
💡 In the following sections of this article, each of these categories will be discussed in detail:
A Detailed Understanding of Each Type of Tool and Content in Blender
In this section, we will introduce each of the 10 main categories of Blender tools and content in a simple and comprehensive way.
1. Add-ons
What are they?
Add-ons are one of the most important types of Blender tools. They are small, programmed software packages that add new features to Blender. They act like auxiliary tools that Blender doesn’t have by default, but by installing them, we can perform more specialized or faster tasks. Add-ons are usually written in Python and come as a single file or a collection of files added to Blender.
What are they used for?
Add-ons are useful in various situations, such as:
- Faster and more precise modeling
- Specialized animation tools
- Importing or exporting specific file formats
- Improving the user interface
- Automating repetitive tasks
- And many specialized functions that Blender does not have by default
Almost all Blender user groups—from 3D artists to developers, game designers, and animators—may need to use add-ons.
Real examples:
- Hard Ops and BoxCutter (for fast and precise modeling)
- Animation Nodes (for creating complex animations)
- BlenderKit (for accessing libraries of models and materials)
- Node Wrangler (a helper tool in the Shader Editor)
How do they get into Blender?
Add-ons usually come as Python files with a .py extension or a set of files and must be installed and enabled through Blender’s Preferences > Add-ons menu. Some add-ons are free, and some are paid. Blender also includes several built-in add-ons that only need to be activated.
Additional notes:
- Add-ons may not be compatible with all Blender versions, so you need to pay attention to the required version.
- Some add-ons can be complex and take time to learn but significantly increase speed and quality.
- Installing unofficial or unknown add-ons might pose security risks; it’s best to download from trusted sources.
To put it simply: Add-ons are like extra kitchen tools added for cooking special dishes, making the cooking process easier and more professional. Blender works without them, but with add-ons, we can work much better and faster.
2. Node Groups
In Blender, Blender tools like Node Groups help users create complex setups efficiently.
What is a node?
In Blender, a “node” is a small block or visual box that performs a specific task. A node takes inputs, processes them, and produces outputs. Connecting nodes together forms a network or chain of operations that leads to the final result.
This system is mainly used in areas like Shading (material and texture creation), Compositing (image effects), and Geometry Nodes (parametric modeling).
Simply put, nodes are like electrical circuit parts or plumbing pipes that transfer and process data (color, numbers, positions, textures).
Example: To create a wood material, you first connect a Wood Texture node, then a ColorRamp node for color adjustment, then the main material node (Principled BSDF), and finally the Material Output node.
What is a Node Group?
A Node Group in Blender is like a magic box that collects several nodes and turns them into a single node unit.
When several nodes are combined to perform a complex task, instead of managing them individually, we put them inside a Node Group.
For example, if we have several nodes to create a wood material, we can save this set as a Node Group and easily use it in different projects.
What is it used for?
- Avoiding repetitive work
- More organized and tidy node management
- Simplifying and speeding up complex tasks
In fact, Node Groups help us condense and organize nodes to make their use and sharing easier.
How do they appear in Blender?
A Node Group appears as a single node in the Node Editor. Clicking on it lets you enter the group to see or edit the nodes inside. This makes projects cleaner and easier to read.
Real-world examples of Node Groups in Blender:
- Complex materials: Node Groups for wood or metal materials in products like Superhive Market’s Realistic Wood combine several texture and color nodes into one group for faster work.
- Visual effects: Node Groups for combining effects like blur and color grading in products like Superhive Market’s Cinematic Effects Pack, making it easy to use in various projects.
- Parametric modeling: Geometry Node Groups for creating complex shapes in products like Superhive Market’s Procedural Architecture, enabling easy sharing and quick editing.
Difference Between Node Groups, Add-ons, and Presets
Knowing the differences between Blender tools such as Node Groups, Add-ons, and Presets is essential for efficient workflow.
| Feature | Node Group | Add-on | Preset |
|---|---|---|---|
| Nature | A set of related nodes bundled into a single unit | A program or script written to add new capabilities to Blender | Ready-made settings (e.g., material, lighting, rendering) saved for quick use |
| How to use | Used directly in Blender’s Node Editor as a single node | Installed and enabled through Blender’s add-ons, adding new features | Loaded by the user to quickly apply settings |
| Flexibility | Allows internal changes and customization | Usually more complex, requires coding | Only preset settings, no structural changes possible |
| Sharing ability | Easy to share and reuse in different projects | Requires add-on installation on each system | Very simple; just load the preset file |
3. Asset
What is an Asset?
In Blender, an “Asset” refers to a ready-made, reusable file or element that can include a model, material, texture, animation, node group, or even an entire scene. In other words, an Asset is a self-contained unit that can be reused across different projects without the need to recreate it.
What is it used for?
- Speeding up workflow: Using Assets means you don’t need to build elements from scratch; just call them up.
- Consistency and coherence: Using standard Assets ensures that different elements in a project stay uniform and coordinated.
- Easy sharing: Assets can be shared easily with a team or other users.
- Reducing project size: Instead of copying elements repeatedly, Assets are referenced, making projects lighter.
Real-world examples of Assets in Blender
- Ready models: Such as weapon models, cars, or furniture from digital stores like Blendermarket or Superhive Market (e.g., Superhive Market – Realistic Furniture Pack).
- Ready materials: Complex material collections like Superhive Market – Realistic Wood Material that are easy to use across projects.
- Ready animations: Pre-made character movement animations or motion effects for faster animation workflows.
- Ready node groups: Packs of nodes for effects or materials available as Assets.
How do they get imported into Blender?
- Asset Browser: Blender has a built-in browser to organize and call Assets into projects.
- Importing files: Assets can be imported with formats like .blend, .fbx, .obj, etc.
- Adding to projects: Assets can be added as linked references or appended copies.
- Asset Library: You can create asset libraries in custom file paths and register them in Blender for project-wide access.
Additional notes
- Assets can be added as “Linked,” meaning changes in the original file propagate to projects using them.
- Using Assets helps keep projects lighter and resource management easier.
- Blender supports “Asset Marking,” allowing you to mark any object or material as an Asset to add it to the library.
- For professional use, Assets can be managed with versioning.
- Some stores like Superhive Market sell Asset Bundles, which include several related Assets.
For more information, watch this quick tutorial:
4. Custom Shaders / Materials
What are Custom They?
In Blender, “Custom Shaders” or “Materials” refer to sets of visual rules and instructions that define how the surface of an object reflects, refracts, transmits light, its color, and other surface properties. These shaders are usually created with shading nodes and can range from simple colored materials to complex realistic or artistic surfaces.
What are they used for?
- Creating realistic and artistic appearances: Custom shaders can simulate surfaces precisely, such as wood, metal, glass, skin, etc.
- Full control over effects: Ability to define special effects like subsurface scattering, reflection, refraction, transparency, and complex textures.
- Creating special effects: For example, holograms, water, smoke, fire, or any material requiring a unique look.
- Use in photorealistic rendering and games: Materials can be used in both rendering and game engines.
Real-world examples of Custom Shaders / Materials
- Hologram Effect Shader: A product by HuyKhoi2407 used to create hologram effects in Blender.
- Realistic Wood Material: Found in Superhive Market collections simulating wood with natural texture and reflection.
- Metallic Paint Shader: Available in add-ons or shading packs producing real metallic and reflective paint colors.
- Water Shader: Materials with transparency, refraction, and waviness to simulate water in animation and games.
How do they get imported into Blender?
- Created with nodes: Usually materials are built in Blender’s Node Editor using various shader nodes.
- Importing material files: Some materials come as .blend files or special formats like *.blendpack or ready-to-use packs.
- Add-ons and packs: Sometimes materials come bundled with add-ons or ready packs that provide access to custom shaders.
- Material Library: Blender’s Asset Browser supports managing and loading materials directly into projects.
Difference between Custom Shaders/Materials and Node Groups
- Custom Shaders/Materials are complete materials or shaders defining how a surface looks, including all relevant nodes for color, reflection, transparency, etc. They are final products intended for project use (e.g., a wooden material).
- Node Groups are organizational units inside the Node Editor, grouping several related nodes into a smaller reusable block. Node Groups can be part of a material or even larger node systems.
Why are they categorized separately?
- Node Groups are purely technical Blender tools for organizing and simplifying node networks and are not materials or shaders by themselves. They can be used in shaders, Geometry Nodes, or compositing.
- Custom Shaders/Materials are final results usually made from multiple nodes and node groups aimed at creating the appearance of a surface or object.
In simple terms: A Node Group is like a “small tool” or “component” used to build a material (shader), but it is not an independent material itself. The material is the final product made by combining several nodes and node groups.
Additional notes:
- Custom shaders can be very complex and should be optimized for faster rendering.
- Some shaders work better in specific render engines (like Cycles or Eevee).
- Custom shaders can also be created by writing GLSL or Open Shading Language (OSL) code.
- Ready materials can be modified and customized as needed.
- Learning and using material nodes is a key skill for producing professional renders.
- Some products like “Final LUT” allow real-time adjustment of colors and material effects.
Like other Blender tools, mastering custom shaders and materials can significantly improve both the quality and efficiency of your 3D projects.
If you’ve ever been confused about the difference between textures, materials, and shaders, this video breaks it all down in simple terms!
5. Preset
Presets are one of the most popular Blender tools that help speed up your workflow.
What is a Preset?
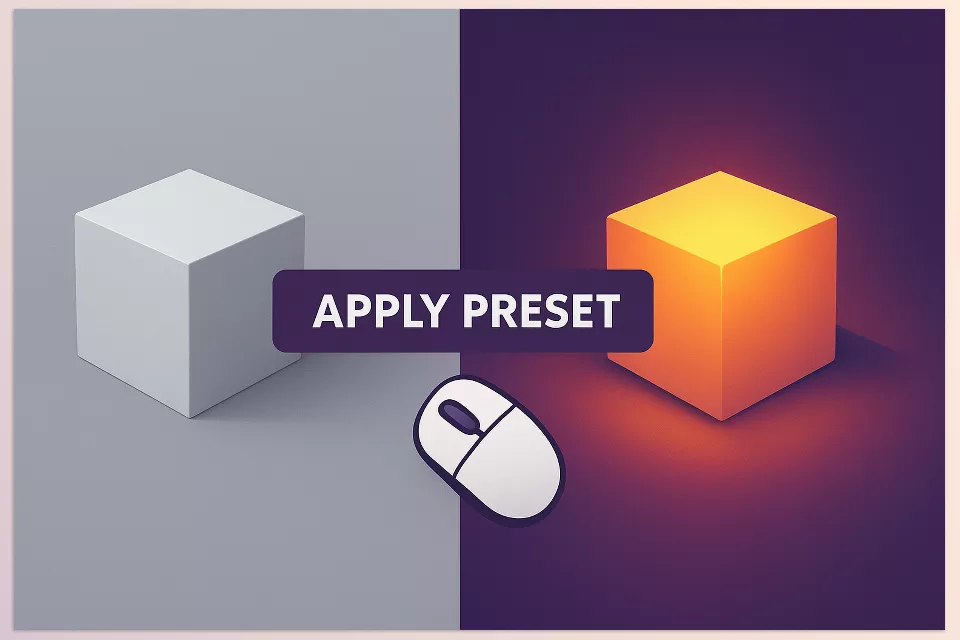
A Preset is a file or a saved set of configurations designed for quick and easy use in Blender. These settings can include materials, lighting setups, render settings, camera configurations, ready-made nodes, or even physics settings.
What is it used for?
- Time-saving: Instead of building settings from scratch, you can load a ready preset and quickly get results.
- Standardization: For large projects or teams, presets ensure everyone uses consistent settings.
- Ease of use: Even beginners can achieve professional results using ready presets.
- Learning aid: Presets serve as good examples to learn the structure and composition of settings.
Real-world examples:
- Superhive Market – Filmic LUT Preset: A color preset that gives your renders a cinematic look.
- Superhive Market – HDRI Lighting Presets: A collection of ready HDRI lighting setups for natural scene illumination.
- Superhive Market – Hair Shader Presets: Ready-made hair shader settings easily applied to hair models.
How do they get imported into Blender?
- As ready files like .blend, .json, or plugin/system-specific formats.
- Usually loaded via the Preset section in various Blender windows or tools (e.g., Shader Editor, Render Settings, Light Settings).
- Some addons or systems support direct import/export of presets.
Additional notes:
- Presets are generally not editable (or only editable in limited ways) and are meant for quick loading and applying settings.
- You can save and share your own presets.
- Presets are not limited to nodes; they can be lighting, render, physics, or even animation settings.
- Smart use of presets increases project speed and quality.
In short: Presets are ready-made packages that encapsulate experience and complex settings into a simple click, boosting your workflow speed and quality.
Difference and Use of Node Group vs Preset in Blender
| Aspect | Node Group | Preset |
|---|---|---|
| Nature & Structure | A collection of related nodes bundled into one unit. Editable internally. Flexible for organizing complex operations. | A predefined set of settings, usually non-structurally editable, provided for quick use. |
| Usage | Used directly in Blender’s node editor as a single node with editable internals. | Loaded as saved settings quickly applied to projects, mostly static. |
| Flexibility | Fully customizable; users can edit parts as needed. | Mostly fixed, designed for easy and fast application. |
| Primary Purpose | Helps manage complex projects and reduce repetitive work by organizing nodes. | Increases speed, enforces standard settings, and avoids rebuilding common setups. |
6. Templates / Starter Files in Blender
What are they?
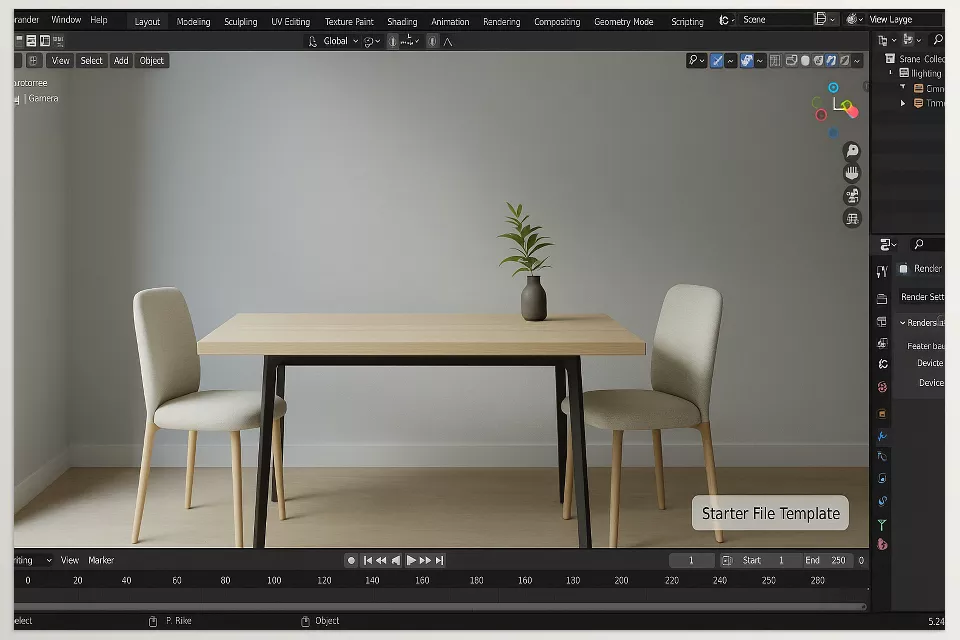
Templates or Starter Files are complete, ready-made files containing a full project or a structured section of it. They are comprehensive Blender tools that provide a full working environment to jumpstart your projects. Unlike node groups or presets that save just a part (like a node group or material settings), templates include the entire workspace — models, lighting setups, cameras, and even node setups. Simply put, a template is a ready project framework to start from.
What are they used for?
When you want to quickly start a project with specific structure and settings (e.g., architectural rendering with professional lighting, or character animation with rigging), templates let you begin without building everything from scratch, focusing on content instead. They are very useful for large, multi-stage projects as everything is pre-arranged and ready.
Real-world examples:
- Starter file for interior architectural render with full HDRI lighting, camera, and base materials from sites like Blendermarket.
- Character animation templates including rig, controllers, and initial animation setups.
- Ready projects for motion graphics with node compositing setups from CGTrader.
How do they get imported into Blender?
Usually as complete .blend files. You can open them as new projects or import specific elements via append/link into your current project.
Additional notes:
- Templates contain a full project, not just a part of it.
- They are very organized and standard, ideal for team collaboration.
- Unlike presets (which only store settings), templates come with models, scenes, and even animations ready.
- Great as guides and starting points for complex, large projects.
- Typically created by professionals and may include important technical tips and optimized settings.
7. Scripts / Operators in Blender
What are they?
Scripts and Operators in Blender are pieces of code written in Python that add new features and commands to Blender. Unlike nodes or node groups, which have a visual structure, scripts work behind the scenes and execute complex operations automatically or via a specific command.
What are they used for?
Scripts are used to automate tasks, add custom tools, or perform repetitive and time-consuming duties. These scripting Blender tools automate repetitive tasks and extend Blender’s capabilities beyond the standard interface. Operators are parts of these scripts that appear as buttons or commands in Blender’s user interface to perform an action with one click.
For example, converting multiple models at once, quickly changing parameters, or creating special modeling tools.
Real-world examples:
- A script or operator that automates character rigging (e.g., Auto-Rig Pro)
- Scripted tools for faster UV unwrap or light baking
- Add-ons that execute complex operations like object scattering with a single button
How do they come into Blender?
They usually come as Python files (*.py) which you install. After installation, they can be added to Blender’s panels, menus, or shortcuts and run via the UI.
Additional notes:
- Scripts/Operators rely on coding and don’t have a visual interface like nodes.
- They enable creating fully custom and complex tools beyond the capability of nodes.
- Updating and developing them requires programming knowledge.
- They are very effective in automating and optimizing workflows.
- Usually packaged as add-ons but with editable source code.
8. Render Engines in Blender
What are they?
A Render Engine is software that produces the final image or animation by calculating lighting, shadows, reflections, and textures from a 3D scene. Essentially, it is the heart of the image creation process in Blender. Render engines are vital Blender tools that determine the quality and style of the final output.
What are they used for?
A render engine converts 3D data (models, materials, lights, cameras) into a realistic or stylized image or video. Each engine uses its own methods and technology for simulating lighting, reflections, and shadows, producing different results.
Real-world examples:
- Cycles: Blender’s advanced physically-based renderer that produces high-quality, accurate lighting and shadows.
- Eevee: Blender’s real-time render engine, fast and suitable for previews and lightweight projects.
- LuxCoreRender: An open-source physics-based renderer focused on realistic lighting.
- Octane Render and Redshift: Popular external renderers connected via plugins, used for industrial and professional rendering.
How do they come into Blender?
Built-in engines like Cycles and Eevee come pre-installed; you just select one in render settings. External engines are usually installed as add-ons and then activated in Blender’s preferences.
Additional notes:
- Render engines differ from nodes/node groups; they handle final rendering, whereas nodes are mostly for building materials, effects, and fine adjustments.
- Choosing a render engine depends on your project type, rendering time, and desired quality.
- Some engines prioritize quality (like Cycles), while others prioritize speed (like Eevee).
- Render engines also depend on your hardware, sometimes requiring powerful GPUs or CPUs.
9. Brushes & Sculpt Tools
What are they?
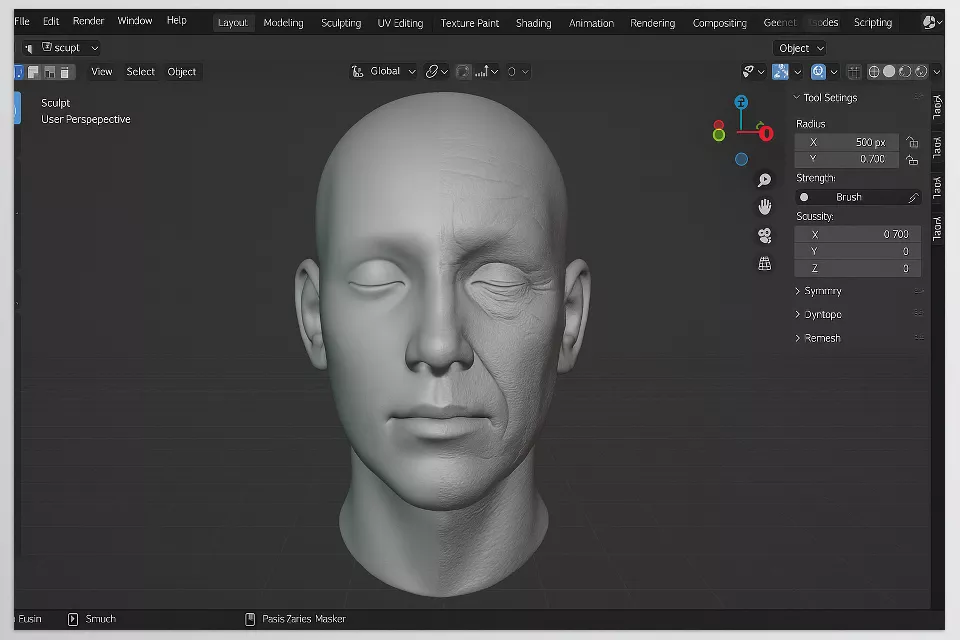
Brushes and Sculpt Tools are Blender tools used for organic, freeform shaping and modeling on meshes. Brushes come in various types, each producing different effects on the model surface, like pulling, smoothing, filling, or moving. These Blender tools give artists great control over the shape and detail of their models.
What are they used for?
They allow artists to create complex, natural, and detailed models. In digital sculpting, you can add fine details like wrinkles, muscles, or unique textures manually and precisely.
Real-world examples:
- Standard brushes like Draw, Smooth, and Grab used in almost every organic modeling project.
- Professional brush sets like Superhive Market – Ultimate Sculpt Brushes designed for speed and precision.
- Special brushes like Clay Strips or Inflate used for volumetric detail sculpting.
How do they come into Blender?
Brushes are usually imported as ready-made files or add-ons. After installation, they become selectable in the Sculpt Mode panel. Some sets include custom settings for pressure, size, and brush speed.
Additional notes:
- Brushes and Sculpt Tools are active modeling tools, not standalone assets or node groups.
- You can create custom brushes tailored to specific modeling needs.
- Using these tools requires artistic skill and understanding of volume and form.
- Often used with features like Multiresolution and Dynamic Topology for flexibility.
FAQ about Brushes & Sculpt Tools
Why are Brushes & Sculpt Tools different from Add-ons?
Brushes and Sculpt Tools are native Blender tools used directly in Sculpt Mode. Add-ons are programs that add new capabilities to Blender and can include brushes, but usually provide completely different tools or functionalities. So, brushes are core modeling tools, while add-ons may bundle specialized brushes or auxiliary tools.
Are Blender’s default brushes enough for all tasks?
Blender’s default brushes are very useful and good for starting out, but for more professional and precise projects, custom brush sets (like those available in Superhive Market) offer benefits like faster workflow, better control, unique effects, and optimization for fine details unavailable in default brushes.
10. Themes / UI Customization
What are they?
Themes and UI Customization in Blender refer to settings that change the look and feel of the software’s interface. This includes colors of windows, fonts, sizes, icons, and layout of UI elements. With these, you can personalize Blender’s interface to work more comfortably and attractively.
What are they used for?
The main goal of changing themes and UI customization is to increase productivity and user comfort. When the software environment matches your style and color preferences, your eyes get less tired and working long hours becomes easier. It also helps users needing simpler or accessible interfaces.
Real-world examples:
- Superhive Market – Dark Pro Theme: A dark theme with special colors for working long hours in low light and reducing eye strain.
- Superhive Market – Minimal UI: A minimalist, clean design for those who want uncluttered windows and icons.
- BlenderKit UI Customizer: An add-on providing advanced window and tool customization options.
How do they come into Blender?
Themes usually come as Python (*.py) or JSON files that you load and activate via Preferences > Themes. Some themes come bundled with add-ons and become available after installing the add-on. Like many other Blender tools, UI customization options can be tailored to match personal preferences and improve productivity.
Additional notes:
- Changing themes/UI does not affect Blender’s core performance, only the appearance and user experience.
- Blender allows fully custom themes that you can save and share.
- Suitable themes help maintain consistency in team projects.
- Always back up your settings before major UI changes.
Understanding Blender Tools: The Key to Successful Professional Projects
The variety of Blender tools is vast. These are often packages for specific intentions that can raise quality. For instance, node groups are a tool that reduces and merges various nodes into one usable collection, so there are no lost nodes that were created for one function. Custom materials and shaders let you create unique and creative looks with precise control over surfaces and colors. Presets and templates provide ready-made settings and files so you don’t start from scratch and can get results faster. Scripts and operators automate repetitive or complex tasks and add new features. Render engines define the quality and style of the final image, each with its own features and performance. Brushes and sculpt tools are mainly for detailed and accurate modeling. Finally, UI customization and themes help tailor your workspace for comfort and efficiency.
Understanding them and using them effectively puts you in a position to fine-tune your own design and production process, save time, and achieve unbelievably higher quality, more professional results. In the realm of Blender, distinctions and specific add-ons and tool is the best way to be creative and make unique projects.
If you’re curious about how each of these tools is actually built, you can check out Blender Tools Development article where I explain the development process in detail.
While Blender’s wide range of add-ons helps streamline modeling, rendering, and workflow, some tools also focus on enhancing the visual style of your projects. Among these, color-related add-ons can help you adjust tones, balance lighting, and achieve a cohesive look. To understand one of the most common methods for color adjustment in Blender, learn more about LUTs and how they can influence your final renders in our dedicated article: A Complete Guide to LUTs.



