

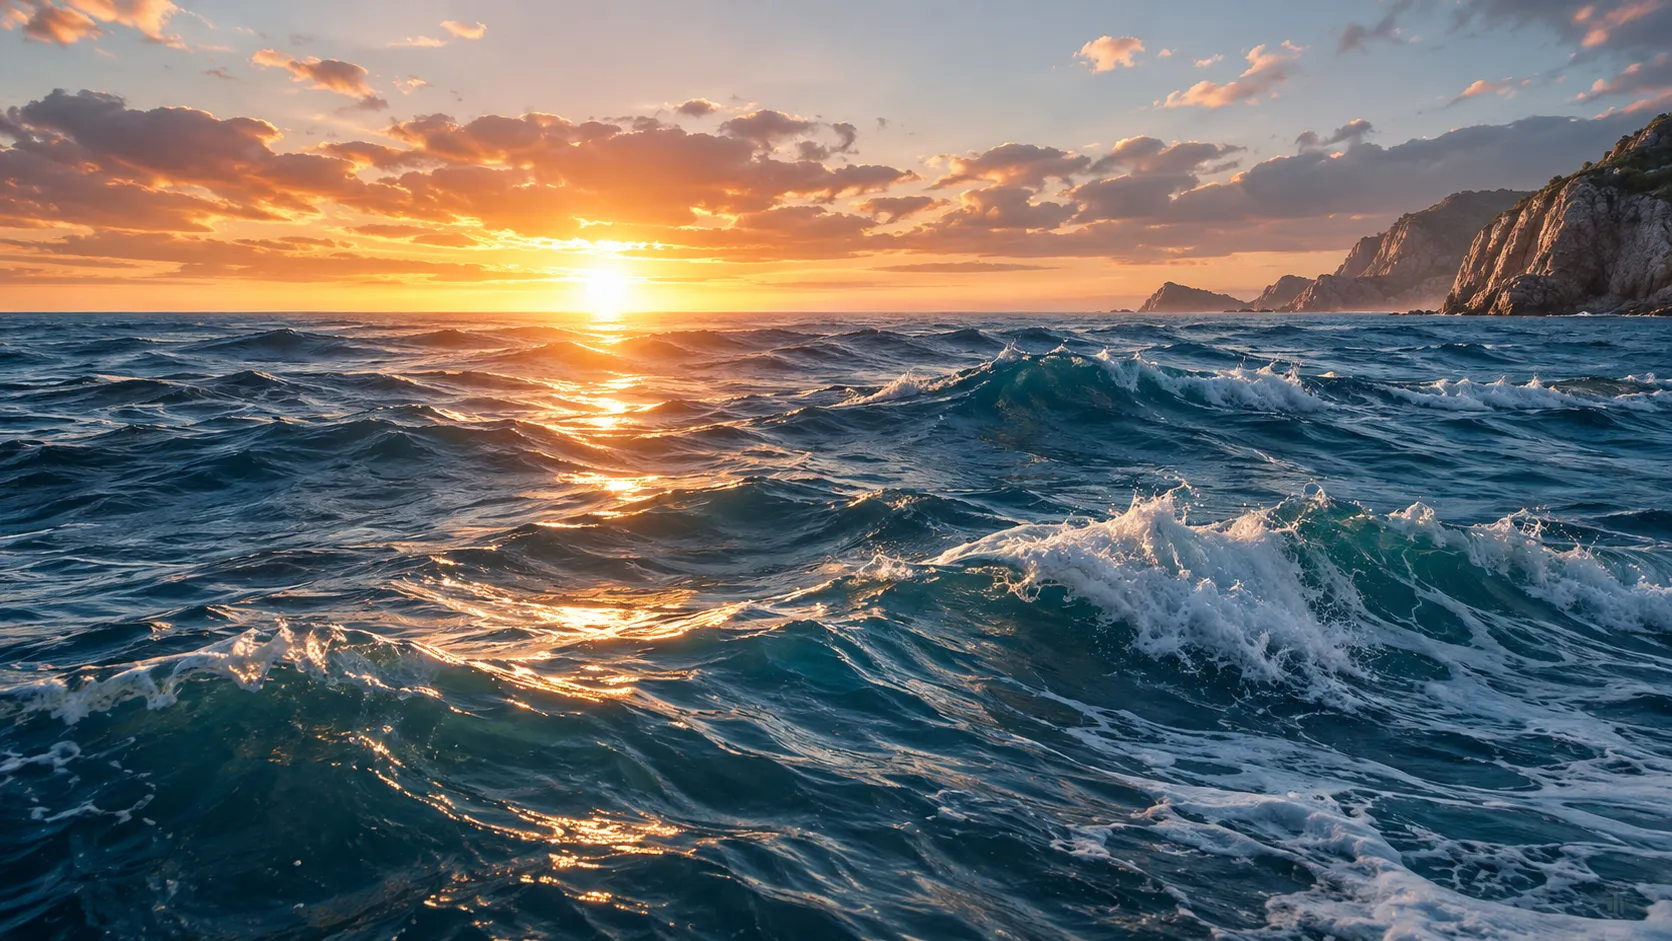
🌊 When Creating a Realistic Ocean in Blender Gets Difficult!
Are you aware of the capabilities of the Physical Open Waters – Ocean by superhivemarket? Creating a 3D scene of the sea or ocean might seem like a simple task at first. But when you want the water to look truly natural, things get a little different! You need to pay attention to wave movement, light reflections on the water surface, color changes in the depth of the ocean, and even how the water reacts to moving boats and different objects.
For example, imagine a boat moving across the ocean. If it doesn’t create any waves behind it, or the water around it doesn’t react to its movement, the scene will look very artificial, even if you’ve created the ocean waves and water material really well.
That’s why creating a natural water environment isn’t just about adding a few animated waves. You also need to coordinate wave simulation, water materials, lighting, and water interaction with objects. Doing all these things separately can take a lot of time, and sometimes adjusting and coordinating them becomes one of the main challenges of a project.

🌊 Creating a Natural Ocean Takes More Than Just Waves!
When you want to create a 3D ocean in Blender, it’s not just about making a large water surface and adding a few animated waves to it! To make the water look truly natural, you need to bring several different features together:
- Wave Simulation: Creating waves with different sizes, heights, and directions to give the water surface more natural movement.
- Water Material: Adjusting color, transparency, light reflection, and light refraction to make the water look more realistic.
- Water Interaction: Creating waves and changing the water surface when boats, ships, or other objects come into contact with it.
- Underwater Effects: Adding floating particles, light scattering, and volumetric effects to create a natural underwater environment.
- Surface Details: Adding small waves and surface details that become especially noticeable in close-up shots.
🎬 Where Can These Details Make a Difference?
For example, imagine you’re creating an animation of a ship moving across the ocean. If you only have regular waves and the water behind the ship doesn’t react to its movement, the result probably won’t look as natural as you expect. This is where the trailing waves behind the ship become important.
Or imagine you’re working on an advertising project where the camera needs to move very close to the sea surface. In this type of shot, large waves alone aren’t enough. Light reflections, water transparency, and small waves also become visible.
Even if you want to move the camera underwater, you’ll need other details, such as floating particles, changes in water color at different depths, and light scattering, to prevent the underwater environment from looking empty and artificial.
In fact, these small details are what turn a simple water surface into a believable ocean.
🛠️ How Can You Create an Ocean Using Blender’s Built-in Tools?
You don’t necessarily need to use third-party add-ons to create an ocean in Blender. Blender itself has several different tools that you can combine to build an animated water surface and make its appearance much closer to what you want.
First, we have the Ocean Modifier, one of Blender’s main tools for creating ocean surfaces. With this Modifier, you can create animated waves and adjust properties such as their height, size, and movement speed.
Along with it, there are several other tools that can help you improve the final result:
- Shader Editor: For creating water materials and adjusting color, transparency, and light reflections.
- Noise Texture: For adding small variations and more details to the appearance of the water surface.
- Displacement: For creating geometric changes and adding details to the water surface.
- Particle System: For creating floating particles and bubbles that can be seen underwater.
- Volume Scatter: For simulating light scattering and creating a sense of depth in the underwater environment.
By combining these tools, you can start with a simple water surface and gradually add waves, materials, and different effects.
🤔 Why Is Creating a Professional Ocean with These Tools Challenging?
The main challenge starts when you want to coordinate all these elements together. For example, the Ocean Modifier can create ocean waves quite well, but if you want a boat to move across the water and create trailing waves behind it, you’ll need additional solutions and settings. The same applies to creating Ripples around objects or showing the contact between water and objects naturally.
On the other hand, creating an underwater environment with floating particles, volumetric effects, and proper lighting requires separate settings for each element.
You also need to pay attention to mesh density, polygon count, and scene performance. The more details you add to the water surface, the harder it may become to manage the scene and keep your project running smoothly.
As a result, although Blender’s built-in tools are quite useful for creating water, achieving a detailed and realistic ocean can require a lot of manual adjustments.
🚀 Physical Open Waters – Ocean: Everything You Need to Create a Realistic Ocean!
If you want to create an ocean in Blender that goes beyond a few animated waves and also looks natural in terms of appearance and details, you need to be able to control different aspects of the water. From wave size and movement to water materials, how the water reacts to objects, and even the effects visible beneath the ocean surface.
Physical Open Waters – Ocean is a specialized Blender add-on that focuses exactly on these areas. It provides a collection of different features for creating and managing oceans, allowing you to build various water environments without dealing with separate and complicated settings.
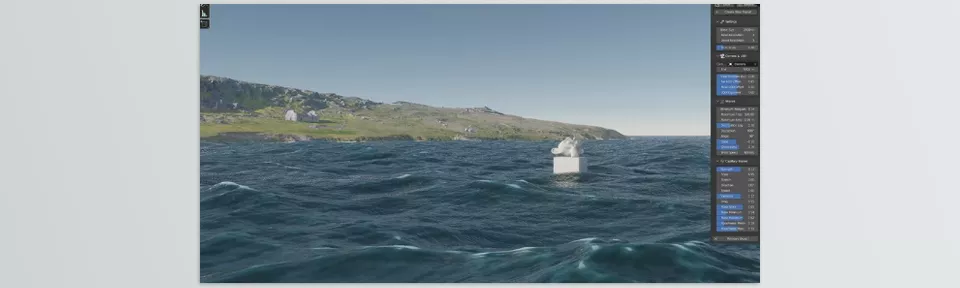
One of the important features of Physical Open Waters – Ocean is that you can see your water changes in Real-Time. This means that when you change wave height, material appearance, or other settings, you can check the results immediately inside Blender. The add-on is also compatible with both Eevee and Cycles render engines, so you don’t need any additional add-ons to work with either of them.
Let’s explore its features and see exactly what Physical Open Waters – Ocean has to offer!
🌊 From Calm Water to a Stormy Ocean: Full Control Over Waves
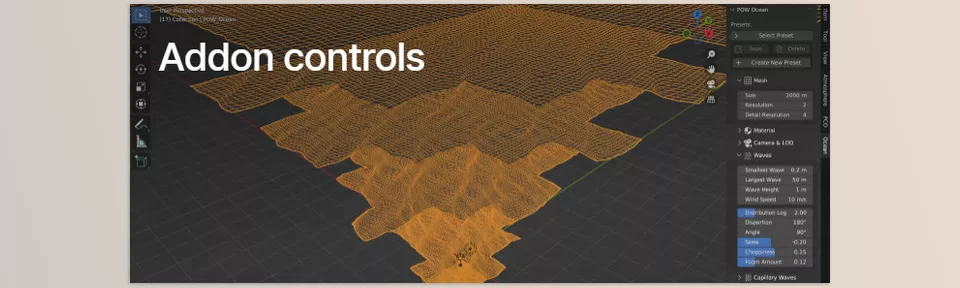
The first step in creating a natural ocean is building a water surface whose size and wave movement match the project environment. Physical Open Waters – Ocean includes several different sections for this purpose, allowing you to adjust both the dimensions of the water surface and its level of detail and movement.
Mesh Size: Setting the Ocean Surface Dimensions
With this option, you can define the overall dimensions of the water mesh and match it to the scale of your 3D environment. For example, if you’re creating a large ocean scene, you can adjust the water surface dimensions to fit the space you have in mind.
Mesh Resolution: Controlling Water Geometry Details
This option determines the geometric density of the water surface. The higher the mesh resolution, the more geometric detail the water surface has available to display wave deformations and Ripples. However, keep in mind that increasing it too much can also make your scene more complex.
Waves: Adjusting Wave Height and Frequency
In the Waves section, you can change the overall movement pattern of the water. Two important parameters in this section are:
- Amplitude: Controls the height and intensity of the waves. By changing this value, you can create calmer water or taller, more powerful waves.
- Frequency: Controls the wave frequency and changes the number and density of waves across the water surface.
Combining these settings allows you to match the appearance of the ocean to the mood of your project. For example, you can create gentler waves for a calm scene or increase the intensity of the water movement to show a rough sea.
Capillary Waves: Small Waves on the Water Surface
Large waves aren’t always what make an ocean look natural. Sometimes, very small details on the water surface have a greater impact on how realistic the image looks.
The Capillary Waves feature is designed to simulate small waves caused by the surface tension of water. These waves add another layer of fine details to the ocean surface and become especially noticeable when the camera gets close to the water.
🎨 Create Water Exactly the Way You Imagine It!
Having natural waves alone isn’t enough to create a realistic ocean. The water color, how it reflects light, and the visual properties of its material also need to match the environment.
Physical Open Waters – Ocean has a dedicated section for adjusting Material, which allows you to customize the appearance of the water.
- Color: Changes the water color and helps match it to the scene. For example, you can create dark blue water for deep oceans or use different colors for coastal environments.
- Subsurface Scattering: Controls how light scatters within the material, creating a more natural appearance when light interacts with the water surface.
These settings help you change the appearance of the water according to your project’s lighting and overall atmosphere. For example, if you’re creating a cinematic ocean shot, you can adjust the water color to match the mood of the scene and make the final result look more consistent.
🚤 When Water Reacts to the Movement of Objects!
One of the most interesting parts of Physical Open Waters – Ocean is its water interaction features. These features are especially useful when your scene contains boats, ships, or different objects and you want their presence to have a visible effect on the water surface.
Physical Open Waters – Ocean offers three important features for this purpose:
Wakes: The Waves Left Behind Boats
You’ve probably seen how waves form along the path of a moving boat and remain behind it as it travels across the water. These trailing waves are called Wakes.
With this feature, you can show the effect of moving objects on the ocean surface. For example, if you have a moving ship in your scene, instead of leaving the water around it completely still and unaffected, you can also add the waves created by its movement.
Ripples: Waves That Form Around Objects
When an object enters the water or moves beneath its surface, small waves usually form around it.
The Ripples feature is designed to simulate these changes in the water surface. For example, you can create natural waves around an object placed underwater, making its interaction with the water environment more visible.
Meniscus: A Small Detail with a Big Visual Impact
When water comes into contact with an object’s surface, a thin, curved edge forms at the point where they meet. This is called a Meniscus.
Physical Open Waters – Ocean also includes this detail to make the boundary between water and objects look more natural. For example, in a close-up shot of a boat on the water, this reflective edge can help make the contact between the boat’s hull and the water surface look more realistic.
🌫️ What’s Beneath the Ocean Surface? Creating Underwater Environments
If you want to move the camera below the water surface and enter the underwater world, having a transparent water surface isn’t enough. The underwater environment has its own visual characteristics, from floating particles to changes in light and color at different depths.
Physical Open Waters – Ocean also provides separate tools for this part:
Underwater Shader: A More Natural Look for Underwater Objects
This feature allows you to use a dedicated underwater shader for objects placed in a water environment. This way, you can adjust the appearance of submerged objects to match the visual conditions of the underwater environment.
Underwater Particles: Adding Floating Particles
If you have a close-up shot of the underwater world, you probably don’t want the space around objects to look completely empty.
With the Underwater Particles feature, you can add small particles to the environment to give the underwater scene more detail. This feature is useful for creating cinematic shots of the deep sea or scenes close to the ocean floor.
Underwater Volumetrics: Creating Depth and Light Scattering
One of the things that makes an underwater environment look more realistic is how light travels and scatters through this space.
Physical Open Waters – Ocean uses Blender’s Volumetric features to let you create underwater volumetric effects. This section is useful for showing light scattering and absorption at different water depths, helping the underwater environment look like more than just a simple blue space.
🎥 Managing Ocean Details Based on Camera Distance
When you create a large ocean, not every part of it needs the same level of detail. The water directly in front of the camera needs more details, but this level of detail is usually unnecessary for distant areas.
Physical Open Waters – Ocean provides the Camera & LOD section, which allows you to manage camera settings and Level of Detail.
LOD, or Level of Detail, means changing the level of detail based on the distance from the camera. With this feature, you can manage the water surface details at different distances, so you don’t have to process every part of the ocean at the highest level of detail.
Along with the Mesh Resolution settings, this feature helps you achieve a better balance between visual quality and scene performance, especially when a large part of the image is covered by the water surface.
⚡ Ready-Made Presets: For When You Don’t Want to Start from Scratch!
If you’re going to create several different ocean scenes, adjusting all the water properties from the beginning can be time-consuming.
That’s why Physical Open Waters – Ocean includes a library of ready-made Ocean Presets that you can use as a starting point.
With this feature, you can:
- Choose your desired settings from the available Presets.
- Modify the ready-made settings to match your project.
- Save your own custom Presets.
- Delete Presets you no longer need.
- Manage your settings library for different projects.
For example, you can have one setting for a calm ocean and use a different Preset in another project to create a rough sea. This way, you don’t have to adjust all the parameters from scratch every time.
🎞️ Animating Different Water Properties with Keyframes
Physical Open Waters – Ocean isn’t just for creating a static water surface; you can also animate its different properties over time.
This add-on supports Keyframe Animation and allows you to define Keyframes for different water settings.
For example, you can change the wave conditions throughout a sequence so that the ocean gradually becomes rougher, or make different water surface properties change at different times.
This feature is especially useful for animation projects where sea conditions aren’t constant, giving you more control over environmental changes throughout the sequence.
🔄 Compatibility with Eevee and Cycles: Without Being Limited to One Render Engine
Another useful feature of Physical Open Waters – Ocean is its compatibility with both Eevee and Cycles render engines.
So, whether you use Eevee or Cycles for your project, you can take advantage of the add-on’s features. This means you don’t have to give up your preferred render engine to use Physical Open Waters – Ocean or look for separate tools for each engine.
🌊 How to Create a More Natural Ocean by Adjusting Waves, Materials, and Underwater Details
Despite the various features of Physical Open Waters – Ocean, the final quality of your ocean doesn’t depend only on the tools you use. Wave settings, material coordination with lighting, and the level of detail in your scene also have a major impact on the result. To make the water surface look more natural without making the scene too heavy or cluttered, keep these tips in mind:
- Match Wave Sizes to the Scale of Your Scene: Large waves are suitable for showing a stormy ocean or rough sea, but in a close-up shot of a coastal environment, they may look too large and unnatural. It’s better to adjust wave height and size according to the environment’s dimensions and camera distance.
- Combine Large and Small Waves: Main waves give the ocean surface movement and volume, but you also need smaller waves to show finer details, especially in close-up shots. Using Capillary Waves helps the water surface look less flat and uniform while adding more natural details.
- Don’t Forget How Water Reacts to Moving Objects: If you have a boat, ship, or another moving object in your scene, simply animating the water surface isn’t enough. With Wakes, you can create elongated waves behind moving objects, while Ripples help you show the movement and contact of objects with the water more naturally.
- Match the Water Material to Your Scene’s Lighting: Water color, reflection, and transparency have a major impact on the final appearance of the ocean. So, it’s better not to evaluate the material under just one lighting condition. Instead, adjust it under your project’s main lighting setup to make sure the reflections and water color match the environment.
- Adjust Underwater Details According to Depth: Floating particles and volumetric effects can add more depth to the underwater environment, but using too many of them may make the image look cluttered. Try to match the number of particles and the intensity of volumetric effects to the camera distance and the environment you want to show.
- Use LOD to Control Details in Distant Shots: Not every part of the ocean needs to be displayed at the highest level of detail. When a large portion of the water surface is far away from the camera, properly adjusting LOD helps reduce unnecessary details and maintain better scene performance.
Finally, after adjusting these settings, check your ocean from different angles and distances. Waves that look natural in a distant shot may appear too large in a close-up view, or material details may look different under the main lighting setup. By reviewing and refining your settings a few times, you can achieve a water surface that matches your project environment and conveys the feeling of a real ocean without making the scene unnecessarily cluttered.
🎬 More Control Over Creating 3D Oceans
Creating a realistic ocean in Blender requires more than just a wavy surface. From materials and light reflections to water interaction with objects and underwater effects, each of these elements plays a role in making the final result look natural.
Physical Open Waters – Ocean brings these features together in a single add-on, providing tools for managing waves, water surface details, underwater effects, and animation. As a result, you can spend much more of your time designing and developing the scene itself instead of manually adjusting these features separately.
If you regularly create ocean environments, boat animations, or cinematic shots of the ocean surface and underwater world in Blender, Physical Open Waters – Ocean can make the process of building these scenes more organized and easier to control. Its features are especially worth exploring when you need diverse waves and natural water interaction with objects.
If you want to see every Blender tool in action and understand how to apply them in your projects, our Blender Tools article breaks everything down step by step.