


When You Feel Like Your Work Is Missing Something…
Do you have experience with the Diopter Plugin by aescripts? Have you ever created a video that was technically flawless? Clean motion, correct color, precise timing… but when you look at the final output, it feels like something is missing? Not that it’s bad — it just doesn’t convey that “cinematic and professional” feel.
Many times, the problem isn’t the design or the animation; the problem is that your image feels too clean and too digital. In the real world, nothing is perfectly sharp at the same time. Light spreads a little, corners are slightly softer, and camera lenses always have their own unique behavior. These small details are what give an image depth and a more realistic feel.
That subtle softness in the corners, that delicate light distortion, that focus gently guiding the eye toward the subject… these are exactly the things that turn an ordinary piece into a professional and impactful output. When they’re missing, your work is correct — but it doesn’t have the “feel.”

What Is a Lens Effect, Anyway?
A lens effect means simulating the real behavior of a camera and light inside software.
In other words, you’re making your image behave like the output of a real lens, not a flat and completely digital image. Because in the real world, a lens always has certain natural imperfections and characteristics that make an image appear more alive and deeper.
For example:
- Depth of Field → The subject remains sharp while the background becomes soft and blurred. This makes the viewer’s eye go exactly where you want it to.
- Distortion → A very subtle curvature in the image that gives the feeling of a real lens.
- Chromatic Aberration → A very slight separation of colors along the edges of the image that creates a cinematic feel.
- Motion / Light Streak → Especially effective in bright scenes or music videos.
- Bokeh Effect → Those blurred circles of light in the background that make the image more visually appealing.
Where Is It Useful?
Almost anywhere you want your work to look one level more professional:
- 🎬 Music videos where you want to create drama and a specific atmosphere
- 📦 Product ads where you want full focus on the subject
- 🎨 2D motion graphics where you want to create artificial yet natural-looking depth
- 📱 Even Reels and Instagram content where you want your work to stand out
The truth is, these effects are like spices.
Too little, and the image feels lifeless.
Too much, and it becomes artificial and cluttered.
Our art is using them precisely and in a controlled way 😄
Is It Possible Without Plugins? Yes… But…
If you want to create a lens effect without any plugin like Diopter Plugin, naturally, you’ll turn to After Effects’ built-in tools. Technically, everything is available — you just have to combine them yourself.
Usually, the workflow looks like this:
- Creating an Adjustment Layer to apply effects to the image
- Adding Gaussian Blur or Fast Box Blur
- Using Camera Lens Blur for a more natural feel
- Drawing a Mask to limit the effect area
- Adding Feather to soften the edges
- Using Track Matte for more precise control
- Adding Optics Compensation for distortion
- Adjusting Blend Mode to make the result more natural
- And finally, probably a Pre-compose to organize the layers
On the surface, everything makes sense. The tools are there, the control is there — you just need to spend time and adjust them carefully.
The Problem Starts When You Want to Make It More Professional
The challenge begins when you want to combine multiple effects and reach a clean, natural result. Settings get scattered across multiple layers, controlling the overall intensity becomes difficult, and even a small change means tweaking several different parameters. If the subject moves, you have to animate the mask. If you change your mind mid-project, you’ll probably need to rebuild part of the structure. Most importantly, the result often feels slightly artificial — because the effects were built separately, not as an integrated system like a real lens behaves. This means you spend more time, and still, the output may not turn out as clean and natural as you imagined.
When a Proper Lens Tool Enters the Workflow
This is where the Diopter Plugin truly shows itself. Usually, when you want to create a natural lens feel, you add Blur, draw masks, add Feather, apply some distortion, and then you realize something still feels artificial. You go back and tweak again. In practice, you’re forcing several separate effects to work together.
Diopter Plugin simplifies this stage. Instead of working with multiple layers, you define a “lens,” and all the effects happen within that defined area. From the start, you’re thinking like a real lens — not like someone stacking multiple effects on top of each other.
What Exactly Does the Diopter Plugin Make Easier?
🔹 Focus and Depth Control — Without the Headache
Want only part of the image to soften? Create a lens, position it, and apply Blur right there. If the subject moves, animate the lens. No need to adjust multiple masks frame by frame. You can quickly guide the viewer’s attention.
🔹 Coordinated Optical Effects
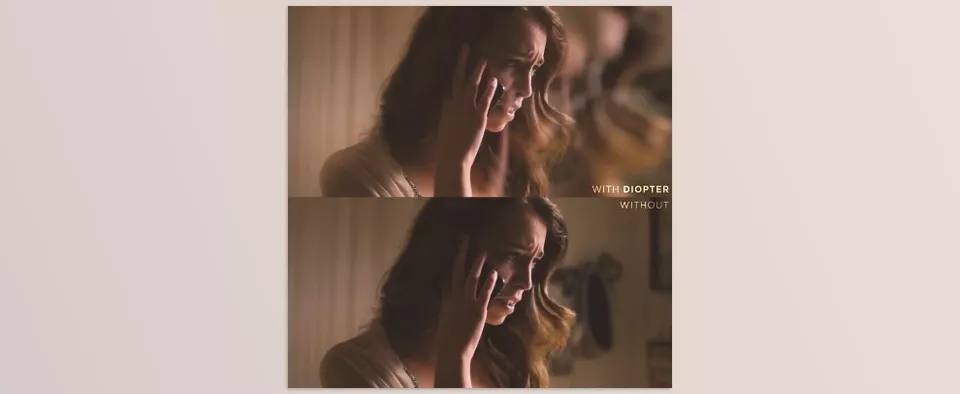
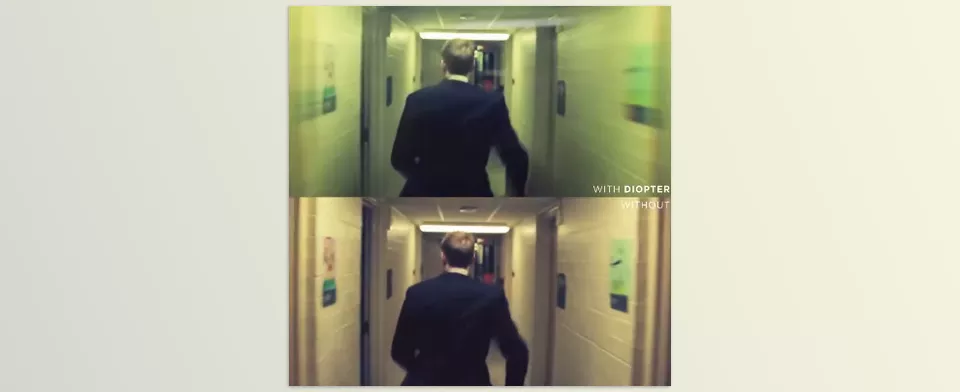
You can add subtle distortion, chromatic aberration, image stretch, or light changes within the same system. Since everything exists under one structure, the result doesn’t feel fragmented. The image gains the feeling of “lens behavior,” not the feeling of “adding effects.”
🔹 Fast Global Intensity Adjustment
If, midway through the project, you feel the effect is too strong or too weak, you don’t need to adjust five different layers. You simply increase or decrease the overall intensity, and everything updates together. In projects where clients request lots of revisions, this is truly a lifesaver.
Imagine you’re creating a product teaser and want the background to gently soften so the product stands out more. Or in a music video, you want the focus to shift from one point to another. With the Diopter Plugin, this becomes a matter of adjusting a lens — not building a pile of extra layers.
The difference is that you’re not just adding Blur; you’re intentionally creating depth and optical behavior. That’s what makes your output look cleaner, more natural, and more professional.
A Few Tips That Truly Make Your Work More Professional
When it comes to Diopter Plugin and lens effects, the difference between professional and amateur work is usually in the details. The tool matters — but how you use it matters even more.
Don’t Overdo It
The first and most important point is that the effect should be “felt,” not distracting. If instead of engaging with the image, the viewer notices the effect and says, “Wow, what a blur!” you’ve probably gone one step too far. Real lenses never behave in an exaggerated way. Set the Blur intensity lower than you think you need, then gradually increase it. Usually, the slightly softer version looks more professional.
Animate the Lens — But Smoothly
In the real world, focus doesn’t change abruptly. If you want attention to shift from one subject to another, animate the lens movement gently with proper easing. Even a very subtle shift can make the image feel more alive. Fast, linear movement usually feels artificial, but a smooth transition conveys the feeling of a real camera.
Chromatic Aberration — Subtle but Precise
This effect is very tempting because it quickly makes the work feel “cinematic.” But the margin is very thin. A very small amount makes edges feel more natural, and the image looks more premium. Too much immediately makes the work look amateur — especially in advertising or branding projects. It’s better to let it appear mainly along high-contrast edges rather than affecting the entire image.
Combine It With Light
Lens effects work much better when paired with good lighting. A very subtle Glow, a light Light Wrap, or even adjusting brightness and contrast in harmony with the scene makes the effect feel like part of the image — not a separate layer on top of it. If the lighting and the effect move in the same direction, the result feels much more natural.
Always Compare Before and After
Every few minutes, turn the effect off and look at the image without it. If the difference feels dramatic and shocking, it’s probably too much. A professional effect should make you feel like “something is missing” when it’s off — not make you say, “Okay, now it looks more natural.”
In the end, a lens effect isn’t meant to be the star. Its purpose is to give depth, create focus, and build a more realistic feel. When you keep that in mind, your usage naturally becomes more professional.
One Step Toward “Looking More Professional”
Becoming more professional doesn’t always mean adding more effects or making your project more complex. Often, the real difference lies in subtle details that might not be immediately visible — but are felt. Things like natural light behavior, controlled focus, or very gentle distortion that removes the flat, digital look.
By using the Diopter Plugin, you can add depth and focus to your project. Since this plugin works as an integrated lens system, you can be sure that the outcome of your project will be much cleaner and better-looking. If you work in motion graphics, music videos, or advertising, adding this plugin to your projects will upgrade your output by one level. It’s amazing the difference it makes with something as simple as making your image behave like a real camera.
Curious about all the tools Blender has to offer and how they can help you in real projects? Our Blender Tools article covers everything you need to know.



