


When Simple Translation Isn’t Enough
Are you experienced in using the Displacer Pro Plugin? Have you ever wanted to move an image or animation but felt that the usual tools just don’t help? The image moves, but what you want — that same lively and magical feeling — doesn’t show at all.
Sometimes you want layers to rotate, scale up or down, or even have a complex effect applied, but After Effects’ default tools only allow pixels to move. The result? Boring and limited!
This is when all of us designers look for a shortcut — something that makes motion more realistic, engaging, and faster, without spending hours on manual adjustments. In short, a tool that transforms image movement from a rigid shift into a lively, controllable experience.

Translation, Rotation, and Scale
Before diving into techniques and applications, it’s important to understand exactly what we’re talking about and why these three concepts are vital for motion graphics and animation.
In this section, we’ll explore Translation, Rotation, and Scale — what they are, how they work, and why, when combined with displacement maps, they can make projects feel much more natural and appealing.
Translation
The simplest type of movement; pixels or images move up, down, left, or right. Like when a layer moves on the timeline, but here it can move very precisely and smoothly based on a map, not just a simple linear shift.
Rotation
Here you can rotate pixels or the entire layer, like the motion of water waves, smoke, or even a spiral transition. The result is a more natural, dynamic movement that gives the image a realistic feel.
Scale
Enlarging or shrinking pixels and layers based on a map; this adds depth and dimension to the image. For example, an explosion expanding from the center or a wave gradually growing and shrinking is much easier and more natural using Scale.
In fact, combining these three tools allows animations not only to move but also to appear lively, dynamic, and engaging, enabling the creation of complex and professional visual effects for motion graphic projects.
It’s Possible Without Plugins — But Not Easy
Before diving into plugins, it’s worth looking at how to achieve these effects and movements without professional tools and why it’s always challenging and time-consuming.
In After Effects, the displacement map tool only allows pixel translation. You can move your image up, down, left, or right, but rotating or scaling based on the map is not possible.
Common workarounds include:
- Rotating layers or adjusting their scale manually using the Transform tool.
- Pre-composing layers and applying multiple effects to create complex motion.
- Using effects like Offset, CC Twirl, or Mesh Warp to manually create some distortion and motion.
But what’s the problem?
- All these methods are very time-consuming and labor-intensive to get a good result.
- Effects usually don’t feel natural or smooth and can seem artificial.
- Combining multiple effects clutters the project and slows down performance.
In short, you can work without plugins, but if you want natural, dynamic, and professional movements, it’s very difficult and cumbersome.
Displacer Pro Plugin: Supercharged Motion
Now, here’s where the fun begins! 😎
Displacer Pro Plugin is a professional After Effects plugin that acts like a supercharged version of the default displacement map. Everything you previously did with traditional, time-consuming methods is now available in a fast, simple environment. With it, you can control motion naturally, smoothly, and creatively — without spending hours on manual adjustments.
Key Features
1. Translation, Rotation, and Scale in One Tool
No need to learn separate tricks for each movement. Everything is in one place and can be easily applied to layers:
- Translation: Moves images up, down, left, or right.
- Rotation: Rotates layers or pixels, like real water waves or smoke.
- Scale: Enlarges or shrinks parts of the image for a sense of depth.
2. Multiple Color Modes: Hue, Saturation, Luma, or Red
Control motion and distortion based on color or brightness:
- Hue: Only pixels of a specific color move.
- Saturation: More saturated areas move more, less saturated areas less.
- Luma: Movement is based on pixel brightness and darkness.
- Red/Green/Blue: Only a specific color channel is distorted.
In short: precise control over motion and the ability to create creative color-based effects.
3. Professional Map Settings: Softness, Gamma, Easing
These make movement appear natural and smooth:
- Softness: Smooths the boundary between displaced and fixed areas.
- Gamma: Adjusts the intensity of the map’s effect.
- Easing: Motion isn’t uniform — starts slow and speeds up, or vice versa, like real movement.
4. Motion Blur and Iterations
- Motion Blur: Adds realistic blur for fast motion, making it appear smoother.
- Iterations: Number of displacement passes. The higher the number, the smoother and more precise the distortion.
5. Built-in Chromatic Aberration and Anti-aliasing
- Chromatic Aberration: Slight color separation at edges, like a real camera lens.
- Anti-aliasing: Smooths edges and prevents jagged lines.
Result: Clean, professional images without extra effects.
6. GPU Accelerated and Apple Silicon Native
The plugin leverages GPU power and modern Apple processors.
Heavy and complex projects run smoothly, without After Effects lagging or slowing down.
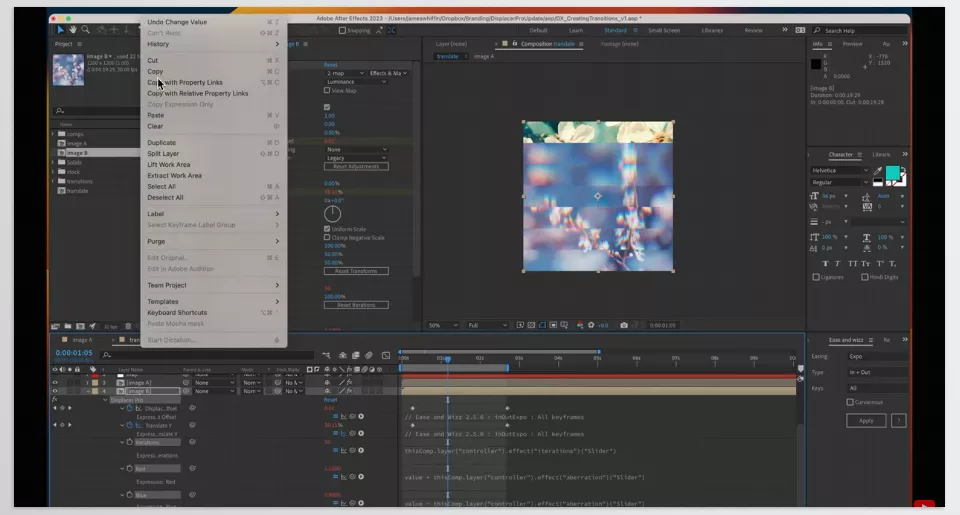
Displacer Pro Plugin transforms your image motion from a dry, simple shift into a lively, creative, and professional experience. Your motion graphic projects gain fresh energy, and you’re in full control.
How Professionals Use It
Now that we’re familiar with Displacer Pro Plugin and its features, here are some pro tips for making motion look more realistic and engaging. These are small, clever tricks that elevate your projects.
- Don’t neglect Iterations and Motion Blur!
These are key to natural motion. Adjust them slightly to make movements smooth. For example, water waves or smoke look natural with appropriate motion blur. - Scale + Rotation + Easing = Smooth, Natural Motion
Nobody likes sudden jumps in a layer! Using Scale and Rotation with Easing makes movements start slow, accelerate, or decelerate naturally, resulting in a professional look. - Combine Color Modes and Chromatic Aberration = Creative Effects
Want your work to stand out? Using color-based displacement (Hue, Saturation, Luma) with a bit of Chromatic Aberration gives layers a magical feel and eye-catching effects.
For example, only the blue parts of a wave move, or the edges of a colored flame slightly separate for realism. - Always Check with a Small Preview!
Before applying a map to the whole project, preview it in a small area. This saves time and ensures the movement is exactly what you want.
With these small tricks, motion becomes smooth, natural, and creative — no more rigid or artificial animations.
Complex Motion, Simple and Fast!
With the Displacer Pro Plugin, you can easily control the movement, rotation, and scaling of your layers and images. No more spending hours trying to achieve natural, smooth motion; everything is combined in one tool, and movements look precise and fluid.
Even heavy motion graphic projects are easier to handle. You can quickly test ideas, create creative effects, and achieve professional results without dealing with complex settings and effect combinations. In short, speed and precision are in your hands, letting you focus on creativity instead of tedious details.
In the end, it’s worth trying. Even a small adjustment on a single layer can make the whole project lively and dynamic. Displacer Pro Plugin makes your projects both more creative and professional-looking, without extra hassle.
Don’t just use After Effects — learn how to make it your ultimate creative playground with our in-depth After Effects Tools guide that covers every essential tool and plugin you’ll ever need.



