When an Image Is More Than Just Sharp—It Has Character 🎥
Do you know about the LensNode Plugin by Node Mill? You’ve probably experienced this before: a video looks perfectly fine in terms of lighting, color, and overall quality, yet it still doesn’t have that cinematic feeling you see in movies or high-end commercials. Somehow, the image feels too clean, too digital, and lifeless—while the exact same project would have felt completely different if it had been shot with a specific lens.
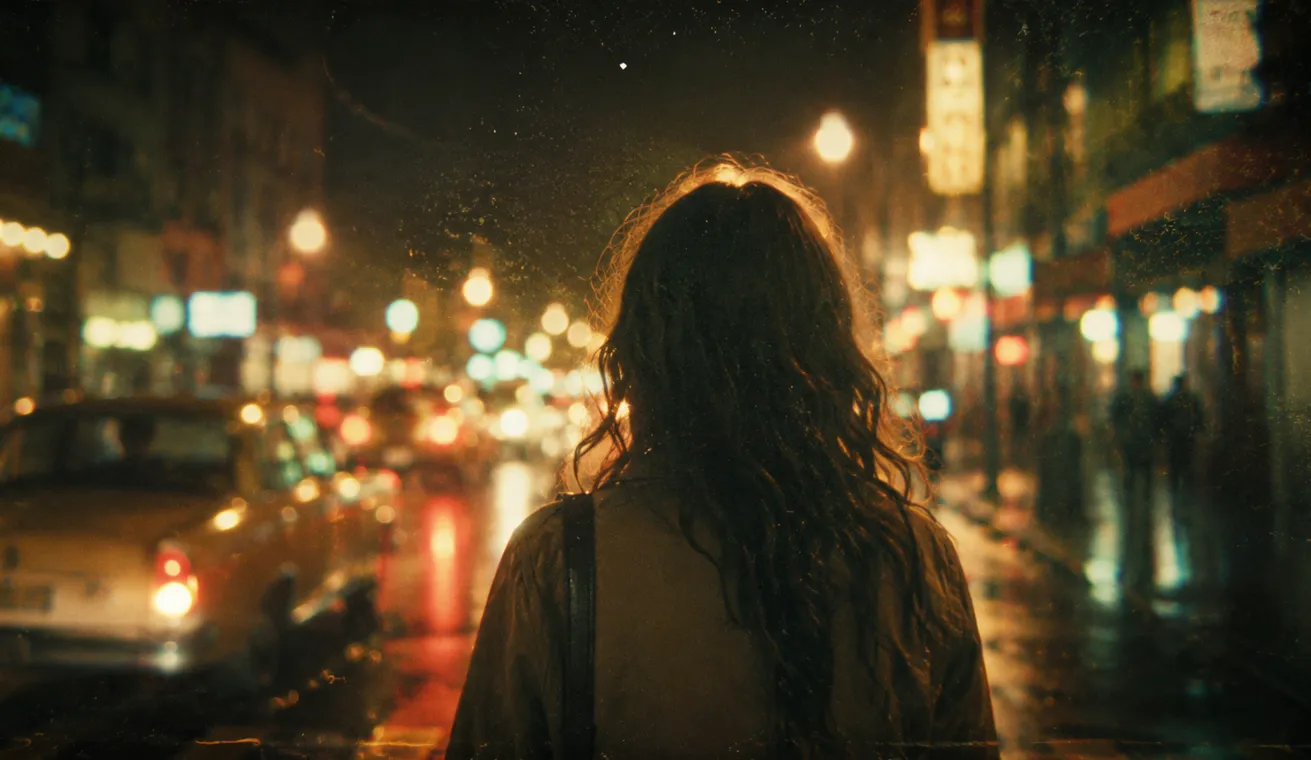
The truth is that a large part of an image’s character isn’t just determined by the camera or color grading. The lens itself has a huge impact on the final result—from the shape of the bokeh to bloom, distortion, vignetting, chromatic aberration, and even the way light spreads across the frame. These subtle details are what give an image its unique look and feel.
But what if the video has already been recorded? Can these characteristics be added afterward? Fortunately, there are now tools that can accurately simulate the look of famous cinematic and vintage lenses, giving your footage a whole new personality without requiring you to buy lenses that cost thousands of dollars.

A Lens Doesn’t Just Capture an Image—It Gives It Character 🔍
Many people think that color grading or camera settings are the only things that change the look of a video, but the reality is that the lens also plays a major role in the final result. Every lens spreads light differently, creates its own unique bokeh shape, may darken the corners slightly, or even add a subtle color cast across the image. These small details are exactly what give each lens its own personality.
That’s why two people can shoot with the exact same camera, yet end up with completely different results simply because they’re using different lenses. This is also why cinematographers and colorists are so meticulous when choosing lenses—because a lens doesn’t just record an image; it also influences its mood and atmosphere.
And this isn’t limited to feature films. From music videos and commercial advertisements to documentaries, branding projects, and even Instagram or YouTube videos, choosing the right lens look can be what makes your work stand out from everyone else’s.
What If We Don’t Have This Tool? 🛠️
You can achieve it using your software’s built-in tools. If you want to recreate the look of a specific lens on your footage, you don’t necessarily need a plugin. DaVinci Resolve, Premiere Pro, and After Effects all include various tools, each handling part of the process. You simply have to combine them yourself until you gradually achieve the look you’re after.
These tools are commonly used:
- Glow for creating bloom and spreading bright highlights.
- Lens Distortion or Optics Compensation for adding lens distortion.
- Camera Lens Blur or Lens Blur for simulating blur and bokeh.
- Curves, Color Wheels, and White Balance for changing the image’s colors and mood.
- Vignette for naturally darkening the corners of the frame.
- Shifting RGB channels to create Chromatic Aberration.
But this is where the real challenge begins…
The problem is that none of these tools were originally designed to simulate the behavior of a real lens. Each one only handles a small part of the process, leaving you to spend hours adjusting sliders until everything works together. On top of that, some characteristics—such as Coma, Fringing, or the true shape of a lens’s bokeh—don’t even have dedicated tools, forcing you to recreate them by combining multiple effects. Even then, the final result often lacks the natural, cohesive look of a real lens, and you’ll have to repeat the entire process from scratch for every new project.
LensNode—Adding Lens Character to Your Footage After Shooting ✨
Sometimes, what gives a video its cinematic feel isn’t just the color or lighting. Much of that unique atmosphere found in films and high-end commercials comes from the behavior of the lens itself—from the way light spreads to the shape of the bokeh, subtle image distortion, and even the tiny imperfections that make an image feel more natural.
That’s exactly what LensNode was created for. This plugin allows you to apply the look and behavior of real lenses to your footage after it has been recorded. Instead of manually combining dozens of different effects for every characteristic, you can simply use ready-made lens profiles and achieve a realistic cinematic look much more quickly.
The plugin is available for DaVinci Resolve, Premiere Pro, After Effects, Final Cut Pro, and Baselight, making it suitable for editing, color grading, and VFX workflows.
More Than 111 Real Lens Profiles—From Classic to Cinematic 🎥
One of the most impressive parts of LensNode is that it offers much more than a few standard effects. The plugin is built using real-world data from more than 111 different lenses, and each profile is designed to recreate the authentic character of that specific lens.
This means you can experiment with the look of lenses such as:
- Zeiss Ultra Prime for a clean cinematic look.
- Cooke Panchro for a warm, classic appearance.
- Canon FD for a vintage aesthetic.
- Nikon Nikkor for the distinctive look of classic lenses.
- Blackwing7 for a modern cinematic style.
- Petzval for unique and artistic bokeh.
- Angénieux for the look of professional cinema lenses.
…along with many other models.
The advantage of this approach is that you don’t actually need to own those lenses during production. You can experiment with different lens looks later during editing and choose whichever one best matches your project.
Accurate Simulation of Every Characteristic of a Real Lens 🔍
A lens isn’t defined by just one overall look. Its personality comes from a combination of different optical behaviors. LensNode simulates these characteristics individually, giving you greater control over the final result.
Bokeh Blur — Bokeh with the Lens’s Own Character
Bokeh isn’t simply background blur. The shape and behavior of out-of-focus highlights are among the most defining characteristics of a lens.
LensNode recreates the authentic bokeh shape of each lens and even lets you rotate it, stretch it, or make it appear more swirled. This allows you to create soft cinematic bokeh or even more unusual and creative looks.
Chromatic Aberration — Adding Natural Color Fringing
Many real lenses, especially vintage ones, produce slight color separation around the edges of the frame.
LensNode recreates this effect naturally. Instead of applying an artificial overlay, the color shift follows the real optical behavior of the lens and changes according to the distance from the center of the image.
Bloom — Natural Light Diffusion
When intense light sources such as lamps, the sun, or reflections appear in the frame, different lenses react in different ways.
LensNode reproduces this light diffusion with high quality, giving your footage a softer, more cinematic appearance without looking like a simple artificial Glow effect.
Coma — The Charming Imperfection of Vintage Lenses
Some lenses, especially near the edges of the frame, cause bright points of light to stretch or smear slightly. This characteristic is one of the reasons many classic lenses have such a distinctive look.
LensNode can recreate this behavior, making your footage feel less digitally perfect and more natural.
Fringing — Color Bleeding Around High-Contrast Edges
Some lenses produce slight color shifts around bright and dark edges.
With Fringing in LensNode, you can add this characteristic in a controlled way, giving your footage a more authentic lens appearance.
Distortion — Reshaping the Image Like a Real Lens
Every lens introduces a certain amount of distortion. Some subtly bend the image, while others remain almost perfectly straight.
LensNode recreates this distortion using real lens data, while also allowing you to increase or decrease its intensity—or even animate it over time.
Vignette and Color Cast — Small Details That Make a Big Difference
Some lenses, when used with a wide aperture, slightly darken the corners of the image or create a very subtle color shift across the frame.
LensNode also takes these two characteristics into account in its profiles so the final result doesn’t simply look like an effect, but instead conveys the feeling of a real lens.
Combine Whatever You Want — Create a Custom Look 🎨
One of the interesting features of LensNode is that you are not always required to use a complete profile.
With the Mix & Match feature, you can combine different lens characteristics. For example:
- The bokeh of a vintage lens
- The Bloom of a cinematic lens
- The Distortion of an old lens
- The Chromatic Aberration of a different model
You can bring them together and create a completely custom look.
This feature is especially useful for projects that are looking for a specific visual style, because you do not have to be limited to the appearance of one particular lens.
More Control Over Bokeh and Lens Effects ✨
LensNode also provides several additional tools for further customization:
- Bokeh Swirl
With this feature, you can increase or decrease the swirling effect of the bokeh and recreate the look of more distinctive lenses. - Bokeh Boost
It increases the brightness and definition of the bokeh in bright areas so that it becomes more noticeable. - Lens Whack
It shifts the center of influence for all lens effects. This feature is very interesting for creating creative effects or simulating distinctive lenses, and it can even be animated.
When Simulation Alone Is Not Enough — Creativity Matters Too 🚀
Sometimes, the goal is not simply to imitate a real lens. At times, you want your image to have a different, exaggerated, or even unrealistic feeling.
This is where Overdrive comes in. With a single slider, you can intensify all the characteristics of the selected lens and quickly achieve a distinctive, stylized result.
For music videos, commercial teasers, or projects that need a different visual look, this feature can be very useful.
Built for Professional Projects 🎬
LensNode is not only designed for creating attractive effects; it was built from the beginning with professional projects in mind.
The plugin supports GPU processing so it can work faster with heavy files. It is also compatible with ACES, HDR, and high-bit-depth Linear processing, allowing it to fit smoothly into professional color grading and VFX workflows.
It is also possible to use multiple separate nodes. This means you can have one node only for Bloom, another for Distortion, and another for Chromatic Aberration, giving you much more precise control over the final result.
It can even be used in DaVinci Resolve Live to display the lens look in real time on Log camera footage, which is especially useful for testing the visual appearance of a project before shooting or during the preview stage.
A Few Tips for Getting Better Results from LensNode 💡
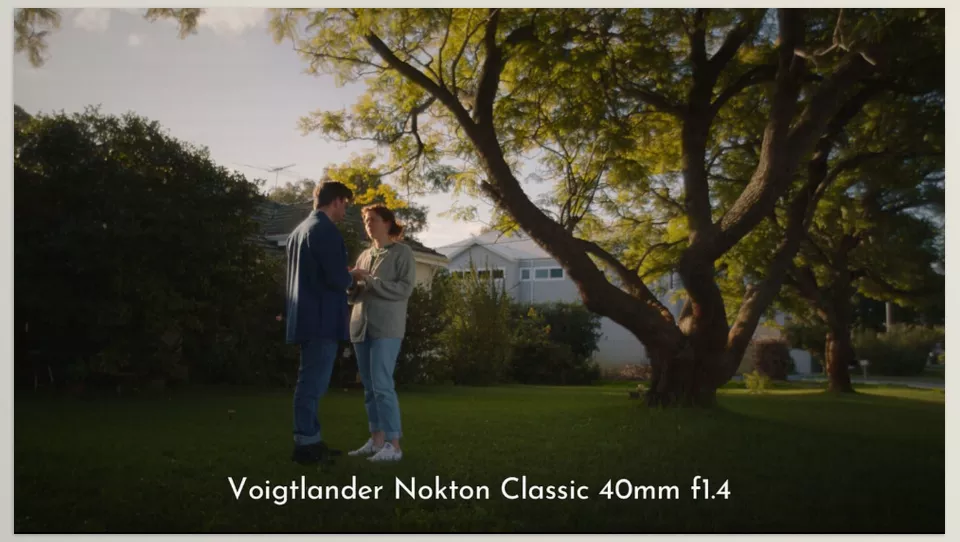
Although LensNode makes selecting and simulating lens looks much easier, it is still helpful to keep a few simple points in mind while using it so that the final result looks more natural and professional. These small details can make a significant difference in the final output.
- Define your goal first: Before exploring different profiles, decide whether you want to recreate the look of a real lens or build a completely creative style. This choice helps you understand how much the effects should be adjusted and where you should begin.
- Do not exaggerate everything: You may be tempted to increase the intensity of every effect, but many characteristics of real lenses, such as Bloom, Chromatic Aberration, or Distortion, are usually very subtle. Excessive amounts of these effects can make the image look unnatural and artificial.
- Adjust the color and lighting first: If you are color grading a project, it is better to correct the exposure, contrast, and main colors of the image before adding LensNode. This helps the lens effects blend more naturally with the footage.
- Experiment with combining profiles: Do not limit yourself to a single lens. With the Mix & Match feature, you can combine different characteristics from several lenses and create a unique look that may not exist in any ready-made profile.
- Keep a consistent look throughout one project: If you are working on multiple shots in one video, it is better to use one main profile so that all the shots maintain a consistent feeling. Constantly changing the lens look between shots may cause the project to lose its visual continuity.
Ultimately, the best results from LensNode are achieved when you treat it as a creative tool, not simply as a ready-made effect. A little adjustment, testing, and combining of different characteristics can help you create a look that perfectly matches the mood of your project.
When Your Video Is Not Just Good, but Has Character Too 🎬
Sometimes, the difference between an ordinary video and a professional result is hidden in these small details. That distinctive softness in the highlights, the unique shape of the bokeh, a subtle vintage feeling, or the natural behavior of a lens can make the image stand out more and feel more cinematic.
It is true that many of these characteristics can also be created using the built-in tools in software such as Resolve, Premiere, or After Effects, but you usually have to spend a lot of time adjusting several different effects before reaching a result that both looks natural and matches the project. LensNode shortens this process and lets you achieve the same professional appearance and feel much more quickly by using real lens profiles.
In the end, the value of a tool like this is not simply in adding a few new effects. What matters is that it helps you gain greater control over the visual character of your work. If you want your videos to have more than just strong technical quality and to develop their own feeling, style, and visual signature, LensNode can be one of those tools that creates a real difference in the final result.
For DaVinci Resolve users who want to speed up their editing process, improve productivity, and get more out of the software’s capabilities, our latest article on essential DaVinci Resolve tools can be a valuable resource worth exploring.