

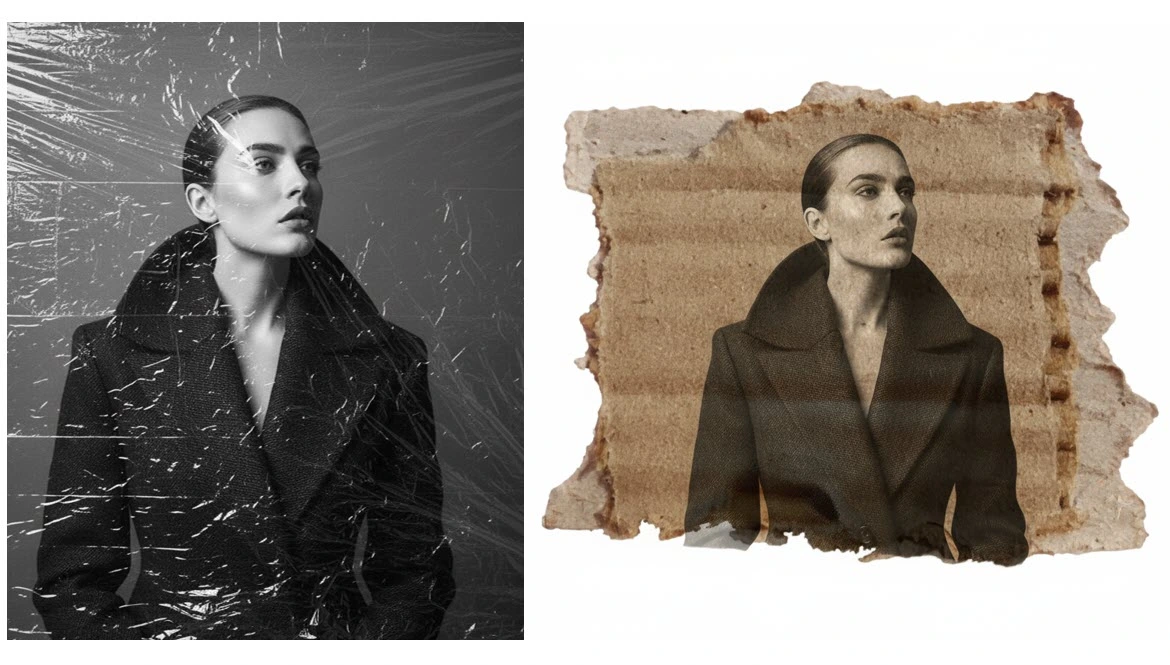
Texture and Effect in a Few Clicks
Texture Overlays are one of the magical tools in digital design, where even the smallest details can make a big difference in the final look of your work. These layers allow you to add texture, light, and special effects to images without damaging the original image.
Imagine your simple poster or image suddenly coming to life with a crumpled or transparent plastic sheet, light moving across its folds, giving the image a real and tangible feel. Or the same image, gaining a creative and urban vibe with torn cardboard and rough edges, making your design feel as if it has emerged from a real environment. Small details like these make your work look more professional, attractive, and unique, drawing the audience in effortlessly.
In the following article, we will show you the simplest ways to add these Texture Overlays to your photos and designs so you can give your work a professional effect with just a few clicks.
What is an Overlay and How It Differs from Effects
An overlay is a layer placed on top of the original image that adds texture, light, or special effects without altering the original image. The main advantage of overlays is that they are editable and movable, allowing you to easily change their intensity, color, light, and position.
On the other hand, effects are typically placed onto the image or the layer that’s active and it’s not as easy to edit them later. Effects tend to change the image in a more permanent and static fashion whereas overlays tend to be more malleable and can be stacked with additional overlays to create a final look.
Simply put, an overlay is like a cover layer that gives you full control and quick adjustments, whereas effects are more permanent and direct changes to the image. This is why many designers rely on Texture Overlays to keep flexibility while adding depth to their projects.
Challenges of Creating Texture Without Overlays
If you try to create effects like crumpled plastic or torn cardboard only with Photoshop, everything must be made entirely by hand. First, you design lines and folds with the Brush tool, then use filters like Blur and Distort to make the texture natural, and carefully adjust light and shadows on the layers. Blending modes must also be selected carefully for a natural integration with the original image.
This method is possible but very time-consuming and difficult. Preserving small details, matching colors and lighting, and correcting changes every time is complex, and even professional designers spend hours achieving a natural and realistic result. Therefore, using ready-made Texture Overlays is a fast and simple way to add realistic and striking effects to images, enabling a professional result in just a few clicks.
5 Professional Overlay Sets for Your Designs
Here, we introduce 5 professional Overlay sets that can quickly add texture, depth, and realistic effects to your images and designs. Each set has its own unique features and is suitable for different design styles.
1. Wrinkled Plastic Overlay Textures
Wrinkled Plastic Overlay Textures includes 20 high-quality wrinkled plastic Overlays, allowing you to easily add natural and realistic plastic textures to your images and designs. Each file is provided in PSD format with Smart Object layers, so by simply replacing with your desired image, you can achieve a professional and natural result.
Key Features:
- High resolution (4500×3000 px, 300 dpi): ensures excellent print and digital quality.
- One-click editable: using Smart Object, placing your image and adjusting the Overlay is very simple.
- 20 different designs: various plastic wrinkles for diversity and suitable selection for any project.
- High flexibility: you can change the intensity, color, and opacity of the Overlay to match the main image.
Usage: Perfect for posters, advertising designs, photos, and digital artwork, giving a tangible and realistic effect without spending much time creating plastic textures manually.
2. Plastic Foil Overlay Mockups
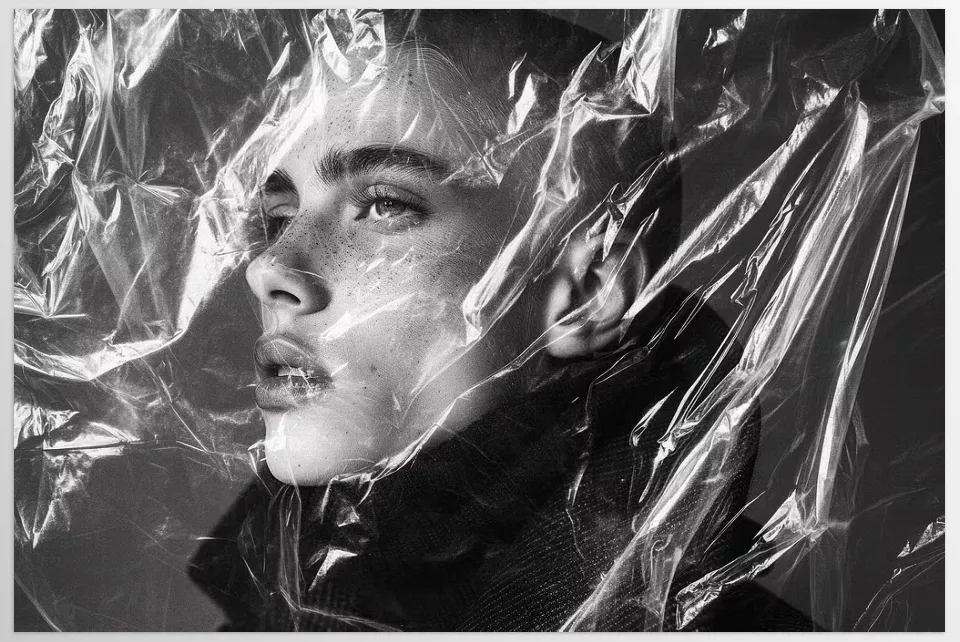
Plastic Foil Overlay Mockups includes 12 horizontal and vertical plastic sheets, allowing you to easily add transparent and modern effects to your designs and posters. By combining transparent and matte sheets, you can create attractive and professional scenes.
Key Features:
- 6 horizontal PSD and 6 vertical PSD: suitable for various designs and combinations.
- Smart Object for quick placement: with one click, you can replace your image or poster and see the result immediately.
- Light, shadow, and opacity adjustment: full control over lighting effects and Overlay intensity for a natural and professional look.
- Includes backgrounds and auxiliary textures: 2 wall backgrounds and 4 paper textures for creating complete and attractive scenes.
- High flexibility: color, design, and sheet thickness can be changed to match any project.
Usage: Ideal for posters, advertising works, digital designs, and even product Mockups, letting you quickly add a transparent, glossy, and professional effect to your work without spending time creating textures manually.
3. Plastic Wrap Overlay Texture
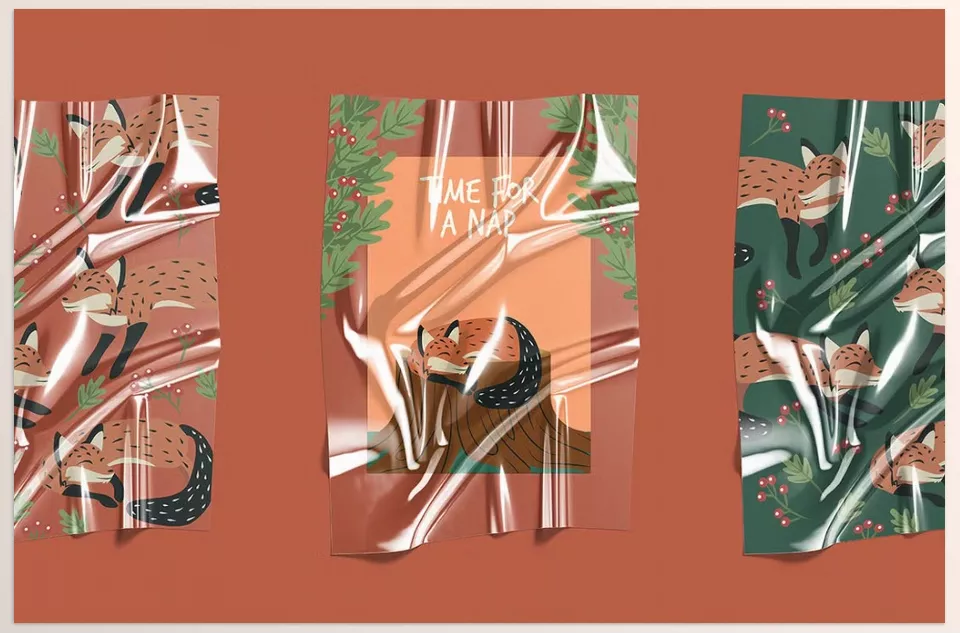
Plastic Wrap Overlay Texture includes 12 high-quality transparent PNG images, allowing you to easily add a wrinkled plastic effect to your images and designs without background limitations.
Key Features:
- High resolution (5000×4000 px, 300 dpi): excellent quality for print and digital use.
- Transparent PNG: allows placing the Overlay on any image or background without extra masking.
- 12 diverse designs: various plastic wrinkles for suitable selection for any project.
- High flexibility: intensity, color, and opacity of the Overlay can be easily adjusted to match the main image.
Usage: Suitable for posters, digital designs, and photos, letting you add a natural and realistic effect to your designs with a few clicks, without spending much time creating textures manually.
4. 25 Ripped Cardboard Overlay
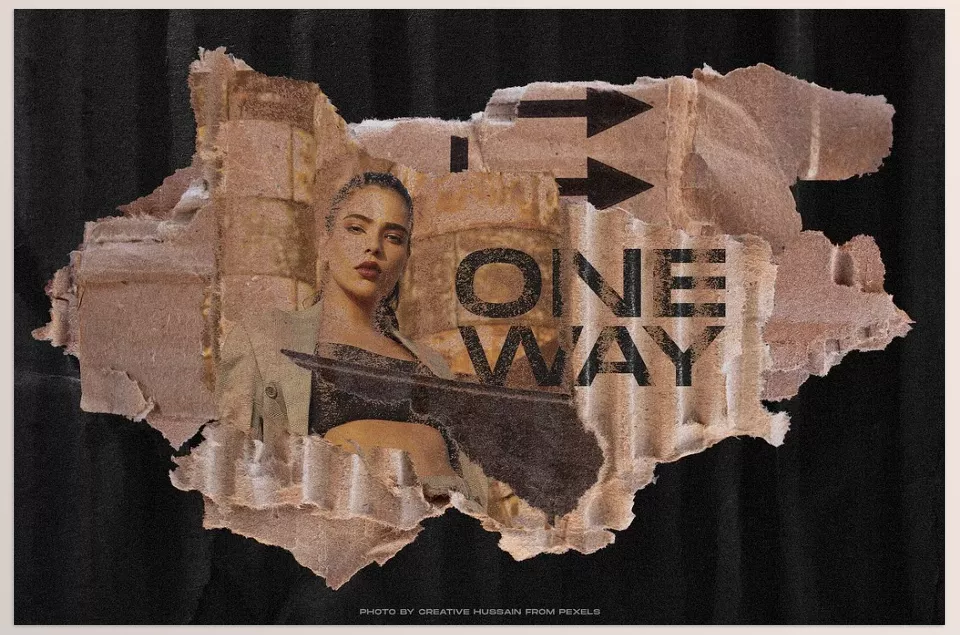
25 Ripped Cardboard Overlays includes 25 high-quality ripped cardboard Overlays, allowing you to add a rough, creative, and urban effect to your designs and posters. Each file is provided in PNG format and can be easily applied to any image or background.
Key Features:
- High resolution (6000×4000 px): excellent quality for digital and print use.
- 25 diverse ripped cardboard designs: various edges and tears for creating a realistic effect.
- Transparent PNG format: allows placing the Overlay on any image without masking or background removal.
- Easy to use: simply drag & drop the Overlay onto your image and adjust its intensity, size, and position.
Usage: Very suitable for posters, advertising designs, digital artworks, and urban projects, helping you quickly give a professional and tangible effect to your designs without spending hours creating cardboard textures manually.
5. Torn Cardboard Textures
Torn Cardboard Textures includes 70 ripped cardboard patterns and various textures, allowing you to create detailed and realistic effects on ripped cardboard in your designs. Using these textures, you can create a rough, creative, and urban look.
Key Features:
- 70 ripped cardboard patterns (PNG) and 30 cardboard textures (JPG): high diversity for various combinations and unique designs.
- 12 additional textures: includes PNG and JPG for more flexibility and details.
- Easy to use: drag & drop the Texture Overlays onto your images and adjust the final effect by resizing, positioning, and adjusting intensity.
- Professional details: each surface has precise and natural details, making your design realistic and attractive.
Usage: Perfect for posters, urban design, logos, albums, and advertising projects, allowing you to add a tangible, professional, and eye-catching effect to your work with just a few clicks, without spending much time creating cardboard textures manually.
These 5 overlay sets each add a unique effect to your designs. Crumpled and transparent plastic, glossy glass, or rough cardboard; all can be used in a few clicks. These products save your time and make your designs professional and attractive without spending hours creating textures manually.
Summary Table of Professional Texture Overlays
This table summarizes the 5 introduced overlay sets. At a glance, you can see each set’s main features, type of effect, and main application to make choosing the right one for your design easier.
| Product Name | Effect Type | Main Application |
|---|---|---|
| Wrinkled Plastic Overlay Textures | Crumpled Plastic | Adding natural and tangible plastic texture to images and posters |
| Plastic Foil Overlay Mockups | Glassy and Glossy | Creating a modern and professional effect for posters and advertising |
| Plastic Wrap Overlay Texture | Transparent and Crumpled Plastic | Adding plastic texture without background limitation |
| 25 Ripped Cardboard Overlay | Ripped and Rough Cardboard | Creating a rough and creative effect for urban and advertising projects |
| Torn Cardboard Textures | Ripped and Varied Cardboard | Adding realistic cardboard details to designs, suitable for posters and albums |
Final Effect: Simple, Fast, and Realistic
Ultimately, with the ease of a few clicks, you can achieve a realistic and tactile finish on your work.
Want crumpled plastic? Want glossy glass? Want rough cardboard? All of these are transparently designed to add professionalism, appeal, and visual impact to your projects.
If you were to create all these effects manually in Photoshop, you would experience how time-consuming and complex it is—from creating folds and small details to matching light and shadows. Ready-made Texture Overlays shorten this process, allowing you to achieve a natural and professional result in minimal time.
Texture Overlays not only save you time and empower your final product, but they also save your creative energy for other, more substantial ideas to bring you a successful project with stunning visuals.
If you’d like to explore more Photoshop tools and learn how to use them, make sure to check out our article on Photoshop tools.



