


The Familiar Problem of Transferring Between Software
Have you had a chance to try the Blender to Daz Studio Plugin? If you’ve worked with 3D software, this situation probably sounds very familiar: you spend hours—or even days—working on a model or animation in Blender. You carefully fine-tune the materials, test the lighting over and over until you achieve the exact mood you want, and finally say, “Okay, this is exactly what I wanted.” Everything is ready to move the project into another software and start the next phase.
But the moment you import the file, something feels off. The materials don’t look the way they should, reflections are different, some textures are disconnected, the lighting no longer has the same atmosphere, and sometimes even the model’s scale is messed up. Suddenly, instead of simply continuing your work, you find yourself redoing a large number of settings from scratch.
The reality is that each 3D software has its own language. Its render engine, material system, and internal structure differ from others. When this “translation” isn’t done correctly, the result won’t be exactly what you expected. That’s why transferring between software is rarely as simple as exporting a file—it can easily turn into a time-consuming and frustrating process.

What Is Daz Studio and What Is It Used For?
If you’ve worked in 3D design—especially character creation—you’ve probably heard of Daz Studio. This software is best known for creating and rendering realistic human characters. When skin details, cinematic lighting, precise materials, and near-photorealistic outputs are important, Daz truly shines. Its built-in Iray render engine calculates lighting, materials, and shadows in a very natural and physically based way.
Daz Studio is commonly used for projects such as:
- Designing highly detailed human characters
- Producing advertising visuals and professional posters
- Creating book and album covers
- Social media illustrations
- Producing cinematic renders for games or animation
Many artists use Daz as a fast and powerful environment for producing realistic outputs, especially when their focus is on the human face and body.
On the other hand, Blender is an all-in-one tool. Modeling, rigging, animation, simulation, full scene control, and high flexibility—Blender is excellent for building and controlling projects. That’s why many people prefer to handle modeling and animation inside Blender and then move the project into Daz Studio for final realistic rendering.
This combination can create a powerful workflow: creative freedom in Blender + render quality in Daz. There’s just one important point: the transfer between these two software must be smooth and accurate. Otherwise, a large portion of your time will be spent on technical corrections.
Default Methods and Their Limitations
If we don’t use any specialized tools, the simplest way is to export an FBX file from Blender and import it into Daz Studio. Technically, this is completely possible, and many people use this method. But the problem begins when, after importing, you realize the result isn’t exactly what you saw in Blender.
With the standard method, you usually have to manually go through several steps:
- Export the file in FBX format
- Import the file into Daz
- Reconnect textures
- Reconfigure materials based on Uber Iray
- Adjust lighting, HDRI, and environment
- Check the scene scale
- Verify morphs and rigging
In practice, you’re not just transferring a model—you’re partially rebuilding the scene.
Common Limitations and Challenges
The biggest challenge is usually related to materials. The Principled BSDF material in Blender does not have a perfect one-to-one equivalent in Daz (Uber Iray). As a result:
- Roughness and Specular are not translated precisely
- IOR may produce different results
- Emission and Transparency usually require manual adjustments
- Some textures need to be reconnected to the correct slots
Additionally, hair created with Particle Systems or Geometry Nodes may break after transfer or not be recognized correctly at all. With animations, you sometimes need to bake everything before exporting to ensure it transfers properly.
The Reality of the Workflow
For simple projects, these issues might not be too frustrating. For example, a static model without complex materials can be fixed quickly. But when dealing with a professional project—a character with complex skin materials, cinematic HDRI lighting, animation, and multiple objects—these manual corrections can take a significant amount of time.
Ultimately, the issue isn’t that transferring without a specialized tool is impossible; it’s that it can become a time-consuming and exhausting process, especially if you need to repeat it over and over.
The Professional Solution | Blender To Daz Studio Plugin
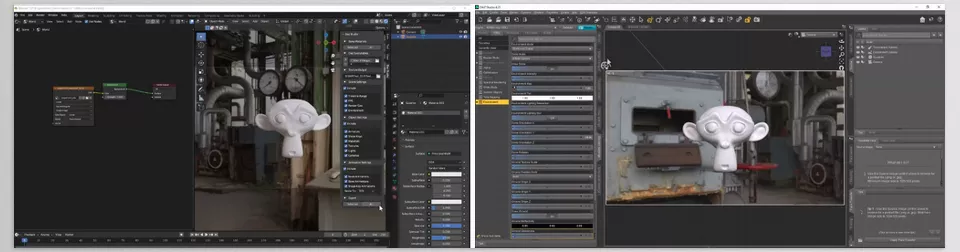
As mentioned earlier, the main issue when transferring a project from Blender to Daz Studio is that settings are not properly “translated.” The file moves, but the result isn’t exactly what you built. The Blender to Daz Studio plugin is designed precisely for that purpose—not just to export files, but to transfer scene data cleanly and accurately.
The most critical part of this transfer is the materials.
🎨 Smart Material Conversion (Where Most Problems Happen)
In Blender, we typically use the Principled BSDF material.
In Daz, the material system is based on Uber Iray. These two are not perfectly aligned, and if they’re not converted properly, the appearance changes.
This plugin transfers key material parameters as accurately as possible, including:
- Base Color → The main surface color (e.g., skin, clothing, or any other material).
- Roughness → Controls how rough or smooth the surface is. Lower values make it glossier; higher values make it appear more matte.
- Metallic → Determines how metallic the surface looks. Important for gold, iron, steel, etc.
- Normal Map → An image map that adds surface detail (like skin wrinkles) without increasing model geometry.
- Alpha → Transparency level. Useful for glass, thin fabrics, or cutout areas.
- Emission → When a surface emits light, such as a monitor screen or neon sign.
Normally, you would have to reconfigure all of these manually inside Daz.
The Blender to Daz Studio plugin helps transfer most of them automatically and logically, so your work’s appearance changes as little as possible.
It also includes a Merge Textures feature, allowing you to combine multiple textures to make project management—especially in heavy files—easier.
🦴 Rigging, Morphs, and Animation Are Preserved
The transfer isn’t just about appearance; movement structure matters too.
Blender To Daz Studio plugin supports:
- Armature → The internal skeleton controlling joint movement.
- Shape Keys (Morphs) → Facial or body shape variations, such as smiles or frowns. In Daz, they are available as Morphs.
- Skeletal Animation → Movements created with the skeleton (walking, head rotation, etc.).
- Transfer of keyframes without needing to manually bake everything (in most cases).
This means if you’ve created an animated character, you’re not just transferring a static model—the movement comes with it.
💡 Lighting, Camera, and Scene Atmosphere
Often, what makes a project special is the lighting and camera angle.
The Blender To Daz Studio plugin helps ensure that:
- Blender lights are transferred
- The camera and its settings are imported into Daz
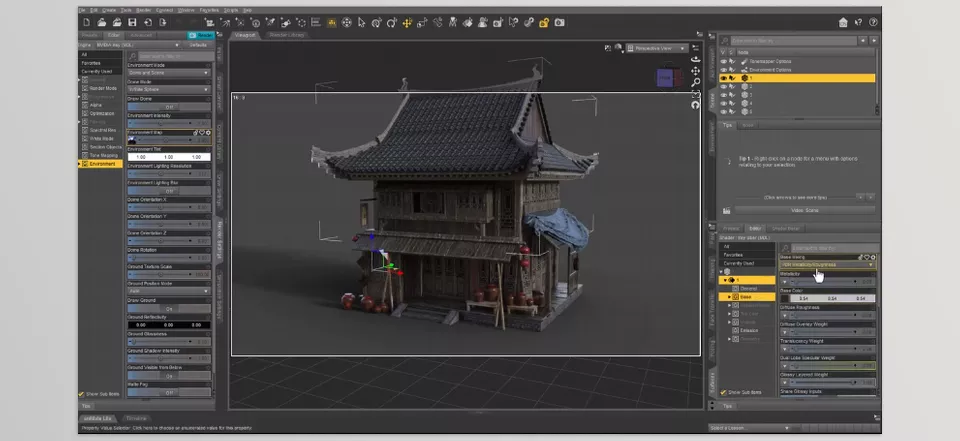
- HDRI (the environmental image that creates overall scene lighting) transfers with correct rotation
- Timeline settings and frame rate are preserved
This helps maintain the original atmosphere of the scene after transfer.
🧩 Suitable for Heavy Projects
The larger the project, the more valuable these features become:
- Exporting multiple objects simultaneously
- Transferring only visible objects
- Clearing the Daz scene before import
- Support for large files
- Converting hair to a Polyline to prevent it from breaking after transfer
Overall, the Blender to Daz Studio plugin doesn’t just “move files”;
It helps ensure that what you created is seen the way you intended.
The result?
Less time spent on technical corrections, less wasted effort, and more focus on the final quality of your work.
How to Get a More Professional Output
To minimize manual corrections after transferring your project, make sure to consider these points before exporting:
- Use standard Principled BSDF
Try to base your materials on Blender’s main shader. Using complex shader combinations or highly intricate setups may not translate accurately and can change the final look. - Avoid overly complex material node setups
The simpler and more logical your node network is, the easier it will be for the plugin to convert it into Uber Iray. Excessive Mix Shaders or complex computational nodes increase the risk of errors. - Test before transferring heavy projects
If you have a large scene with multiple characters and animations, first test with a lighter version or a single object. This helps you catch potential issues early and saves time. - Always check scene scale
Before exporting, make sure object scales are applied and unit settings are correct. If necessary, use the Scale As Percent option to prevent size issues after transfer. - Manage textures properly
Extremely high resolution doesn’t always mean better quality. Overly heavy textures increase file size and slow down import. For heavy projects, you can use Merge Textures. - Check hair and sensitive details before export
If you used Particle Systems or Geometry Nodes for hair, run a test before transferring. This ensures the structure doesn’t break after import. - Review animations
Before exporting, quickly review the timeline and keyframes to ensure everything is properly set and movements are fully saved.
Following these simple steps will make the transfer cleaner and reduce the need for additional corrections after import.
Conclusion | Focus on Creativity, Not Technical Adjustments
In the 3D world, we shouldn’t spend most of our time fixing file transfer errors. Tools are meant to help us reach results faster and more easily—not to add extra complications to our workflow. Transferring from Blender to Daz Studio manually is possible, but it usually comes with numerous readjustments, material checks, and lighting fixes.
When you have to rebuild parts of your work after every import, your creative energy gradually shifts toward repetitive technical tasks. Instead, your main focus should be on better design, stronger lighting, and more professional output. Having a specialized tool for this transfer allows the technical side to become largely automated and reliable.
In the end, the choice is yours. If your projects are simple and infrequent, the manual method might work fine. But if you regularly move between Blender and Daz, or handle larger and more serious projects, having a precise bridge between these two software can make your workflow much smoother.
The result is clear: less time spent on corrections, more focus on quality, and an output that more accurately matches what you envisioned.
Explore every essential Blender tool with our Blender Tools article, which explains how each one works and gives practical examples to help you learn faster.



