


🎬 Why Do We Get Stuck on Rigging Before Animation?
Are you experienced in using the Retargify Addon in Blender? If you’ve ever tried to animate a character in Blender, you’ve probably realized very quickly that before any exciting movement, you have to dive into the relatively complex world of rigging. Setting up bones, creating controllers, and coordinating them together isn’t something you can just breeze through. Especially when you’re not fully comfortable with it yet, even a small change can take up a lot of your time.
On the other hand, many times this isn’t even your goal. You just want to create a simple motion or test an idea, but without a proper rig, you practically can’t even start. This ends up making you spend more time on preparation instead of animation itself.
This is where many people either get frustrated or continue with an average result. The gap between the idea in your mind and what you actually create starts exactly here. The question is: isn’t there an easier way? 🤔

🦴 What Exactly Is Rigging and What Is It Used For?
Rigging is essentially about creating a control skeleton for a character so that you can animate it. This skeleton defines how each part of the body moves and how it reacts to other parts.
For example, when you raise a character’s arm, you need to make sure the shoulder, elbow, and wrist move naturally. Or when a leg bends, the motion should look realistic. This is where tools like Rigify in Blender come in, helping you build a complete and professional rig using a base structure.
The result of using these systems is usually:
- Better control over movements
- More natural animation
- Time savings compared to manual methods
🛠️ What Happens Without Add-ons?
🔧 Common Methods for Rigging
If you don’t use professional tools or add-ons, you usually have two paths: either build everything completely manually, or use Blender’s default Rigify. Both methods are usable, but each comes with its own challenges.
In the manual approach, you have to start from scratch and set up every detail yourself. Rigify shortens this path, but it still requires understanding and configuration.
⚠️ Challenges and Limitations
Although these methods get the job done, they usually take a lot of time and slow down your workflow. Even small changes after building the rig can become troublesome and might even break parts of your animation. On top of that, for beginners, the amount of settings and concepts can be overwhelming, shifting their focus from animation to solving technical problems.
🚀 Retargify; When Things Actually Get Easier
This is where Retargify comes in and targets exactly the part where most people struggle: the complexity and time-consuming nature of rigging. This add-on essentially enhances Rigify and helps you reach results faster while giving you more control—without getting stuck in tedious technical details.
The difference compared to the standard workflow is that instead of building everything from scratch or constantly navigating settings, you get access to a smart, ready-made system that handles much of the work for you, while still allowing manual adjustments whenever needed. That means it’s great for both quick tasks and professional work.
✨ What Can You Actually Do with Retargify?
One of its main uses is that you can quickly create a professional rig for any character. Whether your character is for a game or animation, Retargify helps you add a complete control system without breaking the original skeleton structure, making it ready for animation.
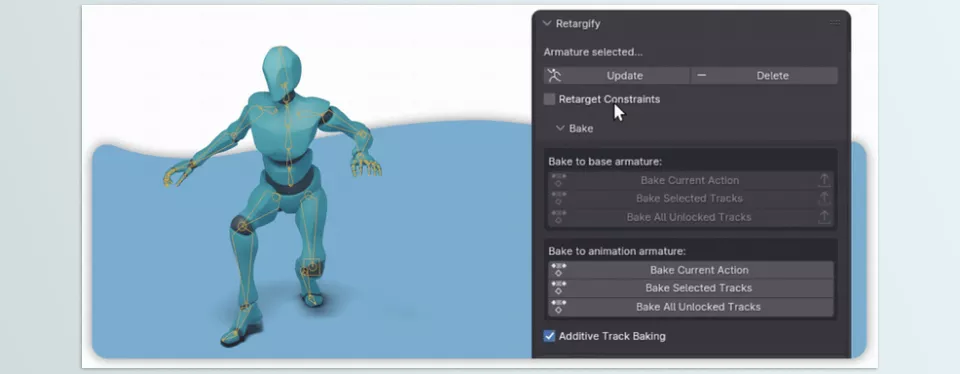
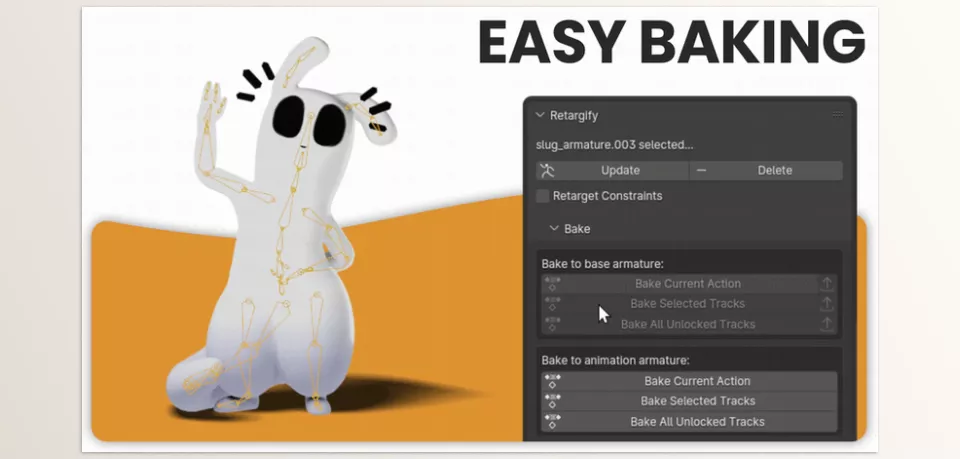
On top of that, it simplifies animation transfer (Baking) significantly. For example, you can:
- Animate on a professional rig
- Then transfer it to the original skeleton with one click
- Or even bring motion capture or pre-made animations onto the rig and refine them
This feature is especially useful when working in teams or dealing with game engines like Unity and Unreal.
⚙️ Why Is It Easier to Work With?
One of its key features is that it works in a non-destructive way. This means it operates on a duplicated version of the rig, leaving your original file untouched. This allows you to:
- Make changes freely
- Test things out
- Or even make mistakes without breaking anything 😄
Also, if you later want to adjust the rig (for example, moving a bone or changing a setting), you don’t need to rebuild everything from scratch. Retargify lets you update the rig without losing your animations and continue working seamlessly.
🧰 Tools That Actually Help You
In addition to all that, it comes with a set of helper tools that make your workflow cleaner and faster. For example:
- Automatically organizes and groups bones
- Uses color-coding to make the rig more readable
- Provides presets you can save and reuse
- Handles connections and constraints largely automatically
These might seem like small details, but in real projects, they save a significant amount of time.
Ultimately, what makes Retargify valuable is that it shifts your focus away from dealing with technical settings and allows you to concentrate more on animation and creativity.
🎯 A Few Tips to Make Your Work More Professional
To get the most out of Retargify, make sure to follow these simple but practical tips:
🔍 Test the rig before starting
Run a quick motion test to ensure everything works correctly and avoid issues later.
🎬 Use Baking smartly
Transfer only the necessary animations to keep your files lighter, cleaner, and easier to manage.
🏷️ Use proper bone naming conventions
Standard names help you transfer animations more easily between different characters.
🔄 Don’t be afraid of Non-Destructive workflows!
Make changes, test, and even make mistakes freely—your original file is always safe.
⚙️ Do a quick check after every change
If you modify the rig, always review the result to prevent breaking your animations.
By following these simple tips, you can both speed up your workflow and achieve cleaner, more professional results. In many cases, the difference between an average and a professional project comes down to these small details 😉
🚀 Why You’re Probably Wasting Time Without Retargify
Rigging has always been one of the most time-consuming and sometimes frustrating parts of animation. Before you even get to the exciting part—animating—you often have to spend a lot of time setting up bones and controls. Retargify targets exactly this stage and helps make the process faster and smoother.
When you start using it, you’ll notice that many tasks that used to be manual and time-consuming are now simpler and more fluid. From building rigs to transferring animations and even making later adjustments, everything is designed to reduce technical friction and help you focus more on the final result.
If you work with characters, this tool can both speed up your workflow and improve the quality of your output. Ultimately, it means less time spent on complex setups and more time creating what you actually have in mind 🎬
If you’re looking for a complete guide to all Blender tools, our Blender Tools article explains every tool step by step and shows practical ways to implement them in your projects.



