

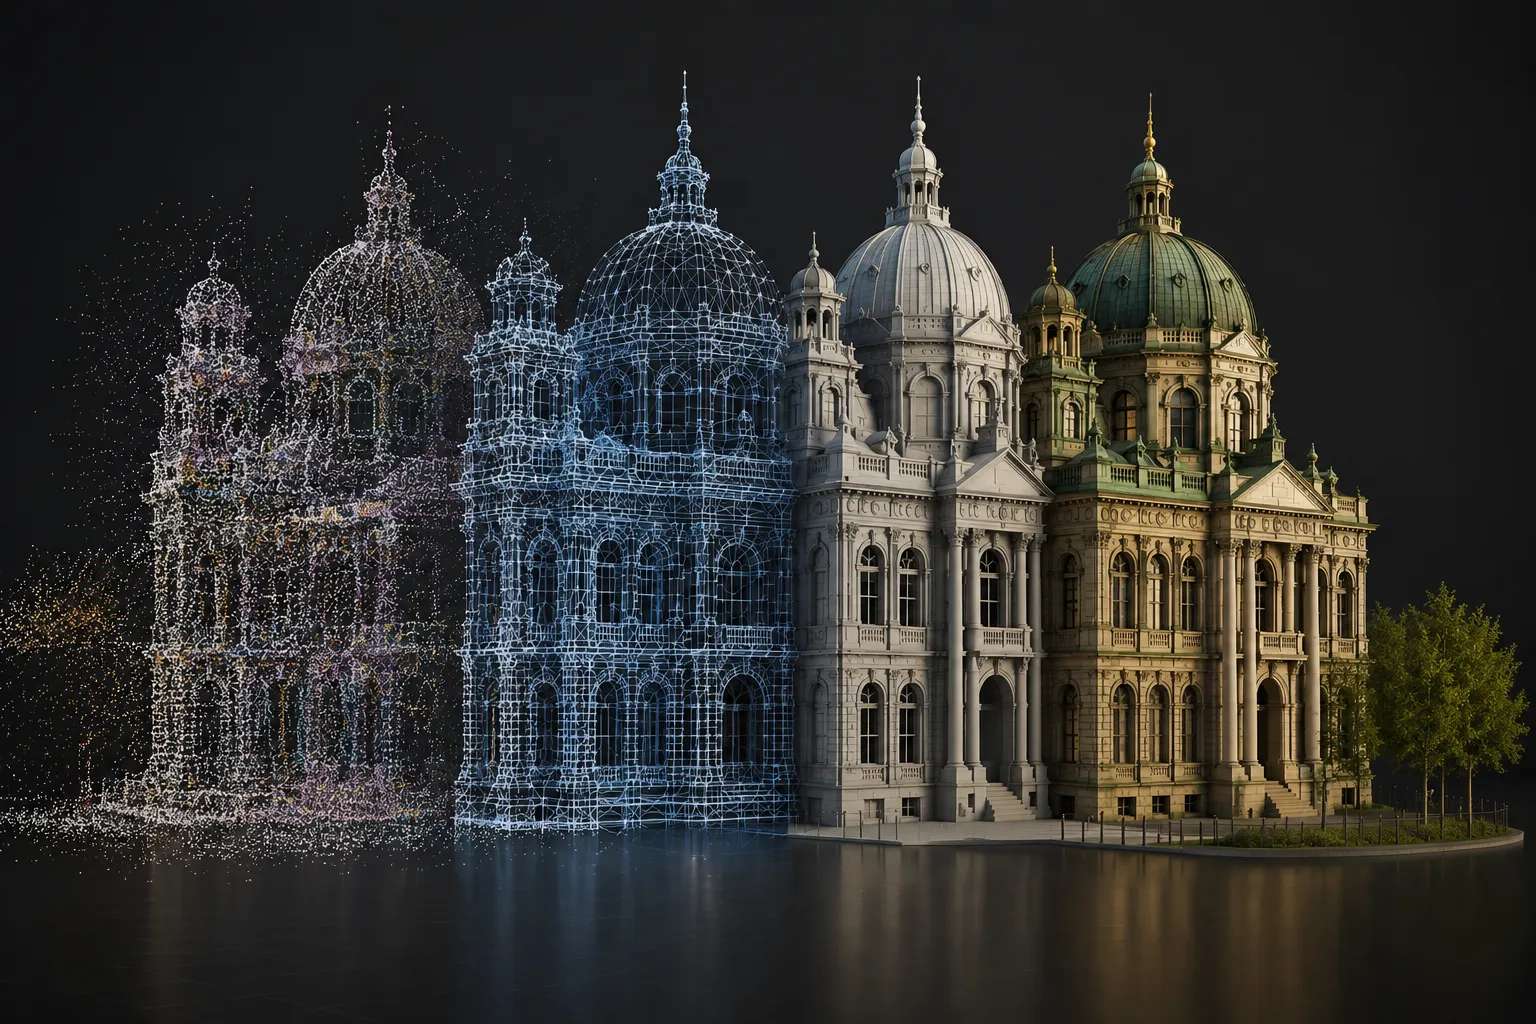
How Do We Bring the Real World Into a 3D Project? 🌍
Have you tried the Point Cloud Visualizer add-on by Superhivemarket at any point? Imagine you want to bring a real building, street, area, or even a natural environment into a 3D project. The usual approach is to sit down and recreate that environment through 3D modeling, but for large, highly detailed spaces, this can take hours or even days.
This is where 3D scanning comes into play. Instead of modeling everything manually, you can capture the real environment using technologies like LiDAR or Photogrammetry and bring its 3D data into your software.
However, the output of these scans isn’t always a clean, ready-to-use 3D model. Quite often, what you have is a massive collection of millions of points in 3D space; data that contains a huge amount of information while also bringing its own challenges when it comes to working with it.

What Exactly Is a Point Cloud? ☁️
A Point Cloud is a collection of 3D points, each with a specific position in X, Y, and Z space. Together, these points can form the shape of a building, terrain, tree, car, or even an entire environment.
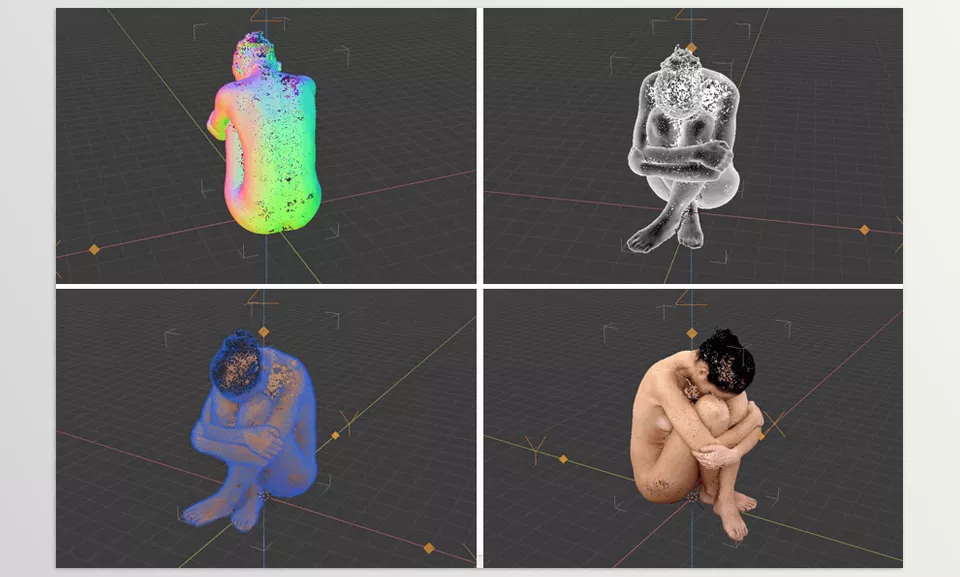
Some Point Clouds contain additional information beyond position, such as Color, Normal, and Scalar Value. So they’re not just a collection of simple points; they can actually store relatively accurate information about a real-world environment.
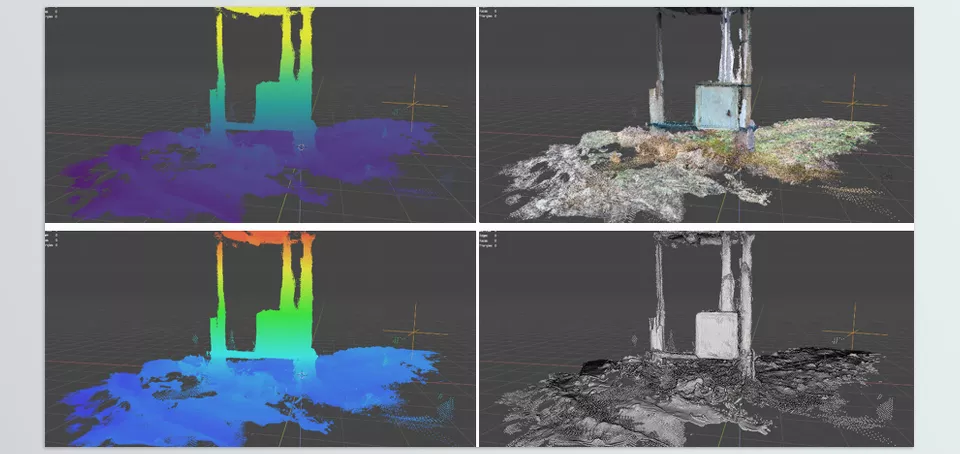
For example, a LiDAR scan of a street can contain millions of points that define the positions of buildings, the ground surface, trees, and various objects. Or with Photogrammetry, a collection of photographs can be used to turn a real environment into this kind of data.
What Is It Used for in 3D Projects?
Point Cloud data can be useful in a variety of situations:
- Real-world environment reconstruction: Using a location scan as the foundation for building a scene.
- VFX and cinema: Bringing real-world environmental information into digital scene creation or compositing.
- Architecture: Accurately capturing existing buildings and spaces before modeling or redesigning them.
- LiDAR: Working with data generated by terrestrial or aerial scanning.
- Photogrammetry: Converting collections of photographs into 3D information.
- 3D Gaussian Splatting: Working with newer forms of 3D reconstruction data generated from images and videos.
The interesting thing is that you don’t always need to convert a Point Cloud directly into a conventional 3D model. Sometimes, simply displaying the information as points is completely sufficient and useful for inspection, design, or even creating a specific visual look.
Working With Point Clouds in Blender Without a Dedicated Tool 🛠️
If you want to work with Point Clouds without a dedicated Add-on, you can use Blender’s own capabilities. Depending on the type of data and what you want to do with it, a combination of Geometry Nodes, Mesh, Vertices, and Python will usually become part of the Workflow. For example, you can convert points into Geometry, perform different operations on them, or use scripts for specific processing tasks.
Depending on the needs of the project, there are several common approaches:
- Geometry Nodes: For processing and controlling points, changing their positions, removing them, or generating Geometry from them.
- Mesh and Vertices: Converting point data into a Mesh structure and working directly with Vertices.
- Python: For importing, converting, or processing data that isn’t easy to manage through Blender’s standard tools.
- Voxel and Volume Workflow: For converting or reconstructing parts of the data into volumetric structures and using them in later stages.
Where Things Become Difficult and Time-Consuming 😵💫
The main problem becomes apparent when the Point Cloud is large. When you’re dealing with millions or even hundreds of millions of points, converting the data into standard Blender structures can dramatically increase memory usage and put significant pressure on Viewport performance. On the other hand, operations such as Crop, removing unnecessary points, filtering based on color or value, Voxelize, Normal estimation, and Surface Reconstruction usually require multiple processing stages and different settings. As a result, something that seems simple on a small dataset can become a relatively complex and time-consuming Workflow on a large scan, especially when you want to keep the data clean while maintaining smooth Viewport performance.
Point Cloud Visualizer: a Complete Point Cloud Workflow for Blender 🚀
Point Cloud Visualizer is a specialized Add-on for Blender that covers almost the entire Point Cloud workflow, from importing and displaying massive datasets to selecting, cleaning, filtering, converting, creating new Point Clouds, and even rendering. So instead of using a separate tool or Workflow for every stage, you can handle much of the process directly inside Blender.
The important point is that Point Cloud Visualizer wasn’t built only for ordinary, small datasets; its primary focus is large-scale data. In the Standard version, it can display hundreds of millions of colored points in the Viewport, with the number of points effectively limited only by your system memory and GPU. To make working with such large datasets smoother, there’s also a Fast Navigation option that displays a Subsampled version of the data instead of drawing every point while navigating through the Viewport.
Professional Display and Control Over Point Appearance 👀
It’s not just the high point count that matters; the tool also lets you control how the Point Cloud is displayed in the Viewport. You can use multiple Shading methods and combine them, display Point Normals, and use a Clipping Plane to limit the visible portion of the data.
Also, if the Point Cloud contains Scalar Values, you can Remap those values within a specified range and display them using different Color Schemes. This is useful when you want to inspect not only the visible colors of the points but also numerical data stored inside the Point Cloud in a visual way.
Interactive Gizmos are also available for Clipping Planes, meaning you can move and adjust the clipping plane directly in the Viewport, and even save different Clipping Plane configurations by name and restore them later. 🔍
Support for a Wide Range of Formats 📂
To avoid limiting you when working with different types of scan and Point Cloud data, Point Cloud Visualizer supports a variety of formats.
For Import, you can use the following formats:
- PLY
- LAS / LAZ
- E57
- PCD
- Text-based formats such as PTS, XYZ, TXT, and CSV
For Export, you can also save Point Clouds in PLY, LAS/LAZ, E57, and PTS formats.
One important point is that the tool also includes a dedicated PLY Reader/Writer optimized for Point data and better performance, so PLY isn’t treated merely as an additional format in Point Cloud Visualizer and has been given serious consideration for Point Cloud Workflows.
Cleaning and Editing Point Clouds Directly 🧹
After importing the data, you don’t have to keep the point cloud as a finished file. You can perform different operations directly on the points themselves and prepare the data for use in your project.
For selection and cleaning, the tool includes both Modal Selection Tools and the ability to use Blender Edit Mode. In Edit Mode, a temporary Mesh is connected to the Point Cloud so you can use some of Blender’s standard tools to manage the points.
For processing the data itself, you also get access to a large collection of filters:
- Subsample: Reducing the number of points to make the data lighter.
- Voxelize: Organizing and reducing data based on Voxels.
- Slice: Separating sections of the Point Cloud.
- Crop: Cutting and removing areas outside the desired region.
- Boolean: Performing Boolean operations on point data.
- Join / Split: Combining multiple Point Clouds or separating one collection into different sections.
- Color Adjustment: Correcting and adjusting point colors.
- Remove by Color: Removing points based on color.
- Remove by Value: Removing points based on a stored value.
- Remove Duplicates: Removing duplicate points.
- Estimate Normals: Calculating and estimating point Normals.
- Project on Mesh: Projecting points onto a Mesh.
- Point Set Registration: Aligning and registering point sets.
- Surface Reconstruction: Reconstructing a surface from a Point Cloud.
This means that if, for example, you have a large 3D scan of a building, you can first crop unnecessary areas, remove unwanted points, Subsample the data, correct the colors, and then move on to surface reconstruction or conversion to a Mesh.
Retopology on a Point Cloud 🧩
One of the tool’s interesting features is its collection of Mesh Retopology tools. These tools use Vertices that snap to points and display the Mesh over the Point Cloud using dedicated Shaders.
In simple terms, you can use the Point Cloud as a reference for the real shape of an object or environment and build a new Mesh over it, without being forced to rely solely on the initial, irregular point structure.
This feature becomes especially valuable when the Point Cloud comes from a real-world scan, and you want to build a cleaner, more controllable Mesh from it.
Converting Point Clouds to Mesh and VDB 🔄
A Point Cloud doesn’t always have to be the final stage. If you want to move into modeling, Geometry Nodes, or Rendering, Point Cloud Visualizer allows you to convert the data into different types of Blender Meshes as well as VDB Volumes.
The good thing is that during conversion, information such as Scalar Fields and Normals contained in the Point Cloud can also be preserved. So the data moving into the next stage isn’t simply a basic Mesh stripped of its information.
For example, you can import a scanned environment, isolate and clean the section you need, and then convert it into a Mesh so you can continue working on it with Geometry Nodes or any Render Engine you want.
Support for 3D Gaussian Splatting ✨
Point Cloud Visualizer isn’t limited to traditional Point Clouds and also supports 3D Gaussian Splatting PLY files.
It can reconstruct point colors from Spherical Harmonics and convert 3DGS data into a Blender mesh that can be rendered in Cycles, achieving a look similar to the 3D Gaussian Splatting effect.
This feature also makes the Add-on useful in newer 3D reconstruction Workflows based on images and video, especially for users moving between Gaussian Splatting, Point Clouds, and Blender.
Creating Point Clouds Inside Blender 🏗️
The features aren’t limited to importing. You can also generate Point Clouds directly inside Blender.
Point Cloud Visualizer allows you to generate Point Clouds from different sources:
- Mesh Surface: Creating points from the surface of a Mesh.
- Mesh Volume: Generating points from the volume of a Mesh.
- Geometry Nodes Vertices: Converting Geometry Nodes Vertices into a Point Cloud.
- Whole Scene: Generating a Point Cloud from the entire Scene.
You can even process the entire Scene as a simulated scan; the tool also allows you to generate Point Clouds by simulating a LiDAR Scanner or Photogrammetry.
This means you can create a Point Cloud from a completely digital Scene and reuse it for testing, design, Visualization, or further processing.
Working With Point Cloud Sequences 🎞️
If the Point Cloud isn’t just a single static frame and is available as a Sequence, the tool also supports Playback, processing, filtering, and Batch conversion.
You can even generate a new Sequence from a Mesh or Scene. This capability is particularly important for Workflows where Point Cloud data changes over time, so the tool isn’t limited to Static projects.
Direct GPU Rendering 🎥
Point Cloud Visualizer also has its own built-in GPU rendering engine, allowing you to convert a Point Cloud directly into an Image or Image Sequence.
Rendering can be done with the Viewport or with a Transparent Background, so you don’t necessarily have to convert the Point Cloud into a conventional Mesh first just to render it.
A Useful Tool for Debugging 🔧
One of its less promotional but interesting capabilities is that it can also be used as a Debugging tool. If you need to inspect the exact Location, Normal, or Color values of points in a 3D project, Point Cloud Visualizer can help you view and examine this information.
The tool also provides a Python API, allowing you to use Point Cloud Visualizer in programming Workflows and custom tools.
Pro Version: for Truly Massive Datasets 🚀
The Standard version provides a comprehensive set of features for many Point Cloud projects, but if you’re working with truly massive datasets, the Pro version offers more specialized capabilities.
The most important Pro feature is Tiles mode. In this mode, you can manage extremely large datasets stored across multiple files as a single collection. The system uses LOD and an Octree to make displaying and managing such large amounts of data more practical and optimized.
The Pro version also provides Measure tools in Tiles mode and includes dedicated Shading options optimized for datasets that don’t contain color information.
As a result, the main difference between the two versions comes down mostly to project scale: Standard provides a comprehensive set of tools for displaying, editing, converting, and generating Point Clouds; while Pro becomes more appealing when you move into very large, multi-file projects where managing massive amounts of data becomes more important.
Overall, Point Cloud Visualizer can be considered an almost complete Point Cloud Workflow inside Blender; a tool that covers Import → display → filtering and cleaning → editing → Retopology → conversion → Point Cloud generation → rendering and Export, while also providing specific capabilities for 3D Gaussian Splatting, LiDAR, and massive datasets.
A Few Tips for a Cleaner Point Cloud Workflow 🎯
To keep working with heavy Point Clouds from becoming a headache, it’s better to pay attention to data volume and how it’s processed from the very beginning. A few simple tips can keep the Workflow more organized while also reducing the load on Blender:
- Lighten the data first. Before converting a Point Cloud into a Mesh, use Crop, Subsample, or Voxelize to reduce the amount of data to a reasonable level.
- Don’t overload the Viewport unnecessarily. With large datasets, Fast Navigation displays Subsampled points while navigating, helping keep Viewport interaction smoother.
- Use Color for filtering. If the Point Cloud contains color information, filtering by color can help separate different parts of the scan.
- Don’t convert everything into a Mesh. Until you actually need conventional Blender Geometry, the Point Cloud itself may be a better option for displaying and processing the data.
- Consider Pro for extremely large datasets. If your data is spread across multiple files and is truly massive, the Tiles feature combined with LOD and Octree makes managing these kinds of projects easier.
Ultimately, the best Workflow is to clean and lighten the Point Cloud as much as possible before moving on to conversion or heavy processing. This gives you more control over the data while avoiding the need to burden Blender with additional data you don’t actually need. ✨
Blender Becomes More Ready for the Real World 🌎
Point Cloud Visualizer is essentially a specialized tool for people who want to bring real-world scanned data into Blender. Instead of seeing a point cloud as a strange, heavy file, you can bring it into your Workflow as processable 3D data, separate different parts, clean it, and convert it into a Mesh when needed.
The main strength of Point Cloud Visualizer is that it isn’t just a simple Viewer. It covers everything from Import and display to filtering, editing, conversion, Point Cloud generation, and rendering, and it’s designed for datasets that can be time-consuming and demanding to handle through Blender’s standard Workflow.
So if you work with LiDAR, Photogrammetry, 3D scanning, or 3D Gaussian Splatting, this tool can be one of those Add-ons that makes the difficult and technical parts of a project much more manageable. But if all your projects are built with conventional Meshes, you probably won’t need much of its functionality.
For anyone looking to explore all Blender tools in depth and learn practical ways to apply them, our Blender Tools article is a must-read.



