

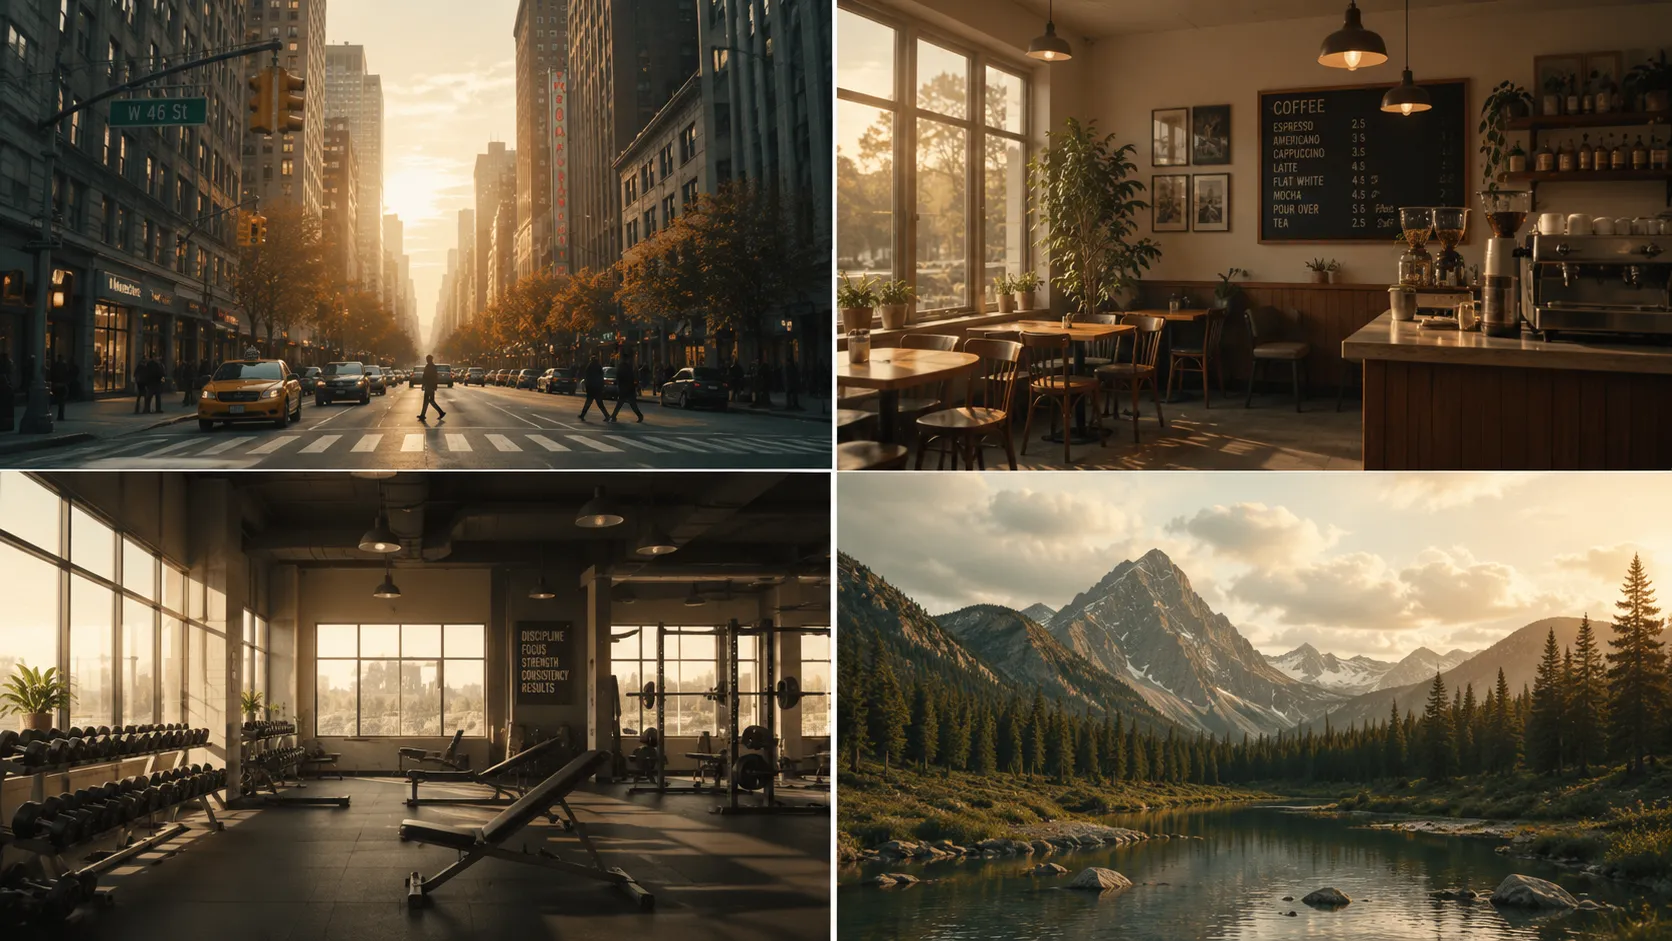
When Every Shot Has a Different Color, the Whole Project Loses That Professional Look! 🎬
Do you know anything about the AI Color Match Plugin by aescripts? You’ve probably experienced this before: after finishing a shoot, you open your project and realize every shot looks different. One is warmer, another is cooler, one is underexposed, another is too bright. This becomes even more noticeable if you filmed with multiple cameras or the lighting conditions changed during production.
In most cases, you’ll have to go through each video clip and adjust the exposure, white balance, contrast, and more in order to even attempt to make each shot look as similar as possible. This can become increasingly frustrating and visually taxing to edit for those large projects.
Fortunately, there are now tools that can handle a large part of this process intelligently, allowing you to spend less time on repetitive adjustments and focus more on editing and creativity.

What Is Color Matching? 🎨
Simply put, Color Matching is the process of making all the shots in your project look as if they were filmed with the same camera under the same shooting conditions. In other words, when the video plays, the audience shouldn’t feel that the color and lighting change every few seconds.
For example, imagine you’ve filmed an interview. The first camera recorded a slightly yellow image, while the second camera produced cooler colors. Or perhaps part of the project was shot at noon, and several other shots were captured close to sunset. If these differences aren’t corrected, the audience may not know why, but they’ll still feel that the footage lacks consistency.
That’s why Color Matching is considered one of the most important parts of editing and color grading. It helps make your project look more professional, cleaner, and visually appealing.
How Can You Match Colors Without a Plugin? 🎨
Fortunately, you don’t necessarily need a plugin for Color Matching. Both Premiere Pro and After Effects include tools that let you bring the colors and lighting of different shots closer together. However, most of these adjustments are done manually, and the more shots you have, the more time the process takes.
The tools commonly used for this include:
- Lumetri Color: For adjusting color, exposure, contrast, and white balance.
- Curves: For precise correction of brightness and individual color channels.
- Color Wheels: For adjusting colors in the shadows, midtones, and highlights.
- Exposure and Levels: For correcting exposure and the overall brightness range.
- Color Match (in Premiere Pro): A feature powered by Adobe Sensei that can automatically bring two shots closer together in terms of color.
Why Isn’t This Method Always the Best Choice? ⏳
All of these tools are useful, and if you’re working with only a few shots, you can probably achieve great results without any plugins. But once you move on to larger projects, things become different. Imagine having to manually adjust the colors of 50 or even 100 different shots—changing the exposure, white balance, contrast, and color every single time, then constantly switching between clips to make sure everything matches. The process is not only time-consuming but also becomes tiring after a while, and there’s always a chance that subtle inconsistencies remain between shots. That’s exactly why many editors prefer using intelligent tools for larger projects, allowing much of this repetitive work to be automated.
AI Color Match: Let Artificial Intelligence Handle the Tedious Work 🤖
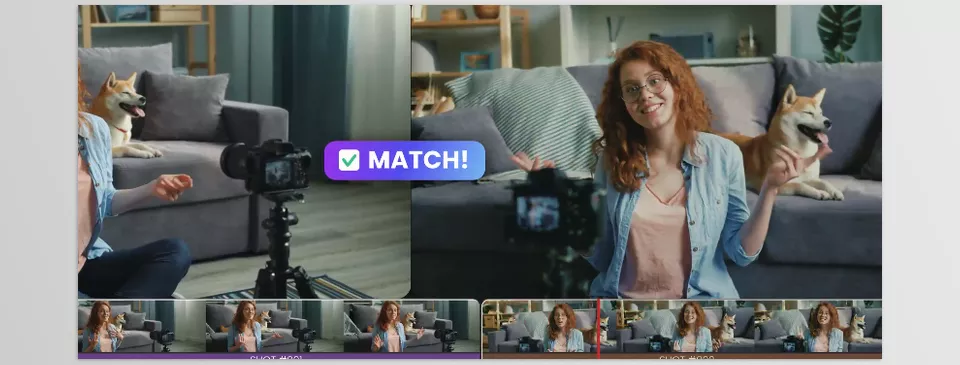
AI Color Match is a plugin for Premiere Pro and After Effects designed specifically to solve this problem. Simply choose one shot as your reference, and the plugin analyzes the image, then attempts to match the color, lighting, and overall appearance of the remaining shots to that reference.
It’s not meant to replace a professional colorist, but it can complete hours of repetitive work in just a few minutes and provide an excellent starting point for color grading.
Intelligent Matching of Color, Exposure, and Contrast
The most important feature of AI Color Match is that it doesn’t simply copy colors. The AI analyzes the reference image and simultaneously evaluates factors such as exposure, contrast, white balance, and the overall look of the image to produce a more natural result.
As a result, after running the plugin, only a few minor adjustments usually remain, and you won’t need to spend hours tweaking different sliders.
Make Your Entire Project Consistent with Just One Reference Shot
Using the plugin doesn’t require any complicated setup. Simply choose a shot with ideal color and lighting, and AI Color Match uses it as the reference.
Within a few seconds, the remaining shots are matched as closely as possible to that look. This is especially valuable for projects with a large number of clips, saving you a significant amount of time.
Perfect for Multi-Camera Projects
If your project was filmed using multiple cameras or the camera settings changed during production, this plugin can be extremely useful.
For example, you might have one shot captured with a Sony camera, another with a Canon, several others with a mirrorless camera, or even a smartphone. AI Color Match helps reduce the color differences between these shots, giving the entire project a more consistent appearance.
Even if the lighting conditions changed between takes, it can still minimize those differences to a large extent.
Take Inspiration from Your Favorite Movies and Videos
Another great feature is that your reference shot doesn’t have to come from your own project.
For example, you can use a frame from a movie, commercial, music video, or any video whose color style you like, allowing the plugin to recreate that color appearance on your own footage.
This feature is especially useful for commercials, music videos, and cinematic projects.
Control the Effect Strength Yourself
Sometimes you don’t want the result to completely match the reference shot. That’s why AI Color Match lets you increase or decrease the strength of the Color Match effect.
For example, you can apply only part of the color adjustments for a more natural result, or increase the intensity when you want closer matching between shots.
Fully Local GPU Processing
One of the major advantages of AI Color Match is that all processing is performed on your own system’s GPU.
That means no frames are uploaded to online servers for processing. Besides protecting your project’s privacy, local processing is also faster than many online services, and you don’t have to worry about uploading large files.
Higher Quality for Professional Projects (Pro Version)
In addition to all the features of the standard version, the Pro version supports both 16-bit and 32-bit projects.
If you’re working on cinematic productions, commercials, or HDR deliveries, this allows color matching to be performed with greater precision while preserving image quality throughout the Color Match process.
Export LUTs and Reuse Them
One of the best features of the Pro version is the ability to export your results as a LUT (.cube) file.
This means that once you’ve achieved a look you like, you can save that color style and reuse it later in other projects or even in applications such as DaVinci Resolve, Final Cut Pro, Premiere Pro, or any other software that supports LUTs.
Available for Premiere Pro and After Effects on Windows and Mac
AI Color Match works in both Premiere Pro and After Effects, and supports both Windows and macOS (including Apple Silicon).
So regardless of which system you’re using, the experience is nearly identical.

A Few Tips to Get Better Results with AI Color Match ✨
Before running the plugin, choose a good reference shot. The more balanced its lighting and colors are, the more natural your final result will be.
- Choose your reference shot carefully. If the reference itself has exposure or color issues, those problems will be transferred to the other shots.
- Adjust the effect strength. It doesn’t always need to be set to 100%. Sometimes a lower value produces a much more natural result.
- Review the project after Color Match. AI is excellent, but it still can’t replace an editor’s eye. If necessary, make a few small manual adjustments.
- Export a LUT. If you’ve created a color style you like, save it so your future projects can be ready with just a few clicks.
- Perform Color Match separately for each scene. If the lighting differs significantly between scenes, matching each sequence using its own reference shot will produce more natural results.
Following these simple tips helps AI Color Match perform at its best, allowing you to achieve a consistent, natural, and professional-looking result in the shortest possible time.
Spend Your Time Editing, Not Adjusting Sliders 🎯
Most of the time, what slows a project down isn’t the difficult work—it’s the repetitive work. Re-adjusting exposure, color, white balance, and comparing shots over and over again is what consumes so much time. AI Color Match was built specifically to reduce that part of the workflow, helping you move past technical adjustments more quickly and focus on editing and your final output.
The AI Color Match plugin was built to automate most of the repetitive editing work within a project, allowing editors to skip the tedious and time-consuming process of adjusting the exposure, color, and white balance of their project to each clip to look as similar as possible. Instead of spending hours performing these edits, the AI Color Match tool can create a project that is nearly ready to be exported and shared in just a few minutes.
If you only edit occasionally, the built-in tools in Premiere Pro and After Effects may be all you need. But if you regularly work on multi-camera productions, commercials, documentaries, or long-form videos, AI Color Match is one of those tools that saves you more than anything else—your time. And when you have more time, you can devote your energy to what truly matters: creating a more professional final result.
Are you looking to expand your knowledge of After Effects tools and understand what options are available? Our After Effects Tools guide explores different types of tools and explains how categories like plugins, scripts, presets, and project templates can help you create better projects.



