


Add Rain to Your Scene Effortlessly!
Have you played around with the Baga Rain Generator at all? Imagine you’re creating a 3D scene: a wet street at night, raindrops on a window, or a rainy forest with glistening leaves. It’s these small details that make a scene feel alive and realistic.
But the truth is, creating rain in Blender or any other 3D software can be a real headache. You have to ensure raindrops fall correctly on surfaces, the rain’s speed and density look natural, the wind and collisions behave properly… in short, there’s a lot of work that even professionals sometimes find exhausting.
Now, imagine doing all this with just a few clicks and focusing entirely on creating your scene and story, not on complicated settings. This is exactly where professional tools like Baga Rain Generator come in handy.

Traditional Methods: Hard and Time-Consuming
Creating rain without a plugin is possible, but it is full of challenges and very time-consuming. Let’s look at the methods available and their limitations:
1. Particle Systems
- You can create rain with a particle system, but every drop must fall correctly and collide naturally with surfaces.
- Adjusting particle speed and density is complex and time-consuming.
- The final result usually requires a lot of trial and error to look realistic.
2. Rain Maps or Wet Textures
- This method shows raindrops on surfaces without creating actual particles.
- For large scenes, you need to create precise maps for each surface, which can take hours.
- Even after all that work, the rain might still not look natural.
3. Creating a Rain Loop
- If you want repeated or looped rain, every drop must complete its path and then start over.
- This involves a lot of trial and error, often requiring multiple adjustments to achieve an acceptable result.
💡 Summary:
Traditional methods work but are time-consuming, complicated, and full of technical details that distract you from scene creation. Your main goal should be storytelling and scene building, not particle setups and masks!
Baga Rain Generator: Real Rain, Just a Few Clicks Away
Now it’s time to see how Baga Rain Generator can make your workflow easier. This Blender plugin allows you to add realistic, professional rain to 3D scenes with just a few clicks. No more hours spent on particles and masks—everything is ready and fast!
What It Offers:
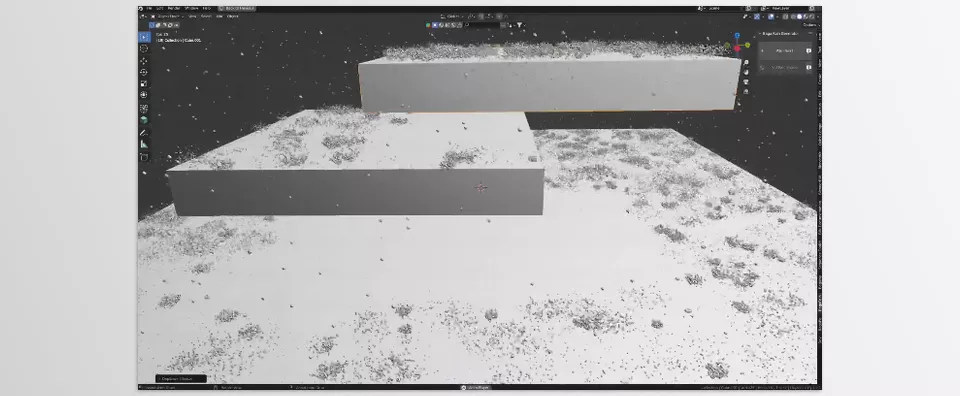
1. Rain on Any Surface (Mesh)
- Select any object in your scene, and rain will be applied precisely on it.
- Only surfaces exposed to rain are affected, keeping the scene natural and optimized.
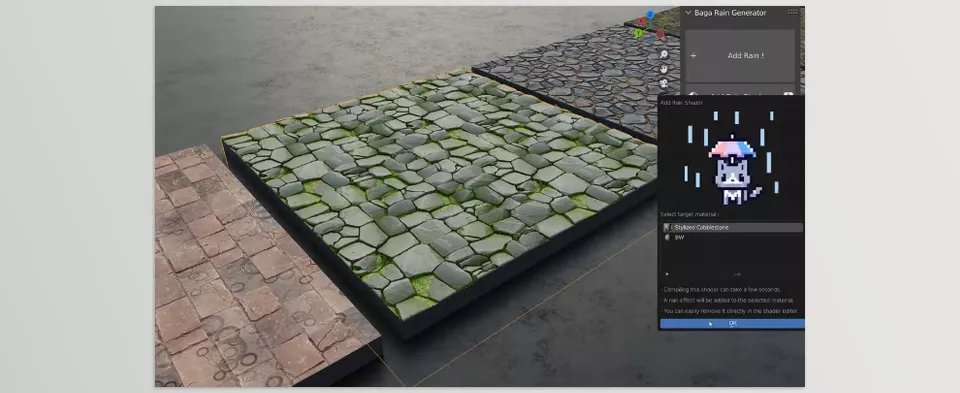
2. Ready-to-Use Rain Shader
- Raindrops and effects are applied to existing materials without altering them.
- Works on glass, wet ground, metal, or any other surface.
- Simulates subtle droplet movement for extra realism.
3. Full Parameter Control
- Rain density: Adjustable from light drizzle to heavy downpour.
- Rain height: Determine from what height drops fall.
- Rain speed: Make rain faster or slower.
- Wind direction: Rain can move with or against the wind.
- Collision with surfaces: Drops collide at the correct angle, ensuring realism.
4. Automatic Loop Animation
- Rain loops automatically, remaining smooth and repetitive.
- Perfect for motion graphics, short animations, or cinematic scenes.
5. Rain Distribution and Optimization
- Two distribution methods for small and large scenes:
- Small scenes: Rain spreads across the entire surface area, looking natural.
- Large scenes: Distribution per object keeps the system lightweight and fast.
6. Integration with Complex Scenes
- Apply rain to multiple objects and materials.
- Drops sync with all materials and collisions without manual adjustments.
7. Practical Examples
- Urban scene: Drops settle on glass, hit the ground, and move with the wind—all with one click!
- Forest or open space: Rain appears natural on leaves, ground, and all objects, without complex particle setups.
Baga Rain Generator doesn’t just create rain; it gives you full control over appearance, motion, and animation. You can build realistic, ready-to-render rainy scenes without spending hours on technical details.
Pro Tips for Best Results
Even with the best tools, following a few small tips can make your results more realistic and professional while keeping the system optimized:
1. Adjust Rain Density and Height
- For larger scenes, use the fast distribution method. This spreads rain across all objects without slowing down the system.
- Set rain height appropriate to the scene: short rain for streets, taller rain for forests or open spaces.
2. Use the Rain Shader on Different Materials
- Apply rain to specific parts of the scene, like windows, wet ground, or tree leaves.
- This ensures the scene looks natural and prevents unnecessary rain on irrelevant surfaces.
3. Combine with Wind Animation
- Simulate wind to give raindrops natural movement. Even a small breeze can make the scene feel alive and increase realism.
4. Loop Control
- For short or repeating scenes, adjust rain speed and timing so the loop is smooth.
- Each drop must complete its path to maintain natural movement when the scene repeats.
5. Extra Tips for Realism
- Combine rain with lighting and reflective materials for a more realistic look.
- Adding a slight variation in droplet size and fall speed creates a natural, random effect.
- For cinematic effects, make droplets closer to the camera larger and more defined, and distant drops smaller and subtler.
Following these tips ensures your rainy scenes are both realistic and smooth. For motion graphics and short animations, they make the scene look professional while optimizing render time.
Why Your Rain Should Be Realistic
Adding realistic rain to 3D scenes isn’t just a visual effect; it gives life and authenticity to the scene. When drops settle naturally on surfaces, interact with the environment, and respond to wind, your scene instantly becomes believable and captivating.
Using tools like Baga Rain Generator allows you to handle all these details effortlessly. You can adjust rain density, height, speed, wind direction, and even animation loops exactly to your scene’s needs—without spending hours on particle and mask settings. This means shorter project production times and much higher visual quality.
It’s easier than you might think, and it’s so much fun! You’ll never want to create a motion graphic, animation, or cinematic scene without it again. If you want to keep your work looking polished while getting lost in narrative and mood for a scene rather than technical challenges, rain is the way to go.
If your goal is to become a confident Blender user, our comprehensive Blender Tools guide covers all the tools, explains their practical applications, and gives you the insight you need to use them creatively and efficiently.



