

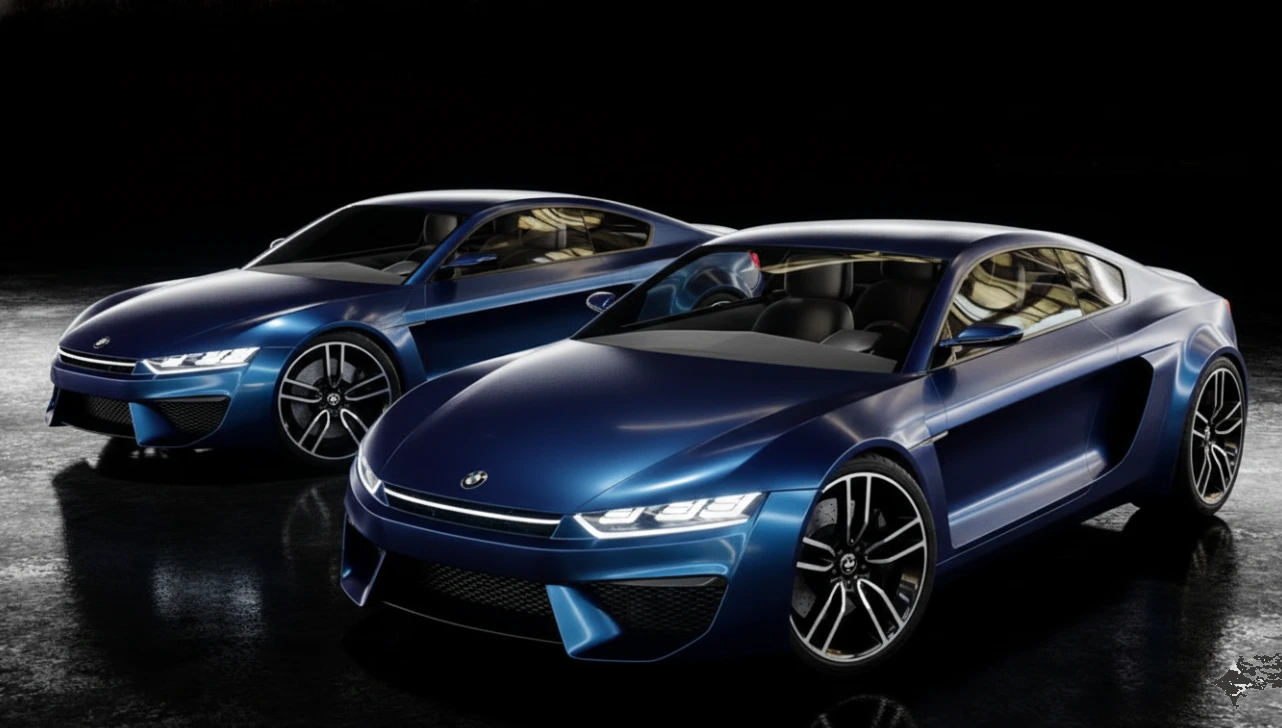
Why Creating Attractive Renders Is Always Hard
Are you experienced in using the Pro Lighting Studio? Have you ever built a great 3D model, with everything clean and perfect, only to find that when you render it, the result looks somewhere between ordinary and lifeless? Exactly at the moment you think your work is finished, you realize something is missing…
The issue isn’t just lighting, although good lighting can add emotion and depth to a scene. Backgrounds, the floor, and materials are also crucial. A simple, boring floor or a background that doesn’t match the scene can ruin even the best lighting, making the final render look dry and lifeless.
Finding the right combination of these elements can be time-consuming and sometimes frustrating. You have to move lights around, try different backgrounds and materials, and even after all that effort, the desired mood may still not appear.
In short, even with a perfect model, lighting, environment, and materials are like a puzzle that must be in the right place to make the final render lively and engaging.

What Is Digital Lighting and Why Is It Important?
Digital lighting refers to the placement and control of lights in 3D scenes to add emotion, depth, and appeal to your work. It’s like magic that can bring a lifeless model to life or turn an ordinary render into something that really catches the eye.
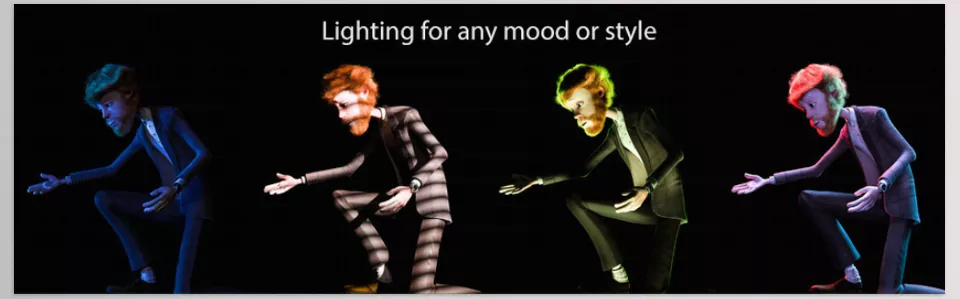
Imagine you have an amazing character; the facial details, outfit, and animation are all perfect. Without proper lighting, all these details appear muted and lifeless. But with the right lighting, shadows, highlights, and reflections become visible, making the character look real and captivating. Even a small movement gains mood and presence with good lighting.
Why does it improve design and animation?
Proper lighting highlights important parts of the model, conveys the scene’s mood and story, and draws the viewer in. For example, soft warm lighting can create a calm, friendly scene, while sharp, angled light can generate excitement and drama. Without good lighting, even the best models and animations cannot be as impactful.
In other words, digital lighting is like painting on a blank canvas: used correctly, it brings your work to life; otherwise, even a masterpiece can look plain and boring.
Traditional Methods: Lighting in Blender Without Add-ons
Blender offers complete built-in tools for lighting, and technically, almost any type of light can be created with it. Many artists have been working solely with these tools for years and have achieved acceptable results.
Built-in tools Blender provides:
For manual lighting, the common tools are:
- Point, Area, Spot, and Sun lights for direct control
- HDRI for ambient lighting and softer scene illumination
- World Nodes to adjust reflections
- Helper objects to shape light reflections on shiny surfaces
Everything seems ready at first glance. But when you dive into the details, challenges appear.
Time-consuming adjustments
The first problem almost everyone faces is that everything is manual. To achieve proper lighting, you have to move lights multiple times, adjust intensity and angles, and render each time to see the result. This process, especially when trying multiple styles, quickly becomes exhausting.
Difficulty matching lights with the environment
Lighting isn’t just about the lights themselves. Lights must match the background, floor, and reflections for the final image to look natural and professional. Often, everything looks correct individually, but when combined, the result lacks the desired mood, and identifying the cause isn’t easy.
Limited to repetitive styles
Because experimenting with new styles takes time and energy, we often revert to a few safe and familiar styles like three-point lighting. While these are fundamental, they rarely produce unique or emotionally strong results. Discovering creative or cinematic lighting without a template is challenging.
Traditional lighting in Blender is entirely possible and proper. You can achieve good results with the default tools, but it usually takes a lot of time, trial and error, and experience. Matching lighting with backgrounds, floors, and reflections is not simple, often pushing artists toward repetitive, safe styles. For projects where speed, variety, and strong visual impact matter, this approach can be exhausting and limiting.
Pro Lighting Studio: When Lighting Turns from a Chore into a Pleasure
Pro Lighting Studio transforms the tedious part of lighting into a fast and creative process. Instead of starting from scratch and constantly moving lights, this tool provides multiple ready-made, well-thought-out setups to test and choose from.
Pre-designed lighting setups
Instead of a single light, you get a collection of ready-made styles designed for different scenarios:
- Character lighting (68 styles)
- Object and product lighting (45 styles)
- Custom car lighting sets (48 styles)
This variety helps you quickly move away from repetitive lighting and explore new moods.
It’s not just about light; the space matters too
Good renders depend on more than just lights. This tool helps you shape the scene’s space quickly:
- Mask combinations to guide the viewer’s attention
- Background textures that create a studio or cinematic feel
Everything is designed to work in harmony with the lights, not separately.
Scene floor: a small detail with a big impact
Instead of a simple gray plane, you can easily:
- Choose the type of floor
- Match suitable materials
Without diving into complicated settings, your scene looks more professional.
Reflections that bring to life
For shiny surfaces, reflections are almost as important as lighting. Here:
- Ready-made reflection maps
- Suitable for metals, glass, and cars
Pro Lighting Studio and its tools help you achieve natural, eye-catching renders effortlessly.
What’s the final result?
Instead of spending time struggling with settings, your focus is on seeing, comparing, and choosing the best mood. A few clicks, a few styles, and the result appears instantly—the exact workflow needed for fast, professional projects.


Professional Tips and Techniques for Better Results
Having a good tool like Pro Lighting Studio is one thing; using it correctly is another. A few simple tips can make your renders look more natural, professional, and unique:
- Mix styles together
Don’t limit yourself to a single ready-made combination. Change lights, backgrounds, and floors separately, and try different mixes. Often, the best results come from unexpected combinations. - Don’t underestimate reflections
For shiny objects like metal, glass, or cars, using ready-made reflection maps makes lighting appear more natural, and surfaces look professional. - Think like a photographer
Before choosing lights, ask yourself what mood you want to convey: warm, cold, calm, or dramatic? This perspective helps you find the right lighting faster. - Choose the overall mood first, then the details
You don’t need everything perfect from the start. Pick the lighting style and scene mood first, then adjust light intensity, angles, and materials. - Small changes, big impact
Sometimes, just changing the light angle or floor material can completely alter the scene’s atmosphere. Give these small details attention.
When you intentionally combine lighting, space, and reflections with an experienced eye, your render doesn’t just become “correct”—it becomes attractive and impactful. These small tips help you maximize Pro Lighting Studio and take your renders to the next level.
Conclusion: Why Waste Time on Difficult Lighting?
Lighting, reflections, and backgrounds affect the final render more than any other element. Even extraordinary models look dry and lifeless without them. Choosing the right lights, matching them with floors and backgrounds, and setting reflections can bring a scene to life and engage the viewer in the story.
Using tools like Pro Lighting Studio makes this process faster, easier, and more creative. Instead of hours of manual light adjustments and trial-and-error, you can try different lighting and environment styles to quickly achieve the desired mood. This allows your energy and time to focus on creating the scene and key details, not on complex and time-consuming settings.
Ultimately, professional lighting is not just about lighting a model but about evoking emotion and narrative in the shot. With some proper adjustments and tools, you can feel free to play around with things, adapt your style, and render something aesthetically pleasing, professional and meaningful. Don’t waste your time trying to render the nuances that the program can easily fix for you, and spend more time constructing the scene and visual experience.
Take a systematic approach to mastering Blender with our step-by-step Blender Tools guide, designed to introduce each tool clearly and show you how to integrate them effectively into your projects from start to finish.



