


When Materials Slow Down Your Creativity…
Are you familiar with using the Extreme Pbr Nexus? Have you ever created a solid 3D model, set up the lighting properly, and yet at the very end felt that the surfaces looked artificial and lifeless? As if everything is technically in place, but the final result doesn’t convey the realistic and appealing feeling you had in mind.
Exactly where materials and shaders are supposed to bring your work to life, you suddenly face a maze of nodes, complex settings, and endless trial and error. Every small tweak to Roughness, Normal, or Color can completely change the outcome and pull your focus away from design into technical struggle.
This is the point where many designers and animators, instead of focusing on ideas and creativity, get dragged into a war of attrition with their tools—a battle not caused by a lack of ideas, but by the complexity of execution.

What Are Materials and Shaders, and Why Are They So Important?
Simply put, a material defines how a surface feels to the viewer. Whether it looks metallic or plastic, rough or smooth, glossy or matte, or even whether it conveys a sense of newness or wear—all of that comes down to the material. In reality, the material is what transforms the raw appearance of a 3D model into something tangible and believable.
The shader acts as the brain of the material; the part that determines how light hits the surface, reflects, or gets absorbed. This interaction between light and surface is what makes an object look real, alive, and natural—rather than like a simple digital volume.
Real-World Use Cases in Projects
🏠 Architecture: realistic presentation of walls, bricks, wood, and concrete for client-ready renders
🚗 Product design: accurate simulation of car paint, bodies, plastics, and glossy metals
🎮 Games and animation: creating natural surfaces, dirt, scratches, and environmental details
🎬 Motion graphics: crafting stylized, eye-catching, and attractive materials
Ultimately, a good material can make even the simplest models look professional, believable, and impactful—and that’s what separates an average result from a high-end output.
The Traditional Approach: When Everything Is Built with Nodes
Typically, these nodes are always part of the setup:
- Principled BSDF for shaping the base of the material
- Image Texture for importing textures
- Texture Coordinate and Mapping for controlling texture scale and direction
- Normal Map for surface details
- And many more small and large nodes, depending on the material’s needs
This approach gives you complete freedom, but everything depends on your patience and personal experience.
Why Does This Method Become Exhausting So Quickly?
The truth is, after a while, this way of working becomes extremely time-consuming and frustrating. Even for a simple material, you have to tweak countless settings, run tests, render, and then go back and adjust again. Your focus slowly shifts from ideas and creativity to figuring out “which slider should I slightly adjust.”
In the end, the result might look good, but the path to get there is so complicated that it drains your energy. For fast-paced projects or commercial work, it’s simply not cost-effective.
Enter Professional Tools: Extreme PBR Nexus
This is where a professional tool like Extreme PBR Nexus comes into play. This add-on is designed for Blender to turn material creation from a technical, time-consuming process into a fast, controllable, and even enjoyable experience. Instead of constantly jumping between nodes, most of your time goes into creative decisions—the real essence of design and animation.
Extreme PBR Nexus is essentially a material management system that handles many complex tasks behind the scenes, allowing you to achieve results with just a few clicks—results that previously required hours of trial and error.
Key Features, Categorized
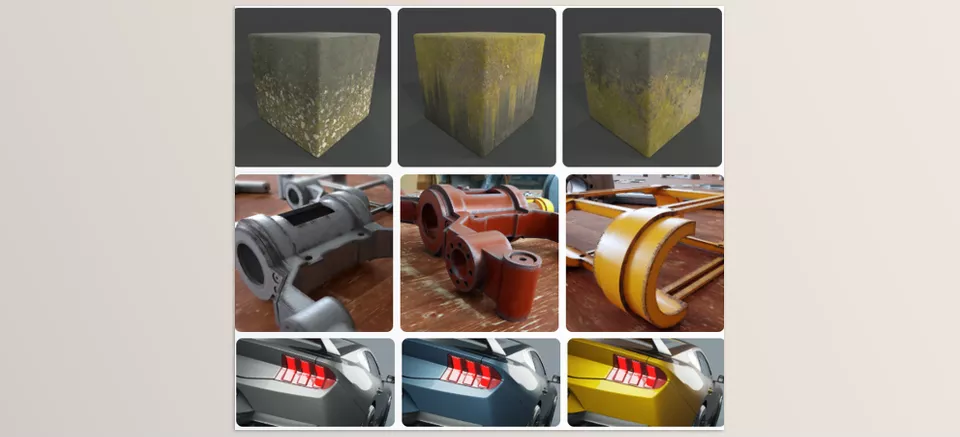
🎨 Massive material library
Over 1,800 ready-to-use, professional materials compatible with both Cycles and Eevee, suitable for a wide range of projects.
🖌️ Material painting
Paint and blend multiple materials directly on your model—from dirt and rust to layered surface effects—without the headache of node construction.
🚗 Ultra-realistic car paint materials
From simple colors to professional metallic paints with real flakes, closely matching what you see in the real world.
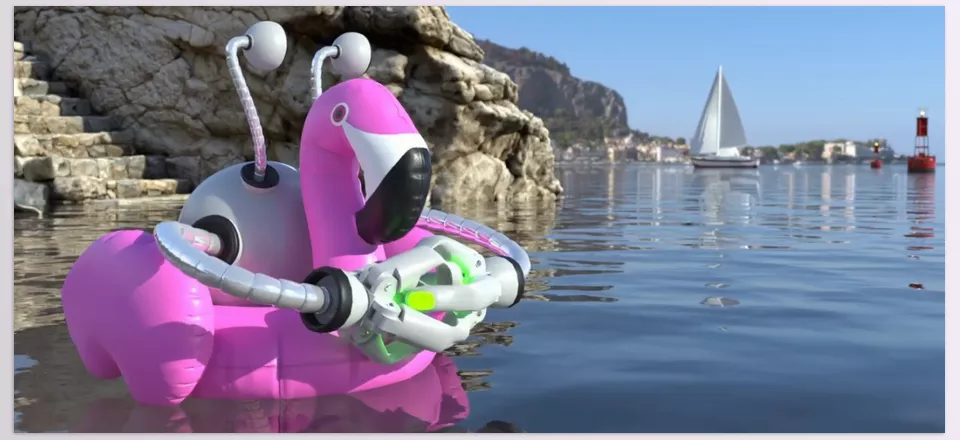
🌊 Ready-to-use animated water
A water material that animates itself and can be edited and used without creating a single node.
🧱 Displacement and microdisplacement
Real surface detail for materials like bricks, stone, and ground, adding depth and realism to your renders.
🧩 Top-to-bottom material blending (Z Mix)
Perfect for walls, cliffs, and buildings where materials naturally layer over each other.
🎮 Export for Unreal and Unity
After creating or painting your materials, you can easily bake them and use them directly in game engines.
Overall, Extreme PBR Nexus is more than just an add-on—it’s a smart shortcut to achieving professional materials faster, without crushing your creativity under technical complexity.
A Few Professional Techniques for Better Results
If you want to get the most out of Extreme PBR Nexus and have your work truly stand out, keep these simple but important tips in mind:
✔️ Always enable the Anti-Tile System
One of the fastest ways to make a surface look fake is visible texture repetition. Anti-Tile helps break up these patterns and makes surfaces look more natural, especially on walls, floors, and large areas.
✔️ Use FX Layers for subtle details
Scratches, fingerprints, stains, and tiny wear marks may not be obvious at first glance, but they are exactly what make your work believable. FX Layers add these details quickly and in a controlled way, without cluttering your node setup.
✔️ Use displacement intelligently
Displacement is powerful, but it’s not needed everywhere. Enable it only on surfaces that are close to the camera or clearly visible. This keeps renders lighter and avoids unnecessary scene complexity.
✔️ Always bake materials for game projects
After painting or blending materials, make sure to bake them before exporting to Unreal or Unity. This ensures lightweight, optimized, and game-ready materials.
✔️ Choose material resolution based on your GPU
Higher resolution isn’t always better. If your GPU’s VRAM is limited, using 1K or 2K textures is often the smarter choice. This speeds up rendering and helps avoid slowdowns or crashes.
By following these simple tips, your work will look more natural, render more efficiently, and your overall workflow will become smoother and less stressful.
Good Tools Aren’t for Laziness—They’re For Creativity
Extreme PBR Nexus is not meant to replace shader knowledge or technical understanding of materials. On the contrary, it helps you use the knowledge you already have faster, smarter, and with less friction—without starting from scratch every time or getting lost in technical details.
If you work with Blender and care about delivering projects that are both high-quality and time-efficient, a tool like this can be a huge help. Especially when you don’t want every simple idea to turn into hours of node wrangling.
In the end, a good tool doesn’t just speed up your workflow—it brings your focus back to ideas, design, and the joy of creating. And that return to creativity is often more valuable than any advanced technique ✨
If you’re looking for a complete guide to all Blender tools, our Blender Tools article explains every tool step by step and shows practical ways to implement them in your projects.



