
🎮 When an Image Is Meant to Look Intentionally Broken…
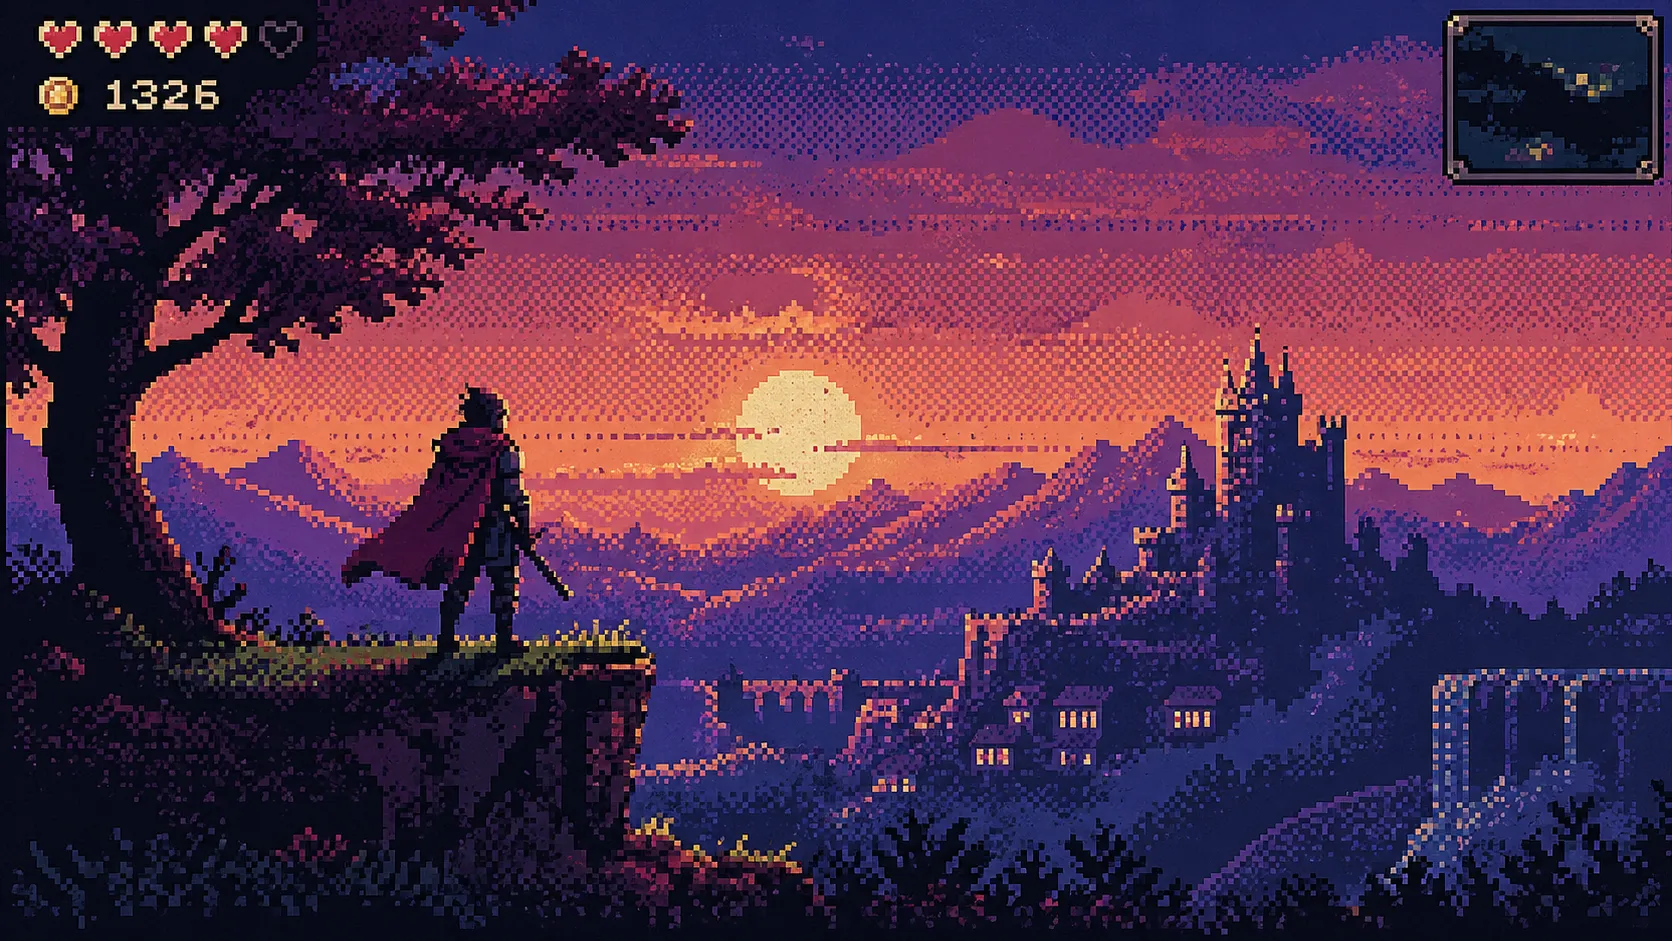
Have you ever explored creating anything with the Dither Decay Plugin by aescripts? Some of the most compelling visual styles come exactly from where quality gets “lower.” Images that are pixelated, have limited colors, and carry a raw, noisy feel—the same vibe reminiscent of old consoles, CRT monitors, or damaged videos.
This look isn’t just a simple effect; it’s a deliberate choice to create a sense of nostalgia, grunge, or even controlled chaos. When an image moves away from that overly clean state, it becomes a more emotional element that connects more easily with the audience.
That’s why this style has become a standalone visual language in many modern projects—especially in gaming 🎮, music videos 🎵, and creative teasers. A language that, by “breaking” the image, actually builds a stronger identity.
Dithering — What Is It and What’s It For?
Dithering is an old technique that dates back to the era of limited hardware. When systems couldn’t display many colors, they used intelligent pixel distribution to make images appear more natural.
Today, this technique has become a creative tool for building visual styles. It’s used for things like:
- Creating a Retro and 8-bit vibe
- Adding noisy and grunge textures
- Limiting colors for a specific style
- Converting video into a pixel art look
Its popularity in motion graphics is obvious—it adds character and moves the work away from that overly clean, digital feel. Often, it’s exactly this small difference that makes a piece stand out.
Without Plugins — How Can We Create This Effect?
If you want to achieve this look without using plugins, you usually have to combine several effects and build the result manually. It’s more of an experimental process than a clear path.
In After Effects, these tools are commonly used:
- Mosaic for pixelating the image
- Noise / Add Grain for creating texture
- Posterize for reducing detail and frames
- Color Reduction/color adjustments for limiting the color palette
By combining these effects and tweaking their settings, you can get somewhat close to a dithering-like style.
⚠️ Challenges and Limitations
Although these methods work, they’re not very direct or predictable. You often need to spend a lot of time experimenting to reach a decent result—and even then, you don’t have precise control over the output.
On top of that, since there’s no real dithering algorithm involved, the result is more of an approximation than an accurate, professional effect. This makes achieving a specific or repeatable style difficult—and sometimes even frustrating.
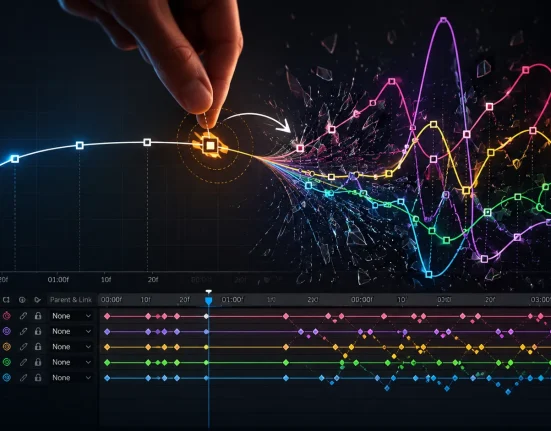
⚡ Introducing Dither Decay — A Faster, More Professional Approach
This is where a specialized tool like Dither Decay comes in, turning a complex and time-consuming process into a fast and controllable experience. This plugin is designed for After Effects and Premiere, with a strong focus on creating high-quality, real dithering effects.
In practice, what it does goes far beyond a simple effect. Instead of combining multiple tools to approximate a result, you’re working directly with algorithms inspired by old hardware and early graphical systems.
The result? An output that’s visually appealing and delivers a much more authentic retro, degraded aesthetic 🎞️
🎛️ Full Control Over the Image Look
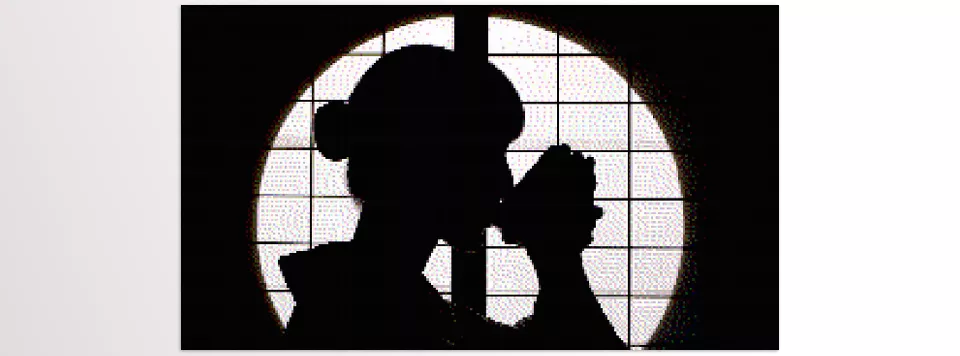
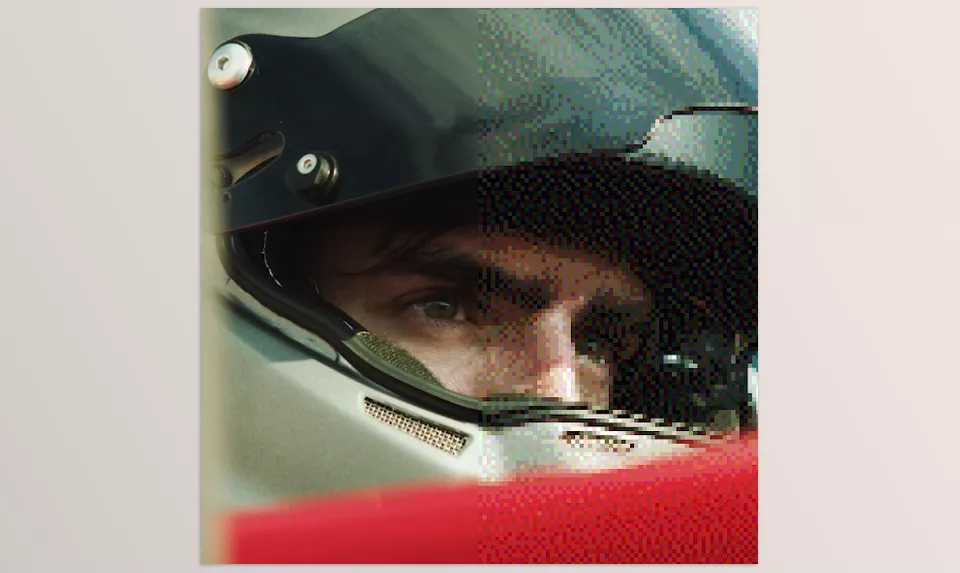
One of the most important features of Dither Decay is the level of control it gives you over details. You can adjust the intensity of the effect from a highly pixelated, harsh look—where the image almost turns into an abstract piece—to a very subtle, textured state.
This means you can use it for bold, stylized work or simply to add a light, subtle layer of texture that enhances the feel without completely changing the appearance. This flexibility is exactly what makes it valuable in professional projects.
🎨 Ready-Made and Customizable Color Palettes
Color is everything in this type of style, and Dither Decay understands that very well. The plugin includes multiple ready-made color palettes that you can quickly apply without dealing with complex settings.
At the same time, if you want full control, you can create your own palette. This allows you to achieve exactly the mood you want—from limited old-school game colors to unique, modern combinations 🎨
🔀 Multiple Dithering Algorithms
One of the key differences between this plugin and manual methods is the presence of multiple real dithering algorithms. Each one creates a different texture and feel.
Some produce smoother, more uniform results; others make pixels appear harsher and more defined; and some closely simulate old consoles or early display systems. This variety makes it easy to test different styles and reach a unique outcome.
⚡ High Speed and Simple User Experience
Despite offering many professional features, the plugin is not complicated to use. You can quickly apply the effect to your footage and see results instantly.
This makes it a very practical option for fast workflows or projects with tight deadlines.
At the same time, if you want to dive deeper, there are enough settings available to fine-tune the output exactly to your taste. This combination of simplicity + depth is one of its main strengths.
🧪 From Effect to Style — Real Use Cases
Dither Decay isn’t just an effect—it’s more of a style-building tool. Whenever an image needs a distinct identity, this plugin quickly proves its value.
It’s especially useful in projects like:
- Gaming videos and streams 🎮
- Music videos and artistic work 🎵
- Creative advertising teasers
- Projects with nostalgic, grunge, or glitch aesthetics
In these spaces, the effect can quickly transform an ordinary image into something recognizable and stylized.
Overall, what makes Dither Decay appealing is that it turns an old technique into a modern, fast, and fully controllable tool—giving you both nostalgia and creative freedom 🚀

🎯 Tips for More Professional Results
If you want to get the best results from Dither Decay, keep these simple but important tips in mind:
- Start subtle and increase gradually
Very strong effects may look appealing at first, but they quickly become tiring. A soft, controlled texture is usually more professional and easier to watch—especially in longer projects. - Don’t use the effect alone
Combining dithering with other effects can make the result much stronger. For example:- Slight Blur to soften edges
- Subtle Glow for an old display feel
- Glitch or distortion to enhance the broken aesthetic
- Take color seriously 🎨
Color choice directly affects the mood:- Cool, dark tones → horror, cyberpunk
- Warm tones → energy and excitement
- Limited palettes → cleaner, more cohesive results
- Adjust the effect based on your footage
One setting won’t work for every shot:- Detailed footage → use a lighter effect to preserve form
- Simpler scenes → allow for stronger, more artistic effects
- Consider the project’s purpose
This style doesn’t work everywhere. In style-driven projects like gaming, music videos, or creative work, it can be very effective—but random use may just clutter the image.
These tips may seem simple, but they’re exactly what elevate a result from an ordinary effect to a professional piece 🚀
🚀 When “Breaking” Becomes Art
Sometimes, to stand out, you don’t need to add something to an image—you need to move away from that overly clean, digital look. Techniques like dithering do exactly that—by introducing limitation, noise, and pixelation, they create a raw and authentic feel that can be more impactful than a flawless output.
Dither Decay transforms this process from something complex and time-consuming into a fast, controllable tool. Instead of approximating results with multiple effects, you can achieve precise outputs directly—and spend more time on design and creativity rather than technical adjustments.
In the end, if you’re looking for a distinctive, nostalgic, or even harsh and grunge style, this plugin can give your work a unique identity—not as an added effect, but as part of your project’s visual language. Something that makes your work stand out and stay memorable 🎯
If you’re curious about how extra tools can really boost what you can do inside After Effects, our comprehensive AE tools guide is a great place to start exploring.