

When Lights Don’t Behave Like a Real Camera ✨
Are you experienced in using the Flared add-on by superhivemarket? You’ve probably experienced this before: after spending hours modeling and lighting a scene, the final render still doesn’t have that cinematic feel. The lights illuminate the scene, but there’s no sign of natural light blooms, lens reflections, or those beautiful light streaks you see in movies and high-end commercials. As a result, the image looks overly clean and computer-generated.
The issue is that real cameras don’t just capture light. When a strong light source—such as the sun, a car headlight, a spotlight, or even a neon sign—appears within the frame, the camera lens reacts by producing effects such as Lens Flare, light blooms, Ghost, Halo, or even lens imperfections. These small details make an image feel more alive, realistic, and cinematic.
Of course, creating these effects in Blender is possible, but it usually requires working with the Compositor, multiple nodes, or even external software like After Effects to achieve the desired result. If you need to do this for multiple shots, you’ll spend a significant amount of time adjusting the effects—time that could instead be dedicated to the actual design and lighting of the project.

What Is Lens Flare and What Is It Used For? 💡
Lens Flare is an effect that occurs when intense light enters a camera lens. It can appear as glowing halos, circular reflections, elongated streaks, or other light artifacts, and it is one of the most important details that give images a cinematic look.
Today, Lens Flare is not used only to simulate real-world cameras. It is also widely used in commercials, promotional videos, motion graphics, animation, game development, and even product visualization to give light sources a stronger visual impact and make scenes appear more dynamic and alive.
For example, imagine the sun shining from behind a building, or the headlights of a car approaching the camera at night. When Lens Flare is used correctly, even a simple scene like this can look significantly more professional and visually appealing.
Common Methods for Creating Lens Flare in Blender 🛠️
Before dedicated tools became available, users typically created Lens Flare effects by combining several of Blender’s built-in features. These methods are still useful today and can produce acceptable results for simple projects.
The most common approaches include:
- Using the Compositor and the Glare node:
In Blender’s Compositor, the Glare node can generate effects such as Glow, Streak, and Ghost. By adjusting the node’s settings, you can control the glow intensity, light spread, and reflection appearance. - Using Bloom in Eevee:
The Eevee render engine includes a built-in Bloom feature that creates a glow around light sources, making it suitable for adding a simple glow to lights, lamps, and other bright areas of a scene. - Creating effects with Geometry Nodes:
For greater control, you can use Geometry Nodes to manually build various lighting elements. However, this approach requires more knowledge and significantly more time to set up. - Using pre-made images and effects:
Some users add Lens Flare after rendering, using overlay images or pre-made effect files in software such as After Effects, to gain greater control over the final appearance.
Why Aren’t These Methods Always the Best Choice? 🤔
Although these methods can produce good results, creating Lens Flare with them is not always fast or straightforward. Most of these techniques require multiple adjustments, and you usually see the final result only after rendering or during compositing. Additionally, if your project contains multiple light sources, cameras, or shots, readjusting the effects for each can become very time-consuming.
Furthermore, creating flares that react like a real camera to movement, light distance, and scene occlusion is not easy with Blender’s standard tools and typically requires even more manual setup.
Flared2: Create Professional Lens Flares with Just a Few Clicks ✨
Flared2 is a professional add-on for Blender that transforms the creation of Lens Flare effects from a time-consuming task into a fast, fully interactive workflow. Instead of relying on multiple nodes, the Compositor, or manual techniques for every effect, you can create flares directly inside the Viewport, see the changes instantly, and adjust the appearance of your lighting exactly the way you want.
One of the biggest differences with Flared2 is that its effects are not simply an image overlay. The add-on is built using Geometry Nodes and works entirely procedurally. This means every part of the flare is fully controllable, allowing you to achieve professional, highly customizable results without having to build everything manually from scratch.
Over 60 Ready-to-Use Presets for a Fast Start 🎨
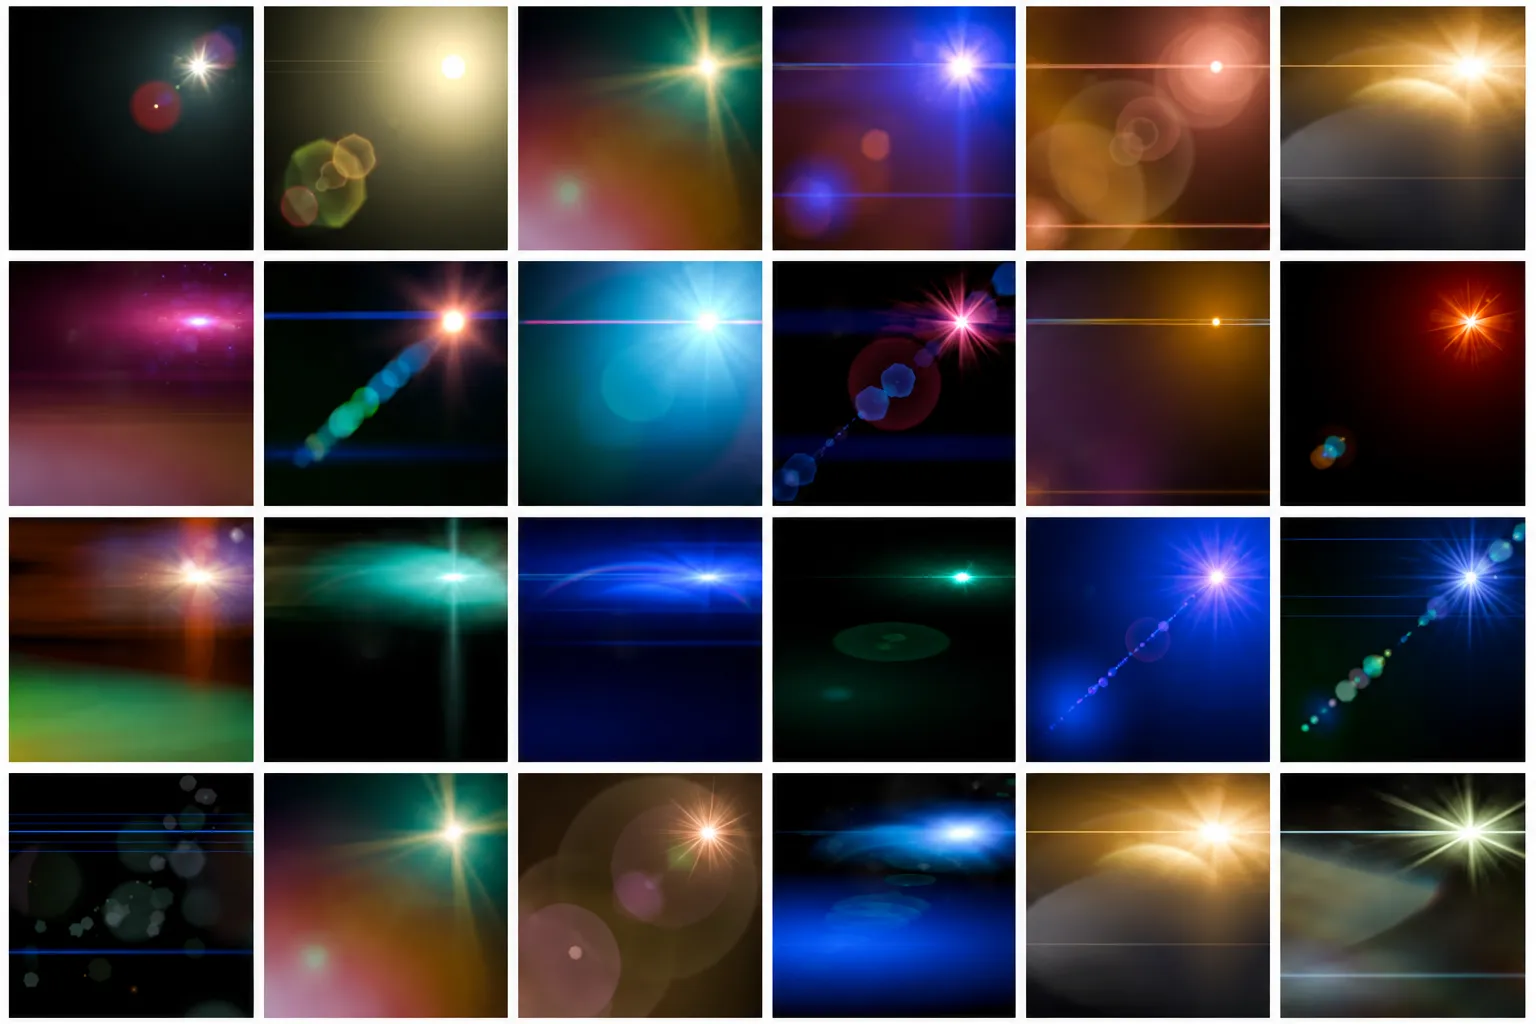
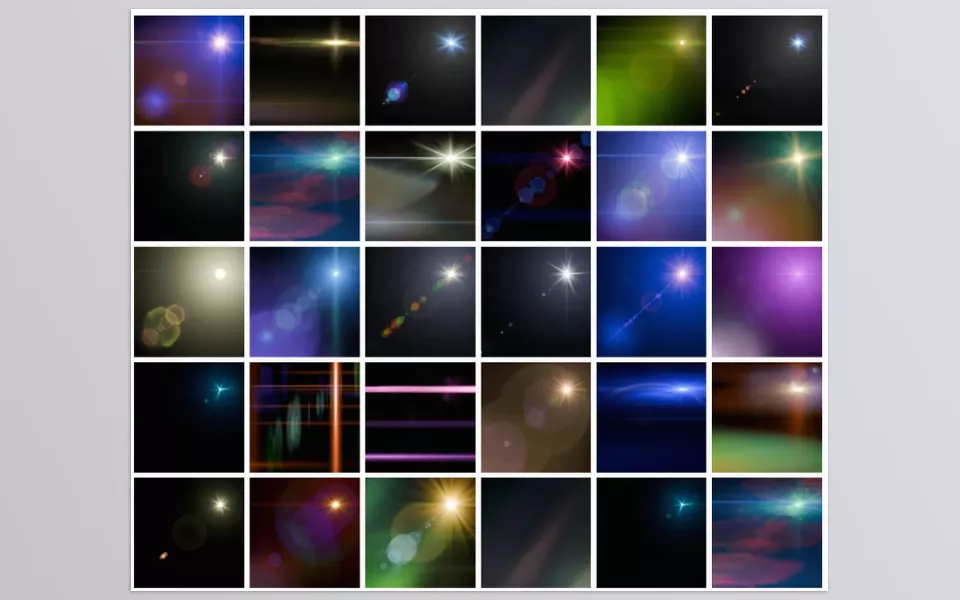
Flared2 comes with more than 60 ready-made presets created by designers and artists. These presets cover a wide range of styles, from natural and realistic flares to sci-fi, fantasy, and anamorphic effects commonly seen in cinematic productions.
This means you don’t have to create everything from scratch when starting a new project. You can simply choose a suitable preset, apply it to the desired light source, and then fine-tune its settings to match your project’s visual style. You can also create and save your own custom presets, making it easy to reuse your favorite settings in future projects.
Real-Time Preview Directly in the Viewport ⚡
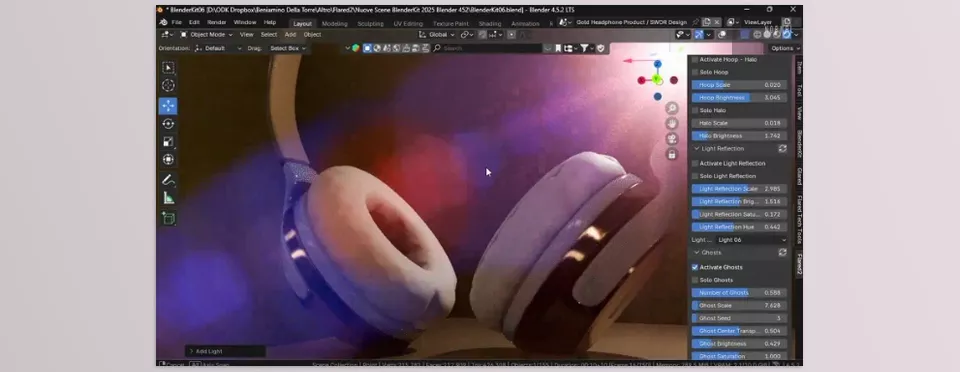
One of Flared2’s key features is its live preview inside Blender’s workspace. Every adjustment you make to the flare settings is displayed instantly in the Viewport, eliminating the need to wait for a final render after every small change.
This feature is especially valuable in projects with moving cameras or multiple light sources, as it allows you to adjust lighting, camera placement, and Lens Flare effects simultaneously.
Create Both 2D and 3D Flares for Greater Control 📐
Flared2 provides two different modes for creating flare effects:
- 2D Mode: The flare maintains a constant size, making it ideal for graphic effects or situations where you want simpler control.
- 3D Mode: The flare’s size and behavior change with its distance from the camera, producing a more natural result that closely resembles that of a real camera lens.
This flexibility makes Flared2 suitable for both motion graphics projects and more complex 3D scenes.
Intelligent Scene Obstacle Detection 👀
One of the features that sets Flared2 apart from traditional methods is its Obstacle Detection system. This feature allows the flare to respond naturally to objects within the scene.
For example, if the sun moves behind a building or an object passes in front of a car’s headlights, the intensity and appearance of the flare automatically change—just as they would in real-world cinematography.
A Complete Collection of Lighting Effects in One Tool 🌟
Flared2 does much more than generate a basic Lens Flare. It provides a complete collection of lighting elements that you can control individually:
- Glow: Creates a soft glow around light sources.
- Ghosts: Produces multiple internal lens reflections.
- Streaks: Adds elongated cinematic light streaks.
- Sun Beams: Generates realistic sun rays.
- Halo: Creates halos around light sources.
- Starburst: Produces star-shaped diffraction patterns on bright lights.
- Hoop: Creates distinctive circular light rings.
- Lens Dirt: Simulates dirt and smudges on a camera lens.
- Light Reflection: Adds additional light reflections.
- Horizontal Ghosts: Generates horizontal reflections similar to those commonly seen in cinematic productions.
By combining these elements, you can transform a simple light source into a fully cinematic lighting effect.
Complete Control Over the Flare’s Appearance ⚙️
Although Flared2 simplifies the workflow, it is far from being limited to a handful of presets. The add-on offers a wide range of customization options, allowing you to achieve exactly the look you want.
You can adjust settings such as:
- Flare color
- Light intensity
- Effect size
- Glow amount
- Number of Ghosts
- Streak shape
- Lens Dirt intensity
- Reflection intensity
- Light blinking speed and behavior
You can also use Blinking Control to create blinking light effects, making it particularly useful for science fiction, robotics, and industrial projects.
No Compositor Required and No Baking Needed 🚀
One of Flared2’s major advantages is that the entire workflow occurs directly in Blender. You don’t need to switch to the Compositor to create the effects.
There is also no baking process involved, allowing you to make changes much faster and adjust your flare settings at any stage of the project.
Compatible with Eevee and Cycles 🔥
Flared2 works with both Eevee and Cycles, integrating seamlessly with the scene’s lighting. Even light sources that are outside the camera’s field of view can influence the appearance of the flare, producing a more natural and realistic result.
Separate Output for Professional Compositing 🎬
If you plan to continue working on your render in software such as After Effects, Flared2 also allows you to render the flares as a separate pass. This gives you greater control during the final compositing and post-production process.
What Types of Projects Is It Suitable For? 🎯
Flared2 is not limited to creating a few simple lighting effects or cinematic scenes. It can be used in any project where lighting plays an important role in conveying atmosphere and enhancing image quality. From product visualization and automotive rendering to nighttime architectural scenes, 3D animation, VFX projects, game development, and motion graphics, it provides an effective way to add more professional lighting details.
In projects such as science fiction scenes, futuristic environments, or shots filled with artificial lighting, precise control over lens flares can make a significant difference in the final result. Flared2 helps transform light sources from simple bright spots into dynamic elements that behave like those captured by a real camera, enhancing the final render with realistic reflections, halos, and lens artifacts for a more authentic cinematic appearance.
A Few Tips to Get Better Results with Flared2 💡
Flared2 provides a wide range of tools for creating lighting effects, but, as with any visual effect, professional results don’t come from simply applying a few presets. Properly adjusting the intensity, choosing the right type of flare, and considering the scene’s lighting conditions will help you achieve a more natural and visually appealing result.
- 🎯 Control the Flare Intensity
One of the most common mistakes when using Lens Flare is making the effect too intense. A flare shouldn’t steal all of the viewer’s attention—it should behave like a natural characteristic of a real camera, subtly enhancing the realism of your lighting. - 💡 Choose the Right Flare for Each Light Source
Not every light source in your scene should have the same type of flare. A car headlight, the sun, and a small lamp all behave differently, and selecting a flare that matches the type of light will produce a much more realistic result. - 📷 Don’t Overuse Lens Dirt
The Lens Dirt effect is excellent for simulating dust, dirt, and smudges on a camera lens, helping create the feeling of real-world cinematography. However, if used too heavily, the image will appear cluttered and artificial rather than natural. - 👀 Use Obstacle Detection in Animated Scenes
If your camera or light sources are moving, enabling Obstacle Detection helps the flares behave more naturally. With this feature, whenever an object passes in front of a light source, the flare reacts just as it would with a real camera. - 🎨 Treat Presets as a Starting Point
Flared2’s built-in presets are excellent for speeding up your workflow, but the best results usually come from making a few custom adjustments. Small changes to the flare’s color, intensity, size, and fine details can transform a preset into an effect that perfectly matches your project’s visual style.
By following these simple tips, you can use Flared2 for much more than simply adding attractive lighting effects—you can create flares that truly become part of the scene’s design and visual storytelling.
When Lighting Is More Than Just Illuminating a Scene 🎯
Very often, what separates an ordinary render from an outstanding one isn’t complex modeling or unusual materials. It’s the small details—how light interacts with the camera lens, the glow surrounding light sources, and subtle optical reflections—that make an image feel more realistic. Creating these details manually, however, can take considerable time and slow down your workflow, especially when you need to manage multiple light sources and different types of flares within the same project.
Flared2 was built to allow you to quickly create the type of light flare you are after in your scene. You can easily preview your flare settings in the Viewport and fine-tune them to achieve the look you want. The included presets and the ability to customize the flare settings to your scene’s needs mean you can focus on your art rather than the technology to create these light effects.
If you regularly work on cinematic renders, commercials, architectural visualization, automotive rendering, or motion graphics, Flared2 can become one of those tools you’ll eventually wonder how you ever worked without. It helps transform the lights in your scene from simple sources of illumination into elements that behave like they would through a real camera lens—bringing the professional, cinematic quality that can make an ordinary render look dramatically more compelling.
If you want a friendly, easy-to-understand walkthrough of Blender tools and how to use them in your projects, our Blender Tools article covers it all in detail from start to finish.



