

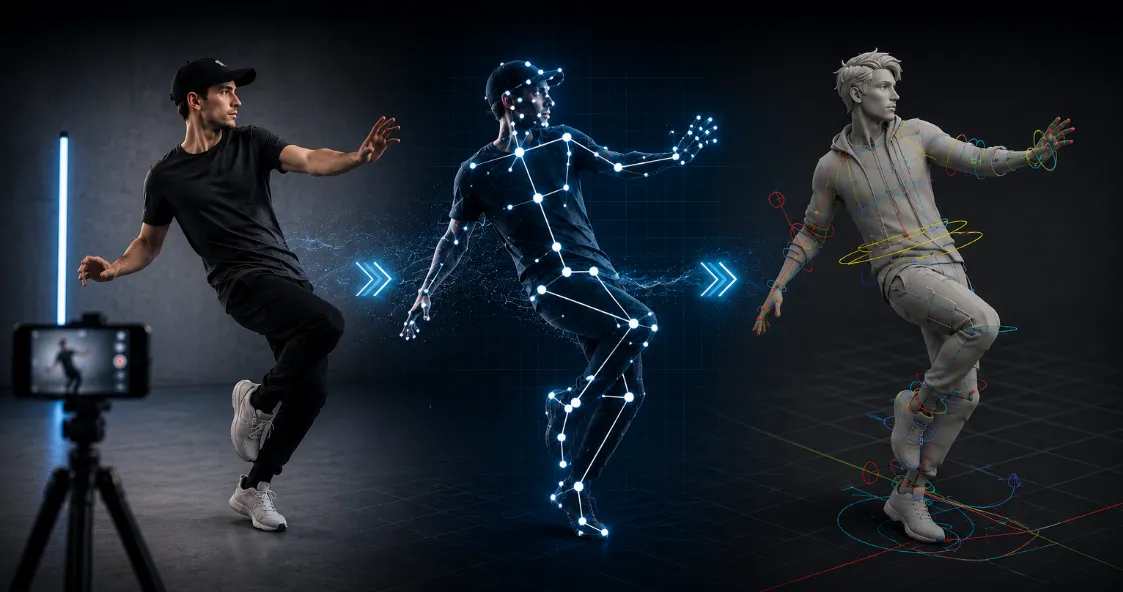
From a Simple Video to Realistic Motion 👀
Do you know how the BlendCap add-on by Superhivemarket works? Creating a character doesn’t always start with designing the character. Often, it takes hours to animate a character to walk, wave, sit down, or show facial expressions. 😵💫
On the other hand, if you want to bring a person’s real movement into your project, you usually need Motion Capture equipment, a special suit, Markers, and separate software. Even after the Capture is complete, the work still isn’t finished, and you usually have to clean up and correct a lot of extra motion.
Now imagine shortening a large part of this process using nothing more than an ordinary video—a video that could even be recorded with a phone or Webcam. 📱✨

What Exactly Does Motion Capture Do? 🎯
Motion Capture, or mocap, converts a person’s real movement into data that can be used in animation. Instead of an animator building every single body movement of a character with Keyframes, the movement of a real person is recorded and then transferred to a 3D character.
This technique can be used for different types of projects. For example, you can use an actor’s movement for a game character, create the walking and running animations of an animated character faster, or even capture facial and hand movements from an actor’s real performance. 🎭
The main advantage of this method is that the movement is based on a real performance from the beginning. So, especially for movements like walking, running, turning, sitting, or hand gestures, it can provide a very good starting point for creating natural Animation.
How Can We Create Motion Capture Without an Add-on? 🎬
Blender itself provides the tools you need to create and edit Animation. If you want to work without specialized Add-ons, you can rig a character and create the movements manually, or use ready-made Motion Capture files and transfer them to your character.
For this, tools and methods like these are commonly used:
- Keyframe Animation: Manually creating movements with Keyframes for different parts of the body.
- Graph Editor: Adjusting Curves and smoothing movements to make the Animation look more natural.
- Dope Sheet: Managing Keyframes and timing different character movements.
- Rigify: Creating a standard Rig and using IK and FK controls to animate the character.
- Importing BVH and FBX files: Importing ready-made Motion Captures and using their motion data in Blender.
As a result, Blender isn’t lacking when it comes to basic tools, and you can build a complete Workflow for Animation and even Motion Capture usage. However, as the number of movements increases, manually managing these steps gradually becomes time-consuming.
Where Is the Main Problem? 😅
The issue is that capturing or importing Motion Capture is only the first part of the process. After that, you need to synchronize the movements with the character Rig, map the Bones correctly, fix issues like Foot Sliding, and adjust the Curves and Keyframes to achieve more natural movement. If you have a custom Rig, this stage can get even more complicated because there is no ready-made mapping, and much of the work has to be done manually. In small projects, this hassle might be acceptable, but when you need to create a large number of Animations, these repetitive steps can take up a lot of your time.
BlendCap: Motion Capture Directly Inside Blender 🚀
BlendCap is a Blender add-on that handles the entire Motion Capture process inside Blender. All you need is a regular video of someone performing; BlendCap can detect body, hand, finger, and facial movements from that same video and turn them into usable Animation. 🎥
You also don’t need a special Motion Capture suit, Markers, or professional cameras. You can work with a phone, Webcam, or even a video you already have. After the initial installation, capture runs completely offline on your system, and videos aren’t uploaded anywhere for processing—especially important for client footage or confidential projects. 🔒
One Video, One Complete Capture from Body to Face 🙌
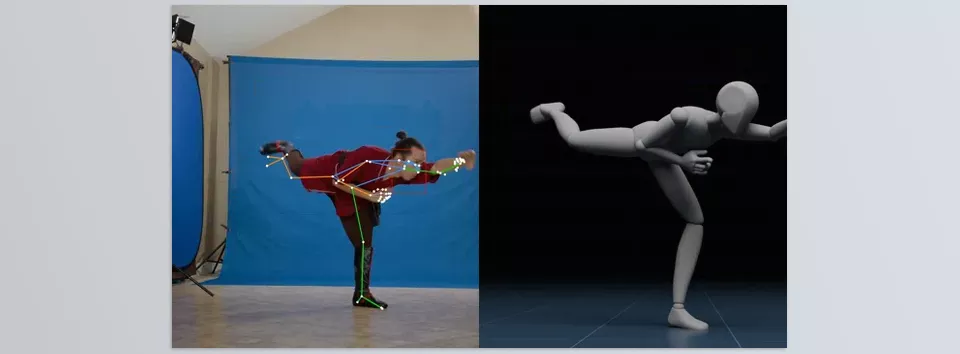
One of the most interesting aspects of BlendCap is that it can track Body, Face, Hands, and Fingers from a regular video while also taking 3D movement information, or World-Space Movement, into account during the Capture.
For example, if you film an actor walking, raising their hand, turning around, and sitting on the ground, you don’t need to create each of these movements separately with Keyframes. BlendCap attempts to convert the actor’s entire performance into motion data so you can later transfer it to your character and refine it.
Capture is possible from videos recorded with a phone, Webcam, or existing Footage, and processing speed varies depending on the hardware. According to the developer, Capture usually takes around one-third of a second per frame.
Face Tracking: Capturing Facial Expressions 😊
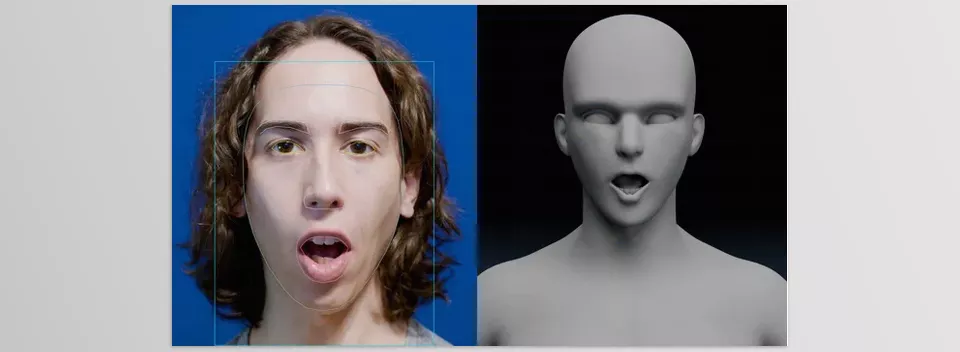
BlendCap isn’t just for the body and can also extract Facial Performance from video. You don’t even have to capture the Face and Body together every time; you can track the face separately and later combine it with another Body Capture.
There are also two main ways to use the facial output. If your character has a Bone-based Face Rig, the Capture information can be used directly with that Rig. The other option is to use ARKit-style Shape Keys, which are very common for Facial Animation.
For greater control, BlendCap also lets you adjust Expressions based on different areas of the face. This means you can change the intensity of facial movements and expressions after Capture, and you don’t have to keep the exact intensity the system detected from the video. 🎭
Finger Tracking: It’s Not Just About the Overall Hand Shape 🖐️
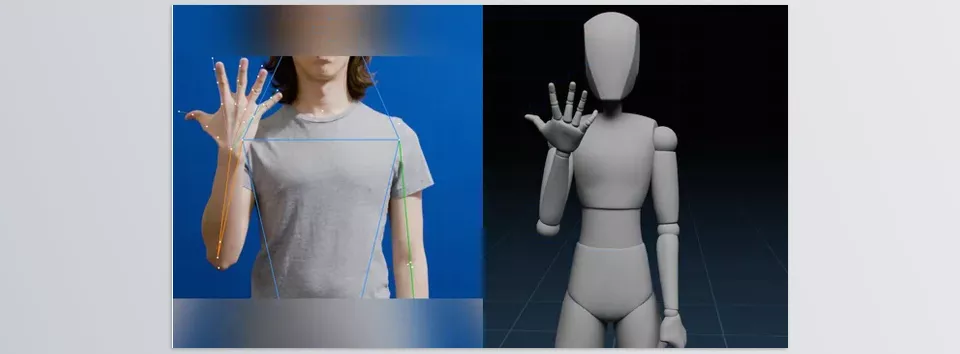
In many Motion Capture systems, hands—and especially fingers—can be challenging. BlendCap provides dedicated Tracking for this area as well, offering Full Finger Pose Tracking in addition to Hand Shape Tracking.
It also includes a dedicated set of controls for adjusting finger movement. For example, you can determine how much the fingers should curl or, if necessary, reconstruct finger movement based on Tracking points to achieve more specific, controllable poses.
For Animations where hands and fingers play an important role—such as pointing, holding an object, making a fist, or performing subtle movements—this feature can provide a much better starting point than creating all of those movements entirely with Keyframes.
Retargeting: Transferring Motion to the Character Rig 🔄
Once Motion Capture is complete, the next important stage is Retargeting, which means transferring the extracted movements to the Rig of the character you want to animate. BlendCap provides a complete Retargeting system for this purpose.
If you use well-known Rigs, the process is easier because BlendCap includes ready-made Presets for Rigify, Auto-Rig Pro, CloudRig, and Mixamo. This means you don’t have to create the Bone Mapping from scratch every time.
For custom Rigs, there is also a Visual Bone-Map Editor that lets you connect the Capture Bones to the Bones of your own Rig. Even if you use a ready-made Preset, you can modify its Mapping and save the edited version as a new Preset to reuse in future projects. ⚡
FK → IK: Ready for Refinement and Polish 🦴
Motion Capture usually isn’t the end of the process; in many cases, you need to manually adjust the position of the hands, feet, or certain parts of the body. BlendCap provides an FK → IK Conversion tool for this stage, which transfers the final motion to the IK controls of the hands and feet.
This feature makes it easier to move on to the Polish stage after Retargeting. For example, you can position the character’s feet more precisely on the ground, correct the hand position, or modify a specific movement without dealing with the raw Capture structure.
In fact, BlendCap tries to shorten the distance between “raw Motion Capture” and “editable Animation” as much as possible. 🎯
Post-processing: Cleaning Up the Capture Output ✨
Because Capture is performed with a regular camera, it’s natural that the output won’t always be completely flawless. Small movements and jitter, depth errors, foot sliding, or even temporarily losing the subject during Tracking can affect the result. BlendCap provides several Post-processing tools for this stage.
Foot Locking and Grounding are designed to keep the feet better positioned on the ground surface and reduce Foot Sliding. In newer versions, Body Grounding has also been improved for movements such as rolling, lying down, crawling, and kneeling, helping body contact with the ground remain more natural.
Depth-Noise Filtering reduces jitter caused by depth estimation, while Smoothing tools smooth body and facial movements. For facial Expressions, you can also adjust the intensity of movements in different areas.
Another useful feature is Camera-Angle Correction, which is designed to correct performances recorded from an unsuitable or tilted angle. Also, if the subject temporarily loses tracking in certain frames, Tracking-Failure Repair helps keep the movement in those sections more usable.
In version 1.0.5, we also added a Vertical Smoothing Slider, letting you control vertical-movement smoothing (such as jumps) separately. As a result, you can reduce jitter without over-smoothing and weakening subtle vertical movements.
Capture Library: Save Your Motions for Later 📚
Every Capture doesn’t have to be used only at that moment and only for that character. BlendCap lets you save Captures in a Temporary Folder or Personal Library so you can later import and retarget them onto another character.
This means that if you capture a good performance of a particular movement, you don’t have to process the video again every time you want to reuse it. You can save the Motion and use it later wherever needed.
On the other hand, BlendCap doesn’t try to lock the Animation into a proprietary format. Once the Motion is applied to the character, you ultimately work with Standard Blender Animation Data, which you can edit like any regular Blender Animation or transfer to other Workflows.
BVH and FBX Output: Not Limited to Blender 💾
If you want to use the Motion Capture in another software or Pipeline, BlendCap also provides Export options in BVH and FBX formats.
You can use this output from raw capture to the retargeted result. Therefore, Animations created with BlendCap aren’t necessarily limited to a single Blender project and can also be used in different Workflows, including projects related to Game Engines.
Simple Installation and Completely Offline Operation ⚙️
BlendCap also includes a One-click Dependency Installer for setup, so you don’t have to go through complicated manual steps to prepare the Python environment. The installer creates its own dedicated Python environment inside the Add-on folder and downloads the required models.
The initial setup requires a download of around 11 GB and approximately 32 GB of free space, but after installation, Capture is performed locally on your system and you don’t need an internet connection to process videos.
This Add-on is currently available for Blender 4.2 and above on Windows and Linux, and for the full experience, an NVIDIA GPU with at least around 6 GB of VRAM is recommended. A CPU-only mode is also available, but it is naturally much slower.
Support for AMD and Intel GPUs has also been considered, but according to the developer, it has not yet been fully validated on this hardware, and results may vary by system. macOS is currently not supported.
Overall, BlendCap isn’t just a tool for “converting video into motion”; it provides a relatively complete Workflow for Capture, Retargeting, Cleanup, and preparing Animation inside Blender. From the body and face to the fingers, from ready-made Rigs to custom Rigs, and from the initial Capture to final refinement, it covers most of the main stages within a single environment. 🚀
How Can You Get More Natural Results? 🎯
BlendCap simplifies the difficult part of Capture, but the quality of the original video still matters. The clearer the subject’s movements and the better the filming conditions, the greater the chance of getting a better result.
- Record a clean video. Try to keep the subject’s body as clear and visible as possible, and make sure important body parts aren’t hidden behind objects or other parts of the body.
- Always review the Motion after Capture. Don’t treat the Motion Capture output as the final version. Check the Curves and Keyframes and manually clean up the areas that need correction.
- Use the appropriate Rig Preset. If your character is built with Rigify, Mixamo, or one of the supported Rigs, using ready-made Mapping can speed up the Retargeting process.
- Perform final corrections with IK for important movements. Especially when the feet need to make contact with the ground or the hand needs to reach a precise point, manual Polish can make a significant difference in the result.
- You don’t necessarily need to capture the Face and Body together. If the facial quality isn’t good in one video but the body movement is suitable, you can perform the Face Capture separately and combine the two parts later.
Ultimately, BlendCap is a powerful starting point, not a tool that handles every stage of animation for you. If the initial Capture is clean and you spend some time on refinement and Polish, you can reach natural, usable movement for your project much faster. ✨
From Real Performance to Animation in Blender 🎬
BlendCap is more than a simple tool for detecting human movement. Its main idea is to shorten the path between real video and usable Animation in Blender—from Body and Face Capture to Retargeting, FK-to-IK conversion, and Motion correction tools. 🚀
If you have to create every movement from scratch with Keyframes, even a relatively simple Animation can take a lot of time. BlendCap gives you a ready-made starting point: you capture real movement from video and spend more time on refinement and creativity instead of building every movement from scratch.
Of course, this tool doesn’t replace animation skills. Video quality, Rig type, and the Cleanup stage still matter a lot, and for professional results, you need to be able to adjust Curves and Keyframes. But if you’re comfortable with Blender and Rigging and are looking for a faster way to bring real human movement into your projects, BlendCap can make an important part of your animation Workflow much more streamlined. ✨
If you want a complete understanding of Blender tools and how to use them effectively in your projects, don’t miss our Blender Tools article, which walks you through every tool step by step.



