

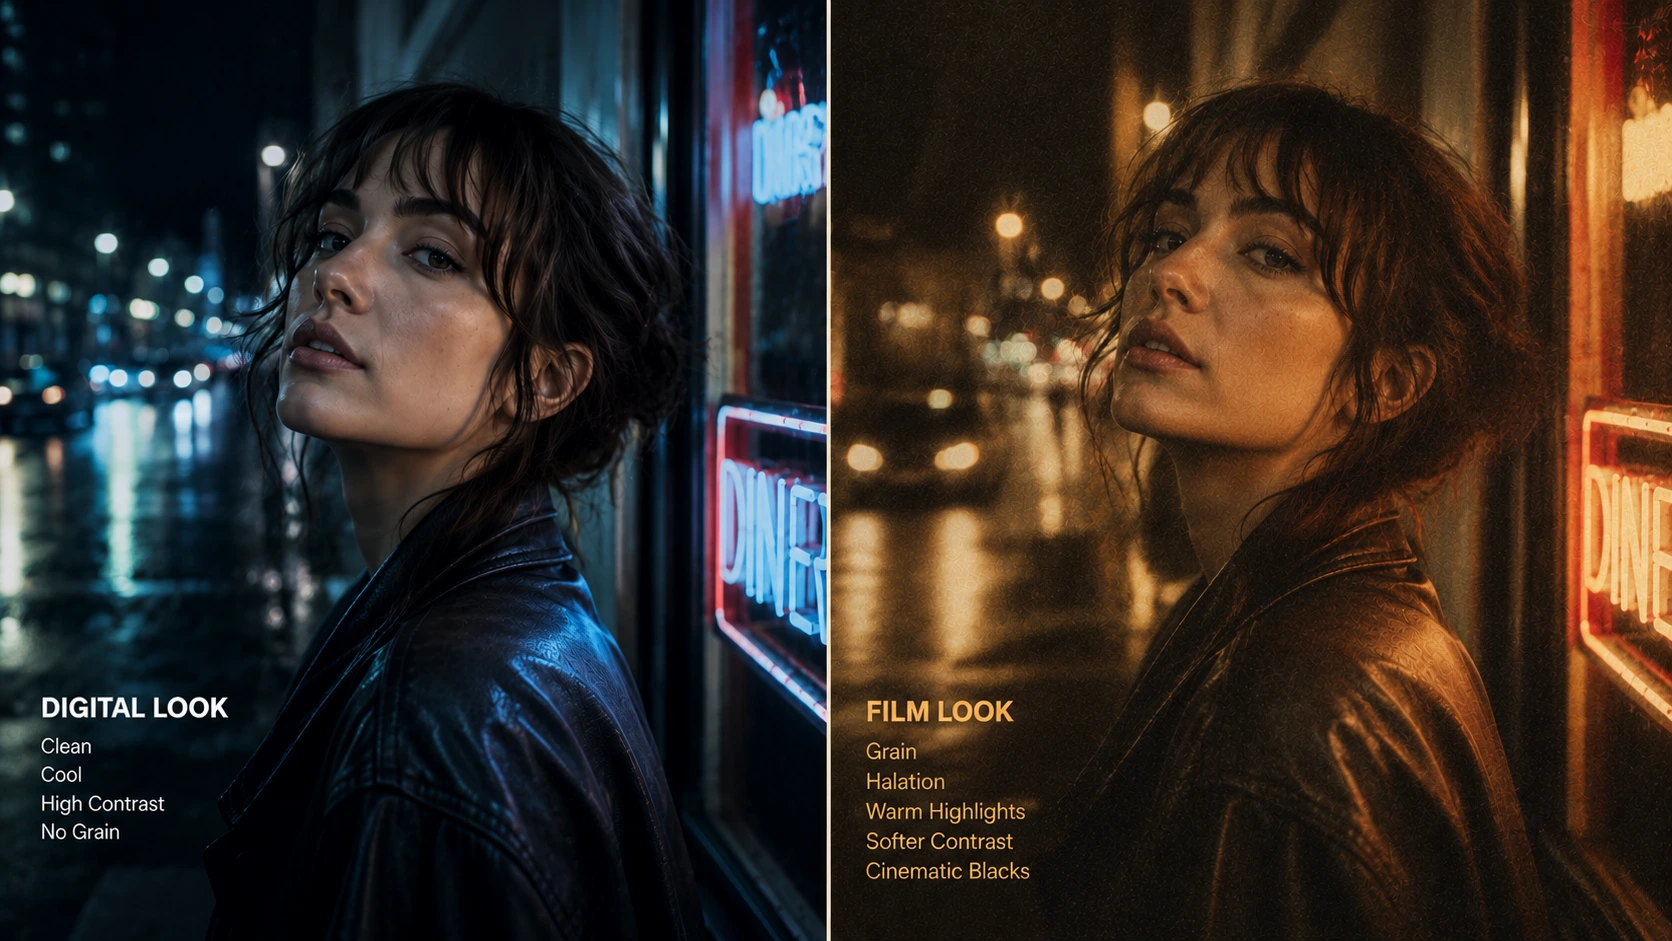
Why Do Some Videos Feel Like Real Film? 🎞️
Are you familiar with the Dehancer Pro Plugin at all? For those who have attempted to create a “Film Look” for their projects in Premiere Pro or After Effects using LUTs, the resulting footage may look good, but it lacks the essential Film Look found in most cinematic movies.
Creating a Film Look requires more than just color correction in your project. Additional features, such as grain, halation, and film texture, help distinguish professional films from ordinary videos.
The problem is that creating this feeling manually is both time-consuming and difficult. And if it’s not done properly, the image can quickly start looking fake and artificial. That’s exactly why tools like Dehancer Pro have become so popular among colorists and editors — because they make it much easier to bring the authentic feel of analog film into digital projects 🎬

How Can You Create a Film Look? 🎬
To create a cinematic look and simulate analog film, multiple techniques are usually combined to remove the raw digital feel from the image. It’s possible to do this without specialized plugins, but it requires a lot of manual adjustments and combining different effects.
One of the most common methods is manual color grading. By adjusting curves, contrast, saturation, and the colors of shadows and highlights, editors try to bring the image closer to cinematic film aesthetics. Many creators also use LUTs to simulate the colors of different film stocks.
To recreate film texture, grain overlays or noise are often added to the footage. Some editors use real film scans, while others manually generate grain so the image doesn’t look overly clean and digital.
Another common technique is manually creating halation and bloom. Usually, bright areas of the image are isolated, blurred, and blended back into the footage using different blend modes to create soft, glowing halos around lights.
To simulate the behavior of real film stock, highlight compression is sometimes applied to make intense highlights appear softer and more natural. Effects like vignette, gate weave, flicker, and dust & scratches are also manually added to create a more analog feel.
The issue is that coordinating all these effects together isn’t easy 😅
If the settings aren’t carefully balanced, the image can quickly become artificial. Grain may look like ordinary noise, halation can feel unnatural, or the colors may become overly exaggerated. On top of that, manually building all these effects takes a lot of time and experience to achieve a truly natural result.
Dehancer Pro — Real Analog Film Emulation 🎞️
Dehancer Pro is a professional film emulation plugin designed to simulate the real behavior of analog film stock. Unlike many tools that only change image colors, Dehancer aims to recreate the entire imaging process of cinematic film — from color and contrast to grain, lighting behavior, image texture, and even natural film imperfections.
That’s why many colorists, editors, and filmmakers use Dehancer Pro to create professional film looks, especially for music videos, commercials, fashion films, and cinematic projects.
Film Profiles — Simulating Real Film Stocks 🎨
The most important part of Dehancer Pro is its massive collection of Film Profiles. The plugin includes more than 60 real film stock simulations, each with its own color science, contrast, and visual character.
Examples include:
- Kodak Vision3
- Kodak Portra
- Kodak Gold
- Kodachrome 64
- Cinestill 800T
- Fujifilm Velvia
- Fujicolor Superia
- Ilford HP5
What makes these profiles interesting is that they’re not just LUTs — they simulate the actual behavior of film stock. That means the way highlights, shadows, skin tones, and light response behave also changes.
The Push/Pull section even allows you to modify film exposure characteristics to create different variations of the same film profile — just like the real chemical film development process.
Print Film — The Final Cinematic Stage 🎬
One of Dehancer’s most important features is the Print Film section.
In real cinema workflows, movies shot on film negatives are later printed onto film print stock, and this stage heavily affects the final visual appearance.
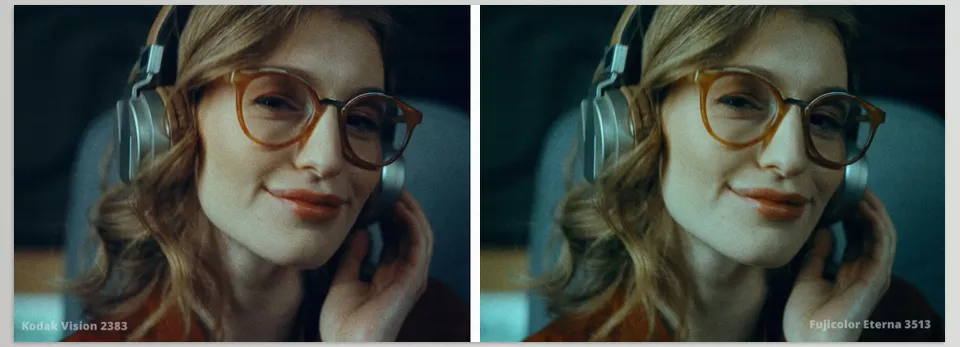
Dehancer Pro simulates this process as well and includes two famous print film stocks:
- Kodak 2383
- Fujifilm 3513
This section makes the image look much closer to real cinematic film and gives it that authentic cinema print feeling.
Film Grain — Real Grain, Not Simple Noise ✨
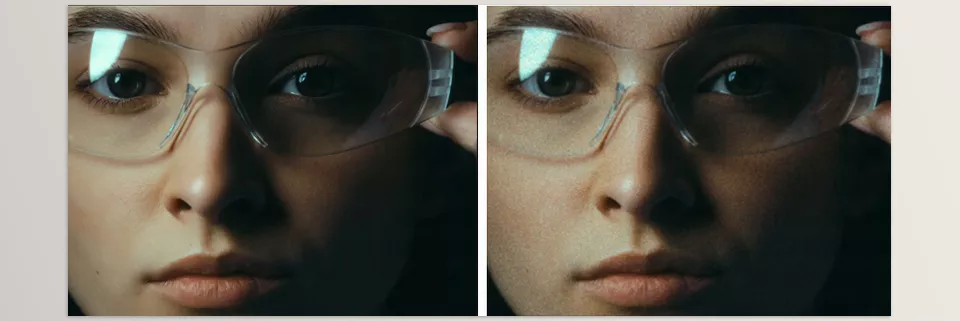
One of Dehancer’s strongest features is its Film Grain system.
Many tools simply place a layer of noise over the image, but Dehancer Pro generates grain based on image brightness and color information, so it appears far more natural.
The plugin includes grain models for different film formats:
- 8mm
- 16mm
- 35mm
- 65mm
Each one has its own texture and character. For example, 16mm grain appears much rougher and more aggressive than 65mm grain.
Halation — That Famous Glow Around Lights 🔥
If you’ve looked closely at real film footage, you’ve probably noticed a subtle red or orange glow around strong light sources. This happens because of the chemical structure of film stock and is called Halation.
Dehancer Pro simulates halation very naturally and includes multiple profiles for different visual styles depending on the mood of the project. This effect is most noticeable around intense light sources — especially in night scenes, car headlights, neon signs, or direct sunlight. That subtle red and orange glow around lights makes the image feel far more cinematic and closer to real film 🔥
Bloom — Softening the Highlights 🌤️
Bloom makes bright light sources appear softer and more cinematic.
The effect resembles the look created by vintage lenses or diffusion filters.
Inside Dehancer Pro, Bloom isn’t just a simple glow effect — it’s designed around the real behavior of light, so the image doesn’t become overly artificial.
Film Compression — Controlling Highlights ☀️
Digital footage often looks harsh and overly sharp in very bright areas, especially in highlights. Sometimes this can remove the natural feeling of the image.
Film Compression inside Dehancer Pro helps soften and control these intense highlights, similar to the way real film handles light. This allows highlight details to remain more natural while giving the image a softer and more cinematic appearance.
The effect is especially useful in scenes containing bright windows, skies, skin tones, or strong light sources ☀️
Film Breath & Gate Weave — The Organic Feel of Real Film 📼
Real film was never perfectly stable.
Sometimes brightness would subtly fluctuate between frames, or the image would slightly shift due to the movement of film inside the camera or projector. These imperfections made the film feel more alive and organic.
Dehancer Pro recreates these behaviors as well:
Film Breath
Subtle changes in brightness and color between frames.
Gate Weave
Tiny image movements that simulate real film transport motion.
These effects are especially great for vintage and retro projects.
Film Damage — Scratches, Dust & Analog Texture 🧡
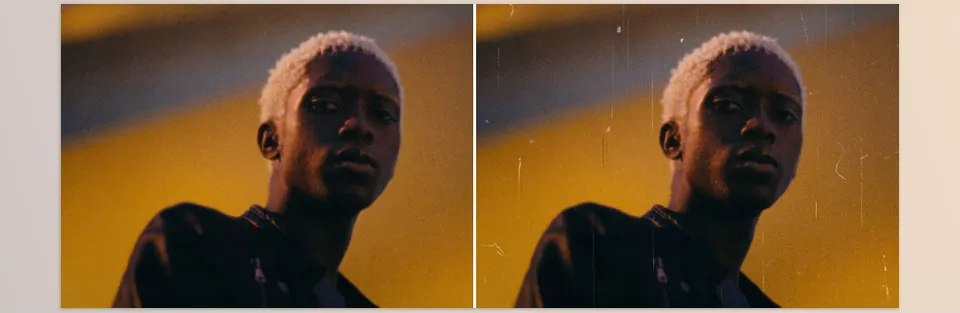
Dehancer Pro includes a section called Film Damage, designed to simulate the natural imperfections found in old film stock. This tool can add effects like dust, hair, and scratches to create a more authentic analog feel.
Unlike simple overlays that just place scratches on top of footage, this system is designed so these details appear naturally integrated into the image.
This feature is especially useful for creating a vintage or retro aesthetic. Whether you want to recreate VHS visuals, Super8 film, or old archival footage, Film Damage can give your footage a raw and nostalgic atmosphere 🎞️
Overscan — Simulating Real Film Frames 🎞️
Overscan is one of Dehancer’s most unique and visually interesting features because it not only focuses on color and lighting — it also simulates the physical appearance of film itself.
This section can add details such as film perforations, frame borders, spacing between frames, and negative edges — exactly like what you’d see in real 8mm or 16mm film footage.
What makes it even more impressive is that all these elements are created using real film scans, making the result look far more authentic and believable.
Overscan is especially powerful for vintage projects, retro music videos, or recreating old film aesthetics 🎞️
Camera Profiles — Support for Different Cameras 📷
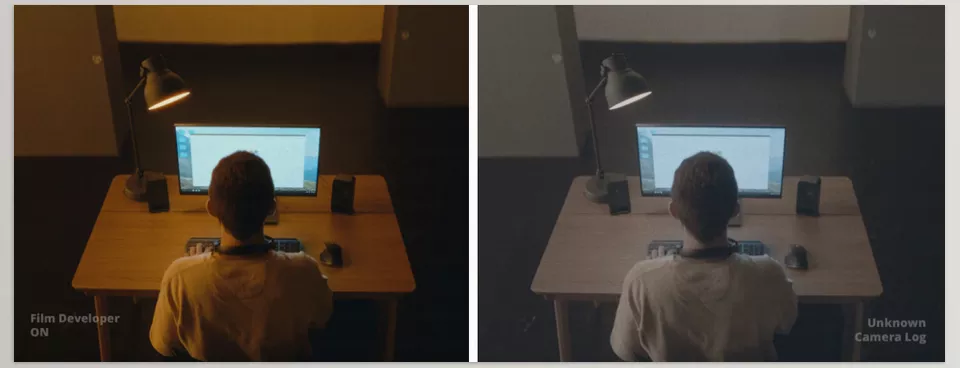
Dehancer Pro supports a large number of camera log profiles.
This means it can properly interpret log footage from different cameras, including:
- Sony S-Log
- Canon Log
- RED Log
- ARRI LogC
- Blackmagic
- DJI
- Apple ProRes Log
This support allows film emulation to look more accurate and natural.
LUT Generator — Exporting Your Custom Look 🎨
If you create a great look inside Dehancer Pro, you can easily export it as a LUT and use it in other projects as well.
This means you won’t need to rebuild your settings every time, and you can maintain a consistent visual style across multiple projects.
Dehancer Pro also allows exporting LUTs in different formats and qualities depending on your needs — whether for monitoring, future projects, or even real-time preview while shooting.
This feature is especially useful for creators who maintain a consistent visual identity for their brand or productions 🎨
Additional Tools for Color Grading 🎛️
Besides film emulation, Dehancer Pro also includes several additional professional tools:
CMY Color Head
Simulates the color filters used in film print processing systems.
Print Toning
Separate control over shadows, midtones, and highlights.
Vignette
Creates natural lens-style vignettes.
Defringe
Removes chromatic aberration for a cleaner image.
False Color & Clipping Monitor
For accurate exposure and lighting control.
These extra tools make Dehancer Pro more than just a film look plugin — it becomes a complete cinematic color grading toolkit 🎬
Why Has Dehancer Pro Become So Popular? ❤️
What makes Dehancer Pro special is that it doesn’t simply imitate the appearance of film — it recreates the actual behavior of film.
The combination of Film Profiles, Grain, Halation, Bloom, and Print Film makes digital footage appear far more natural and cinematic.
That’s why many filmmakers and colorists consider Dehancer Pro one of the best film emulation tools available, especially when they want to give footage a warm, authentic, analog feel 🎬
A Few Tips That Can Make Your Results Much Better 👌
Dehancer Pro comes with a wide range of settings and tools, and if you use them correctly, it can give you incredibly professional-looking results. A lot of the time, the difference between an attractive Film Look and an artificial-looking image comes down to just a few small adjustments. These tips can help your final result look more natural and cinematic.
Correct the Base Lighting and Colors First
Before jumping into Dehancer, it’s better to first adjust your footage’s lighting, white balance, and overall color. This plugin performs best when the original image is already in good condition.
Choose the Right Film Profile
Selecting the right Film Profile has a huge impact on the overall feel of the image.
For example:
- Kodak Portra → Great for skin tones and human-focused videos
- Kodak Vision3 → Perfect for cinematic and commercial atmospheres
- Cinestill 800T → Excellent for nighttime scenes and neon lighting
Don’t Overdo the Grain
More Grain doesn’t always mean a more cinematic look 😄
In most cases, subtle Grain makes the image feel more natural and professional. But if you push it too far, the image can quickly start looking noisy and artificial.
Use Halation in a Controlled Way
This effect looks especially beautiful around lights, sunlight, and highlights, but if the intensity is too high, the image may start to feel unnatural.
Keep Bloom Soft
Bloom is supposed to soften the lights, not turn the entire image into a foggy scene. A subtle and controlled amount usually gives much better results.
Select the Correct Camera Profile
If you’re working with Log footage, choosing the right Camera Profile is extremely important. It helps colors get processed more naturally and gives better Film Emulation results.
Combine Effects Together
For Vintage or Retro-style projects, combining Grain, Gate Weave, and Film Damage usually looks far more appealing than using each effect individually 🎞️
At the end of the day, the most important thing is not trying to use every effect at maximum intensity. In many professional projects, subtle and controlled adjustments usually create a much more cinematic and premium-looking result 🎬
When a Digital Image Finally Gets Some Soul ❤️
The truth is, these days almost every camera delivers good image quality. Even smartphones can record sharp and clean-looking videos. But what truly makes a project feel professional and cinematic isn’t just image quality — it’s the emotion and atmosphere the image conveys. That warmth, texture, and depth we see in real film make visuals feel more alive and engaging.
The problem is that creating this feeling manually is both time-consuming and highly dependent on experience. Matching Color Grading, Grain, Halation, Bloom, and all the other small details can quickly make the image look artificial if not done correctly. This is exactly where Dehancer Pro makes things easier. Instead of spending hours building different effects manually, you can achieve a natural and professional Film Look much faster — with details that genuinely resemble real analog film 🎞️
Whether you create music videos, commercials, fashion films, or even social media and YouTube content, Dehancer Pro can instantly make your project look several levels more professional. At first, it may seem like just another plugin, but once you see the final result, you realize how much these small details can impact the feeling and overall quality of an image 🎬
While Dehancer Pro focuses on recreating the organic feel of analog film through grain, halation, bloom, and film-print emulation, another major part of a cinematic image comes from the lens itself. The softness of highlights, optical distortion, bokeh behavior, and the overall “lens character” can dramatically change how footage feels emotionally and visually. That’s exactly where tools like LensNode become incredibly powerful. Instead of simulating film stock, LensNode focuses on recreating the optical personality of vintage and cinematic lenses, helping digital footage feel even more natural, cinematic, and alive 🎬
If you want to explore how cinematic lens behavior can completely transform the feeling of your footage, make sure to check out our full article about LensNode.





