

Why Do Some Renders Feel Unreal? 🤔
Are you knowledgeable about the Realistic Touch – Surface Imperfection for Blender? You’ve probably experienced building a 3D scene where everything—lighting, modeling, and materials—seems correct, yet the final output still feels artificial. That’s when it becomes unclear what exactly is wrong.
In most cases, the issue comes from everything being too clean and perfect. Completely smooth surfaces with no marks or traces make the image look more like a digital creation rather than something inspired by the real world.
The reality is that in the real world, no surface is ever perfectly clean. There are always signs of use—like fingerprints on glass, scratches on metal, or a very thin layer of dust. These small details are what make an image feel believable and alive ✨

What Exactly Is Surface Imperfection and Why Is It So Important? ✨
Surface Imperfection refers to those subtle, often unnoticed details that exist on almost every surface in the real world, but are frequently ignored or removed in many 3D works. Yet, these are precisely the elements that take a piece out of the “clean and artificial” state and give it a realistic feel.
These imperfections can take many forms, such as:
- Fine scratches
- Smudges and grease
- Dust
- Fingerprints
Individually, they might not seem very important, but once they are integrated into a material, their impact becomes obvious. These details make light behave more naturally on surfaces, reflections become more believable, and the material moves away from that overly “clean CG” look.
For example, a glass with a few fingerprints looks far more believable than a perfectly clean one, or a wooden table with scratches conveys a stronger sense of use and life 🪵
Traditional and Manual Methods
If you want to add these details without using ready-made tools, you usually need to build them manually in the Shader Editor. This is absolutely doable—and many artists rely on this approach—but it requires time and precision.
Typically, this workflow includes:
- Using separate textures (downloaded or self-created)
- Combining multiple textures inside the Shader Editor
- Using Noise and procedural textures
- Adjusting different maps, such as:
- Roughness
- Bump
- Specular
- Manually controlling the intensity and influence of each layer on the material
Challenges and Limitations
While these methods are entirely possible, they are often time-consuming and relatively complex. For each project, you have to set everything up from scratch, and if you don’t have enough experience in shading, the result may look artificial or unnatural.
On top of that, finding the right textures and making them work well with other materials can be a challenge on its own. As a result, many times we either skip these details altogether or fail to achieve the result we have in mind 😅
Introducing a Simpler Solution: Realistic Touch 🚀
To solve the challenges of manual workflows, tools like Realistic Touch – Surface Imperfection are designed exactly for this purpose: allowing you to quickly add realistic details without dealing with complex nodes and time-consuming setups.
This isn’t just a simple texture pack; it’s a ready-to-use, smart system for adding imperfections to materials—helping you work faster while achieving more professional results.
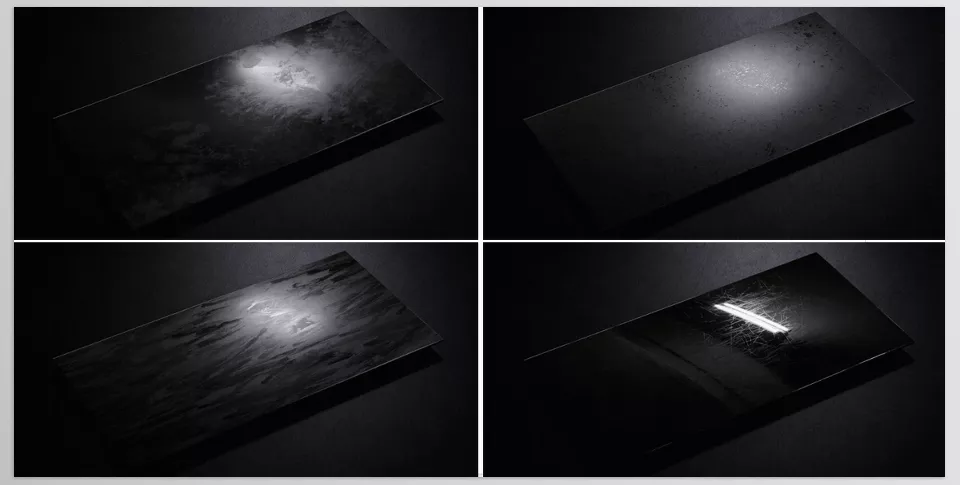
🎨 A Complete Library of Professional Textures
The first thing you encounter is a large, well-organized collection of textures. Realistic Touch includes more than 200 4K textures, each designed for specific types of details, such as:
- Dust
- Scratches
- Fingerprints
- Grunge/stains
- Smears and grease
This categorization makes it easy to quickly find the right texture for your project without wasting time searching.
🔁 Seamless for Hassle-Free Use
One of the most important features is that all textures are seamless. This means when they repeat across a surface, no visible seams or edges appear.
This is especially important for:
- Large surfaces
- Repeating objects
- Close-up shots
Because even the smallest texture issue becomes very noticeable.
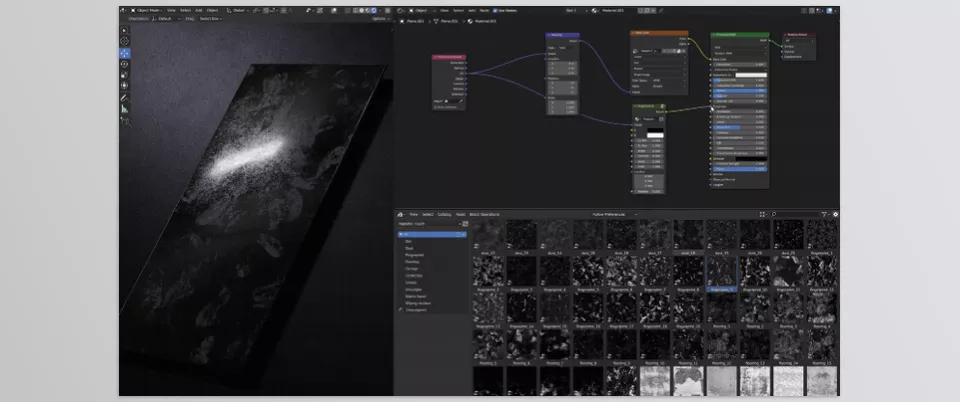
⚡ Ultra-Fast Usage (True Drag & Drop)
One of the most appealing aspects is how simple it is to use. You don’t need to build nodes or design shaders from scratch. Just:
- Drag the texture or shader from the Asset Browser
- Drop it onto the material
- Connect it
And you can see the result almost instantly 😄
This shifts your focus from technical work to creativity.
🎛️ Full Control Over Material Behavior
Despite its simplicity, the tool gives you great control. You can decide exactly how the imperfection affects your material:
- Connect to Roughness → control glossiness or matte appearance
- Connect to Bump / Normal → create subtle surface relief
- Connect to Specular → adjust reflection behavior
This allows you to use a single texture for multiple purposes and achieve different results.
🎚️ Adjustability and Customization
Adding a texture is not enough—you need control over it. Realistic Touch allows you to:
- Adjust the effect strength
- Modify contrast
- Change texture scale
- Combine multiple imperfection layers
For example: a subtle dust layer + a light scratch = a highly realistic result 👌
🧠 Fully Compatible with Blender
This tool is specifically designed for Blender and works seamlessly with both of its main render engines:
- Cycles (for realistic rendering)
- Eevee (for fast and real-time work)
This makes it suitable for any type of project, from motion graphics to commercial renders.
🎬 Real Use Cases in Projects
Where this tool truly shines is in practical use—exactly where it transforms a “good” scene into a believable one. For example, adding subtle fingerprints to a glass or fine scratches to a metal surface instantly removes the overly clean CG look and adds realism.
You can use Realistic Touch in various scenarios, from dirtying surfaces in industrial environments to creating a worn, aged look on objects. It’s even useful in luxury projects, where adding very subtle imperfections helps maintain realism without making the result look “dirty.”
Ultimately, what makes this tool valuable is that it turns a time-consuming and complex process into a fast, controllable workflow—saving time while elevating the quality of your results ✨
Simple Tips for More Professional Results 💡
To achieve truly professional and natural-looking results, having good textures alone is not enough—how you use them matters even more. Here are a few simple tips:
Don’t Overdo It
One of the most common mistakes is overusing imperfections. When everything is full of scratches and stains, the result doesn’t look more realistic—it looks messy and artificial. The best approach is to keep these details subtle and controlled, so they are felt rather than clearly seen.
Combine Textures
In the real world, surfaces rarely have just one type of imperfection. A surface might have dust, scratches, and fingerprints at the same time. Combining textures like:
dust + scratches + fingerprints
makes the result far more natural and believable.
Adjust the Intensity
Don’t always use textures in their default state. By tweaking parameters like contrast, strength, or opacity, you can precisely control their impact. Often, a small adjustment can make a big difference.
Pay Attention to Scale
An incorrect texture scale is something that quickly gives away a fake look. If scratches are too large or too small, the brain immediately notices. Always adjust the scale to match the object.
Consider the Context
Every project has its own mood and context. A luxury product should be almost clean with minimal imperfections, while an industrial or old environment can be full of them. Always ask yourself: “How clean would this surface be in the real world?”
In the end, don’t forget that Roughness is one of the most important factors in achieving realism. Much of the realistic feel comes from subtle variations in light reflection—not just from bump or visible textures 👌
The Small Details That Change Everything
The truth is, the difference between an average render and a professional one often lies in these small details. Things that may not be directly noticeable, but your brain responds to them and perceives the image as more natural and believable.
Tools like Realistic Touch make this process much easier. Instead of spending time manually creating and adjusting these details, you can quickly add them and focus on creativity and design.
In the end, you decide how much and where to use these details—but if you haven’t paid attention to them before, adding these small imperfections can make a significant difference in the quality of your renders 😉
If your goal is to stop guessing and finally understand what each Blender tool does and when to use it, our step-by-step Blender Tools guide is exactly what you need.